Avigilon™ Control Center Web Client User Guide Version: 5.
© 2006 - 2014 Avigilon Corporation. All rights reserved. Unless expressly granted in writing, no license is granted with respect to any copyright, industrial design, trademark, patent or other intellectual property rights of Avigilon Corporation or its licensors. AVIGILON, CAPTURE IT WITH CLARITY, HDSM, HIGH DEFINITION STREAM MANAGEMENT (HDSM), THE BEST EVIDENCE, LIGHTCATCHER and the ACC logo are registered and/or unregistered trademarks of Avigilon Corporation in Canada and other jurisdictions worldwide.
Table of Contents Introduction ........................................................................................................................................................ 1 What is the Avigilon™ Control Center Web Client ....................................................................................... 1 For More Information .......................................................................................................................................... 1 Avigilon Training Center .
Avigilon Control Center Standard Web Client Editing a Saved View .................................................................................................................................... 11 Renaming a Saved View .............................................................................................................................. 11 Deleting a Saved View .................................................................................................................................
Table of Contents Controlling Live Video ..................................................................................................................................... 24 Broadcasting Audio in a View .................................................................................................................. 24 Using Instant Replay ................................................................................................................................... 24 Triggering Manual Recording ...
Avigilon Control Center Standard Web Client Exporting Still Images ..................................................................................................................................... 55 Exporting a Print Image ................................................................................................................................... 57 Exporting WAV Audio .................................................................................................................................
Introduction What is the Avigilon™ Control Center Web Client The Control Center Web Client is a simplified, web-based version of the Control Center Client software. The Web Client allows you to access any camera that is connected to an Control Center Server. Through the Web Client you can monitor live and recorded video, and search or export events in the camera's recording history. The Web Client can be accessed from any Internet Explorer browser that is connected to your local network.
Avigilon Control Center Standard Web Client Regular Avigilon Technical Support is available Monday to Friday from 12:00 a.m. to 6:00 p.m. Pacific Standard Time (PST): North America: +1.888.281.5182 option 1 International: +800.4567.8988 or +1.604.629.5182 option 1 Emergency Technical Support is available 24/7: North America: +1.888.281.5182 option 1 then dial 9 International: +800.4567.8988 or +1.604.629.5182 option 1 then dial 9 E-mails can be sent to: support@avigilon.com.
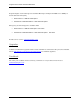
Accessing the Web Client To access the Web Client, you need the Avigilon server's IP address and port number. This information is listed in the server's Setup tab in the Avigilon Control Center Client software. See the Avigilon Control Center Client User Guide for more information. 1. To access the Web Client, open Internet Explorer and enter the following address: http://:/ (For example, http://192.168.2.
Avigilon Control Center Standard Web Client Figure A.
Views What are Views? A View tab is where you watch camera video. Inside the View tab is a set of image panels that allows you to organize how video is displayed. Adding and Removing a View View tabs allow you to customize how you monitor video. You can open a new View in the browser to see more video or close Views as required. To... To open a new View tab To close a View tab Do this... Click > . On the View tab, click . View layouts You can organize how video is displayed through View layouts.
Avigilon Control Center Standard Web Client Selecting a Layout for a View You can organize how video is displayed by selecting a View layout. The figure shows the default View layouts. On the toolbar, select then select one of the layout options. Figure A. Layouts on the toolbar Editing a View Layout If the default View layouts do not fit your surveillance requirements, you can customize a View layout. 1. 6 On the toolbar, select > Edit Layouts.
Views Figure A. Layouts on the Toolbar 2. In the Edit Layouts dialog box, select the layout you want to change. 3. Enter the number of Columns and Rows you want in your layout. 4. In the layout diagram, do any of the following to further customize the layout.
Avigilon Control Center Standard Web Client Figure B. Edit Layouts dialog box o To create a larger image panel, select a grey line to delete the border between two image panels. When a line is highlighted in red, the line can be deleted. o To restore an image panel, select a dotted line to divide a larger image panel into two. When a dotted line is highlighted in green, the line can be restored. o To restore all default View layouts, click Restore Defaults.
Views Making a View Full Screen You can maximize a View to fill an entire monitor screen. On the toolbar, click . Ending Full Screen While the View is in full screen mode, click . Cycling Through Views If you have multiple Views open, you can cycle through the View tabs by displaying each one for a few seconds. This is useful when monitoring a large number of cameras. To activate the Cycle Views feature, click .
Avigilon Control Center Standard Web Client a. Select the Site that the View should be added to. b. Give the Saved View a name. c. Give the Saved View a logical ID. The logical ID is a unique number that is used to open the Saved View through keyboard commands. d. Click to choose where the Saved View appears in the System Explorer. If your Site includes virtual sub-sites, select a location for the Saved View. The list on the right updates to show what is stored in that directory.
Views Editing a Saved View 1. Open a Saved View. 2. Make any required changes to the View tab. 3. Click . Renaming a Saved View 1. In the System Explorer, right-click the Saved View and select Edit. 2. In the Rename View dialog box, enter a new name or logical ID and click OK. Deleting a Saved View 1. In the System Explorer, right-click the Saved View and select Delete. 2. In the confirmation dialog box, click Yes.
Maps Working with Maps A map is a graphical reference of your surveillance site. You can create a map out of any image of your location, then add cameras, encoders, saved Views, and other maps to the image to help you quickly navigate through your surveillance site. Using a Map You can open a map in any image panel, then open video or alarms from the map. 1.
Avigilon Control Center Standard Web Client Figure A. Map in an image panel. To... Display video from a camera on the map Open a linked map Open a linked View Do this... • Drag a camera from the map to a different image panel. • Click the camera on the map. • Click the map icon on the map. You can use the Forward and Back buttons to move between maps. • Click the Saved View on the map. Adding a Map You can create a map from any image in JPEG, BMP, PNG, or GIF format.
Maps 2. In the Map Properties dialog box, click Change Image and locate your map image. Figure A. Map Properties dialog box 3. In the Map Name field, enter a name for the map. 4. Click to choose where the map appears in the System Explorer. By default, the map is added to the Site that you initially selected. o o If your Site includes virtual sub-sites, select a location for the map. The list on the right updates to show what is stored in that directory.
Avigilon Control Center Standard Web Client Figure B. Editing: Map tab By default a camera is displayed as an icon with a yellow triangle to represent its field of view. o Drag the black points at the end of the yellow field of view to resize and position the camera angle. 7. Drag encoders, Saved Views and other maps that you need from the System Explorer onto the map. 8. In the Map Icon Properties options, you can change the way icons are displayed on the map.
Maps c. Click Delete from Map to remove the object from the map. d. (Cameras only) Select the Show field of view check box to display the camera's yellow field of view. This option is only available when the camera icon is used. Drag the corners of the yellow triangle to expand the field of view. Drag the black circle at the end of the triangle to rotate the field of view. 8. Click to save your new map. Editing and Deleting a Map You can update a map or delete an old map anytime. 1.
Web Pages Working with Web Pages You can add web pages to the Web Client to gain quick access to online content that may be linked to your surveillance system. Using a Web Page To open a web page, perform one of the following: Double-click in the System Explorer. Drag In the System Explorer, right-click from the System Explorer to an image panel. and select Add to View. The web page is displayed in one of the image panels. Use the web browser buttons to navigate through the internet.
Avigilon Control Center Standard Web Client Figure A. Web Page Properties dialog box 2. Enter a name for the web page. 3. Enter the web page URL in the Web Address field. 4. Select a Zoom Level for viewing the web page inside an image panel. 5. Click to choose where the web page appears in the System Explorer. By default, the web page is added to the Site that you initially selected. o o If your Site includes virtual sub-sites, select a location for the web page.
Video Monitoring Video Inside a View tab, you can monitor and control video from multiple cameras. Once you open a camera in a View tab, you can control the camera's live and recorded video stream. Adding and Removing Cameras in a View To monitor video, add a camera to the View. The camera video can be removed from the View any time. Adding a Camera to a View Perform one of the following: Drag the camera from the System Explorer to an empty image panel in the View.
Avigilon Control Center Standard Web Client Inside the image panel, click . Viewing Live and Recorded Video When you monitor video, you can choose to watch live and recorded video in the same View, or only one type of video per View. Once you've added the required cameras to the View, perform the following: To switch the View between live and recorded video, click either Live or Recorded on the toolbar.
Video Maximizing an Image Panel You can maximize an image panel to fill the browser window. Maximizing an Image Panel Perform one of the following: Right-click an image panel and select Maximize. Inside the image panel, click Double-click the image panel. . Restoring an Image Panel In an maximized image panel, perform one of the following: Right-click the maximized image panel and select Restore Down. Inside the image panel, click Double-click the image panel. .
Avigilon Control Center Standard Web Client Controlling Live Video Listed in this section are the features that are only available while monitoring live video. Broadcasting Audio in a View If there are speakers linked to a camera, the button is displayed in the image panel when you watch the camera's video. The button allows you to broadcast your verbal response to what is occurring in the video, like a Public Address (P.A.) system.
Video Here are the camera recording states: Recording Recording triggered by an event Not recording Starting and Stopping Manual Recording In an image panel that is displaying video, perform either of the following: In the top-left corner of the image panel, click to start manual recording. The record indicator is highlighted to show that the camera is recording. Manual recording continues until it is stopped, or until the maximum manual recording time is reached.
Avigilon Control Center Standard Web Client Figure A. PTZ controls 3. To pan or tilt, perform one of the following: o In the image panel, drag your mouse from center to move the camera in that direction. The farther the cursor is from the center of the image panel, the faster the camera will move. o If the camera supports Click to Center, click anywhere on the image panel to center the camera to that point. Figure B.
Video 4. Use the other PTZ controls to perform any of the following: To... To zoom To control the Iris To control the Focus Do this... • Click to zoom in. • Click to zoom out. • Click the image panel and use the mouse scroll wheel to zoom in and out. • If the camera supports Drag to Zoom, click and drag to create a green box to define the area you want to zoom in and see. • Right-click the image panel and select Zoom Out Full. • Click to close the iris. • Click to open the iris.
Avigilon Control Center Standard Web Client 3. Click To activate a PTZ pattern To activate a PTZ tour To activate an auxiliary command to stop recording the pattern. In the PTZ controls pane, select a pattern number and click . The pattern will repeat until the pattern is stopped or another pattern is run. In the PTZ controls pane, select a tour number and click . The tour will repeat until stopped or until other PTZ controls are used. 1. Select an aux command number and click 2.
Video Figure A. Edit PTZ Tour dialog box 3. In the Edit PTZ Tour dialog box, give the tour a name. 4. In the Tour Pause Duration field, enter the amount of time before a tour repeats. Tours repeat until manually stopped, or until other PTZ controls are used. 5. In the Tour Mode drop down list, select one of the following: o Sequential: the PTZ camera will go to each preset in the set order. o Random: the PTZ camera will go to each preset in random order. 6.
Avigilon Control Center Standard Web Client 6. a. In the Preset column, select a preset from the drop down list. b. In the Move Speed column, enter how fast you want the PTZ camera to move to this preset. The higher the %, the faster the camera moves. c. In the View Time column, enter the amount of time you want the PTZ camera to stay at this preset position. The view time is 10 seconds by default. d. Repeat step 7 until all the presets for this tour have been added. 7.
Video 3. To display cameras that are linked to the POS transaction source, click transaction image panel. in the POS If multiple cameras are connected to the POS transaction source, you will be prompted to select one. Controlling Recorded Video Listed in this section are the features that are only available while monitoring recorded video. Playing Back Recorded Video The Timeline displays when video was recorded and lets you control the video playback.
Avigilon Control Center Standard Web Client • Click to fast forward. Tap the arrow again to increase the playback speed. • Click to rewind. Tap the arrow again to increase the playback speed. You can play the video up to eight times the original speed. To stop playback To jump forward or back on the Timeline Click . • Click to step forward one frame. • Click to step backward one frame. On the Timeline, click or points on the Timeline.
Video Bookmarking Recorded Video You can add bookmarks to recorded video to help you find and review an event later. Bookmarked video can be protected against scheduled data cleanup so the video is never deleted. Adding a Bookmark Tip: You can add a bookmark any time the Timeline is displayed. 1. Drag the time marker to where you want to start the bookmark, then right-click the Timeline and select Add Bookmark.
Avigilon Control Center Standard Web Client 3. In the Cameras pane, select all the cameras that need to be attached to this bookmark. Note: You can only bookmark multiple cameras from the same Site. 4. In the Time Range to Bookmark area, enter the full duration of the bookmark. You can also move the black time range markers on the Timeline to adjust the time range. 5. In the Description field, enter extra any information you want to include with the bookmark. 6.
Video Export a bookmark Click Export then complete the Export tab. When editing a bookmark, refer to Adding a Bookmark for details about the editable options. When exporting a bookmark, refer to Export for information about the export options. Reviewing POS Transactions While you watch recorded video, you can also review the POS transactions that occurred at the same time. 1. Select a camera that is linked to the POS transaction source and display the camera's recorded video 2.
Avigilon Control Center Standard Web Client Figure A. Display Adjustments panel The Display Adjustment settings are displayed in a floating pane immediately beside the image panel. 2. Move the sliders to adjust the Gamma, Black Level and White Level. The image panel displays a preview of your changes. 3. Click Restore Defaults to clear your changes.
Search You can quickly search for recorded video that is linked to an event or search through the camera's recording history. Performing an Event Search The Event Search allows you to search for specific motion events and digital input events. 1. In the New Task menu, click The Search: Event tab is displayed.
Avigilon Control Center Standard Web Client Figure A. Search: Event tab 2. In the Camera to Search area, select all the cameras you want to include in the search. 3. In the Time Range to Search area, set the date and time range of your search. The time range is highlighted on the Timeline by the black time range markers. You can also drag the time range markers to modify the time range. 4. In the Events to Search For area, select the types of events to include in the search. 5. Click Search.
Search 3. Click Export this event to export the selected event video. See Export for more information. 4. If you want to further refine your search, click Perform a pixel search on this event. You can now search for any pixel movement in the selected search result. See Performing a Pixel Search for more information. 5. Click Bookmark this event to bookmark the selected search result. See Bookmarking Recorded Video for more information. 6.
Avigilon Control Center Standard Web Client Figure A. Search:Pixel tab By default, the entire search image panel is highlighted in green. 2. In the Camera to Search area, select a camera. 3. In the Time Range to Search area, set the date and time range of your search. The time range is highlighted on the Timeline by the black time range markers. You can also drag the time range markers to modify the time range. 4. Define the pixel search area by using the motion detection tools above the image panel.
Search 6. Enter a number in the Join results less than field to set the minimum number of seconds between separate search results. You can enter any number between 1-100 seconds. 7. Click Search. Viewing Pixel Search Results 1. In the Search Results area, select a search result. The event is highlighted on the Timeline and the video is displayed in the image panel. Details about the search result are displayed to the right. 2. Use the Timeline controls to review the event.
Avigilon Control Center Standard Web Client Figure A. Search:Thumbnails tab 2. In the Camera to Search area, select a camera. 3. In the Time Range to Search area, set the date and time range of your search. The time range is highlighted on the Timeline by the black time range markers. You can also drag the time range markers to modify the time range. 4. In the image panel, move or drag the edges of the green overlay to focus the search on one area in the video image.
Search Figure B. Search: Thumbnail results tab 2. Select a thumbnail to highlight the video on the Timeline. 3. Click Step In, or double-click the thumbnail to perform another search around the thumbnail. Click Back to return to the previous results page. 4. Click Open In View to open the recorded video in a new View. 5. Click Change Search to change the search criteria. Performing a Bookmark Search The Bookmark Search allows you to search for a specific bookmark. 1.
Avigilon Control Center Standard Web Client Figure A. Search:Bookmark tab 2. In the Search field, enter any text that may appear in the bookmark's title, description, linked camera name or the name of the user who created the bookmark. The search is automatically performed on all the listed bookmarks until only the matches are displayed. Viewing Bookmark Search Results 1. In the Bookmark list, select a bookmark. The bookmark is highlighted on the Timeline and the video is displayed in the image panel.
Search 4. Click Export this bookmark to export the selected bookmark. See Export for more information. 5. If you want to further refine your search, click Perform a pixel search on this event. You can now search for any pixel movement in the selected bookmarked video. See Performing a Pixel Search for more information. 6. Click Edit this bookmark to edit the bookmark. See Bookmarking Recorded Video for more information.
Avigilon Control Center Standard Web Client Figure A. Search:POS Transactions tab 2. In the POS Transaction Sources to Search area, select all the POS transaction sources you would like to include in the search. 3. In the Time Range to Search area, set the date and time range of your search. The time range is highlighted on the Timeline by the black time range markers. You can also drag the time range markers to modify the time range. 4.
Search Viewing POS Transaction Search Results 1. In the Search Results area, select a search result. The event is highlighted on the Timeline and the video is displayed in the image panel. Details about the search result are displayed to the right. 2. Use the Timeline controls to review the event. See Playing Back Recorded Video for more information. 3. If the search result is linked to multiple cameras, select a camera from the drop down list above the image panel to change the video that is displayed.
Export You can export video in multiple video and image formats. The Export tab can be accessed from bookmark options, the Search tab and by opening a new Task. You can also export snapshots of an image panel as you monitor video. It is recommended that you export video of individual events and backup video for your archives. See Backup for more information. Exporting Native Video The Native (AVE) format is the recommended format for exporting video.
Avigilon Control Center Standard Web Client Figure A. Export tab for recorded video export 2. In the Format drop down list, select Native. 3. In the System Explorer, select the camera video you want to export. 4. To automatically divide the export into separate files, select the Split file into sizes of: check box then select one of the options from the drop down list, or manually enter the size of each file in MB.
Export images per second. If you select 1/2, only 15 images for that second will be exported. Select this option to control the time between each exported video image. Export one image every __ min __sec For example, if you enter 5 min. 0 sec., only one image will be exported every 5 minutes. 7. Click one of the following: o Start Export – to save the file locally. o Burn to disc – to burn the file directly to disc media. a. In the Save As dialog box, name the export file and click Save. a.
Avigilon Control Center Standard Web Client The number of discs required to export a video varies widely depending on the camera and the type of disc used. Video is stored on the server with minimal compression to maximize the function of Avigilon's HDSM™ technology, so the size of an export can be quite large due to the camera's megapixel resolution and frame rate. Generally, if you are exporting a 2 minute video from a 2MP H.264 HD camera into AVE format, you would be exporting a 93MB file.
Export Figure A. Export tab for recorded video export 2. In the Format drop down list, select AVI video. 3. In the System Explorer, select the camera video you want to export. 4. In the Encoder field, select the compression used. The VC-1 (Windows Media Video) compression is included by default because it is tailored for high-resolution AVI encoding. If you are planning to burn the export to disc, it is important to select a compression method to help reduce the export size and maintain video quality. 5.
Avigilon Control Center Standard Web Client For example, if you enter 5 min. 0 sec., only one image will be exported every 5 minutes. 12. Click Change Image Region... to only export part of the video image. In the Change Image Region dialog box, move and resize the green overlay then click OK. Only areas highlighted in green are exported. 13. Click Display Adjustments to adjust the gamma, black level and/or white level. 14. Click one of the following: o Start Export – to save the file locally.
Export d. Monitor the export progress to see if extra discs are required. When a disc is full, the export automatically pauses and you are asked to insert a new disc. After you insert a new disc, click Resume Export. The number of discs required to export a video varies widely depending on the camera and the type of disc used.
Avigilon Control Center Standard Web Client Figure A. Export tab for still image export 2. In the Format drop down list, select PNG Images, JPEG Images, or TIFF Images. 3. In the System Explorer, select the camera video you want to export. 4. (JPEG only) In the Quality drop down list, select the exported image quality level. 5. In the Resolution field, select a resolution for the video image. You can manually enter the resolution or click the drop down arrow to select a standard resolution.
Export images per second. If you select 1/2, only 15 images for that second will be exported. Select this option to control the time between each exported video image. Export one image every __ min __sec For example, if you enter 5 min. 0 sec., only one image will be exported every 5 minutes. 9. Select the Export at most __ images check box and enter a number to limit the amount of images that are exported. 10. Click Change Image Region... to only export part of the video image.
Avigilon Control Center Standard Web Client Figure A. Export tab for still image export 2. In the Format drop down list, select Print Image or PDF File. 3. In the System Explorer, select the camera video you want to export. 4. (Print Image only) Click Printer Settings to change the printer and paper size that the image is printed on. 5. Select the image overlays you want: Timestamp, Camera name, and Camera location. 6. Click Add Export Notes to add notes about the exported image.
Export The Preview area displays the video you are exporting. 11. When the export is complete, click OK. Exporting WAV Audio If you want to export audio with video, simply export the video in AVI or Native format. Any audio that is linked to the video is automatically included in the export file. This procedure would export the audio alone. 1. Open the Export tab. In the New Task menu, click . Figure A. Export tab for audio export 2. In the Format drop down list, select WAV. 3.
Avigilon Control Center Standard Web Client 6. In the Save As dialog box, name the export file and click Save. The Preview area displays the video linked with the audio you are exporting. 7. When the export is complete, click OK. Exporting a Snapshot of an Image You can export a snapshot of any image panel with video. When you export a snapshot, you are exporting whatever the image panel is currently displaying. 1. To export a snapshot, perform one of the following: o o In the image panel, click .
Export Figure A. Export tab for Snapshot export 2. In the Format drop down list, select an export format. 3. For the selected export format, define your preferences: Format Export options Native This is the recommended export format because the exported image Note: The Native format requires the maintains its original compression and can be authenticated against Control Center Player tampering in the Control Center Player. to view. 1.
Avigilon Control Center Standard Web Client Note: The Resolution field automatically maintains the image aspect ratio. 2. Select the image overlays you want: Timestamp, Camera name, and Camera location. 3. Click Change Image Region... to only export part of the video image. In the Change Image Region dialog box, move and resize the green overlay then click OK. Only areas highlighted in green are exported. 4. Click Display Adjustments to adjust the Gamma, Black Level and/or White Level. 1.
Export 4. Click Display Adjustments to modify the image quality. 4. Click Start Export. 5. In the Save As dialog box, name the export file and click Save. If you are printing the snapshot, the image is sent to your printer instead. The Preview area displays the snapshot you are exporting. 6. When the export is complete, click OK.
Backup If you need to export a large amount of camera video, it is faster to backup the content into Avigilon Backup (AVK) format. AVK files can be opened in the Control Center Player and be reexported as needed. It is recommended that you export video of individual events and backup video for your archives. See Export for more information. Be aware that you can only back up video if the option is enabled in the Control Center Admin Tool. For more information, see the Control Center Server User Guide.
Avigilon Control Center Standard Web Client Figure A. Backup tab 2. In the System Explorer, select all the cameras you want to backup. 3. In the Backup Options area, set the time range you want to backup. The time range is highlighted on the Timeline by the black time range markers. You can also drag the time range markers to change the time range. 4.