
Installation guide


10
English
• Avigilon Camera Installation Tool software application.
• Camera's web browser interface:
http://<camera IP address>/.
• Network Video Management software application (for
example, Avigilon Control Center).
NOTE: The default camera username is admin and the default
password is admin.
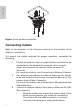
Aiming the Dome Camera
1. Loosen the pan and tilt lock screws on the camera.
2. Turn the lens to the desired direction by panning and tilting
the lens.
3. Once satisfied, tighten the pan and tilt lock screws to
secure the dome camera’s position.
4. Rotate the azimuth control ring to set the image to the
correct angle.
5. In the Avigilon Camera Installation Tool or camera web
browser interface, adjust the camera’s Image and Display
settings to achieve the desired zoom position.
(Optional) Configuring Onboard Storage
To use the camera’s onboard storage feature, you must insert an SD
card into the SD card slot. Avigilon offers a line of SD cards that have
been fully tested with this camera to ensure optimal SD card
performance. For ordering information, please refer to the Avigilon
price list.
It is recommended that the SD card have a capacity of 8GB or more,
and a write speed of class 6 or better. If the SD card does not meet the
recommended capacity or write speed, the performance of the
onboard storage may suffer and result in the loss of frames or footage.
1. Insert an SD card into the camera.
Caution — Do not force the SD card into the camera or you
may damage the card and the camera. The SD card can only
be inserted in the direction shown on the camera.