
Specifications


Table Of Contents
- Contents
- Introduction
- Installation and Authorization
- Session and Track Features
- Advanced Editing Features
- Advanced Automation Features
- AutoJoin with Latch Mode
- Touch/Latch Mode
- Trim Mode
- Composite Automation Playlist
- Copy Track Automation to Sends
- AutoMatch
- Prime Controls for Writing Automation in Latch Mode
- Glide Automation
- Trim Automation
- Write Automation to the Start, End, or All of a Track or Selection
- Write Automation to the Next Breakpoint or to the Punch Point
- Overwrite or Extend Mute Automation
- Snapshot Automation
- Preview Automation
- Capture Automation
- VCA Master Track Automation
- Surround Features
- Pro Tools Audio Connections for 5.1 Mixing
- Configuring Pro Tools for Multichannel Sessions
- Default I/O Selectors in I/O Setup
- 5.1 Track Layouts, Routing, and Metering
- Routing Audio for Surround Mixing
- Multichannel Audio Tracks
- Multichannel Signal Routing
- Paths in Surround Mixes
- Example Paths and Signal Routing for a Surround Mix
- Introduction to Pro Tools Surround Panning
- Output Windows
- Surround Panner Controls
- Panning Modes
- Divergence and Center Percentage
- LFE Faders in Multichannel Panners
- Pan Playlists
- Surround Scope Plug-In
- Video Features
- Included Plug-Ins
- Index
Complete Production Toolkit 2 Guide92
Panning Modes
The Panning Mode button provides access to
four panning modes: X/Y mode, Divergence Ed-
iting, 3-Knob mode, and AutoGlide mode. Pan-
ning controls can be automated in all four
modes.
Panning Modes
X/Y Mode Joystick-style panning by dragging
the Pan Location cursor within the X/Y Speaker
Grid. See “X/Y Panning” on page 92 for more in-
formation.
3-Knob Mode Point-to-point panning, between
pairs of speakers. See “3-Knob Panning” on
page 93 for more information.
Divergence Editing The divergence X/Y Grid can
be dragged to resize the divergence boundaries.
See “Divergence Editing Mode” on page 96.
AutoGlide Mode Point-to-point panning from
the Pan Location cursor to a new destination
over a specified AutoGlide Time. See “AutoGlide
Mode” on page 94 for more information.
To enable a Panning Mode:
Click on the Panning Mode button in the Sur-
round Panner until the desired mode icon is dis-
played.
X/Y Panning
To pan in X/Y mode:
1 Click on the Panning Mode button until the
X/Y mode icon is displayed.
2 Drag the Pan Location cursor, or click any-
where in the Grid and drag to pan the track. The
location of the Pan Location cursor determines
the pan position of the signal. For example, to
pan something to the left rear speaker, move the
Pan Location cursor to the lower-left corner of
the Grid.
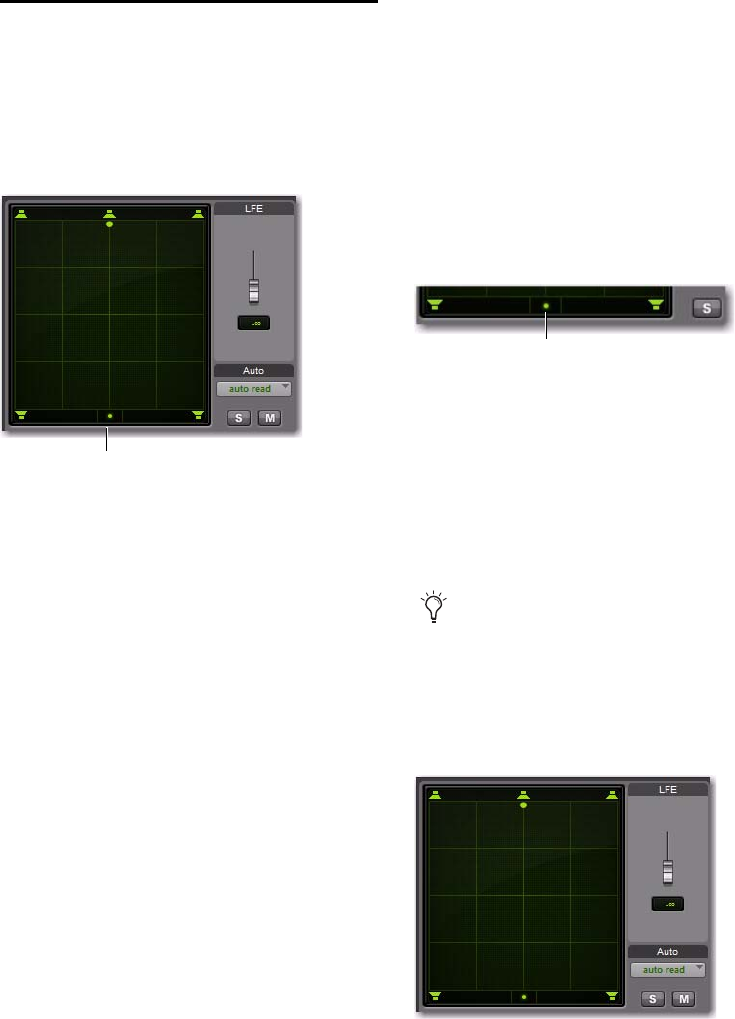
Panning Mode button (X/Y mode shown)
Panning Mode button
Panner Mode button set to X/Y mode
It is not necessary to click exactly on the Pan
Location cursor. Clicking anywhere in the
Grid will move the Pan Location cursor rel-
ative to where you click or take over with a
hardware panner. Panning does not jump to
the click position.
X/Y Panning
X/Y mode icon