
Specifications


Table Of Contents
- Contents
- Introduction
- Installation and Authorization
- Session and Track Features
- Advanced Editing Features
- Advanced Automation Features
- AutoJoin with Latch Mode
- Touch/Latch Mode
- Trim Mode
- Composite Automation Playlist
- Copy Track Automation to Sends
- AutoMatch
- Prime Controls for Writing Automation in Latch Mode
- Glide Automation
- Trim Automation
- Write Automation to the Start, End, or All of a Track or Selection
- Write Automation to the Next Breakpoint or to the Punch Point
- Overwrite or Extend Mute Automation
- Snapshot Automation
- Preview Automation
- Capture Automation
- VCA Master Track Automation
- Surround Features
- Pro Tools Audio Connections for 5.1 Mixing
- Configuring Pro Tools for Multichannel Sessions
- Default I/O Selectors in I/O Setup
- 5.1 Track Layouts, Routing, and Metering
- Routing Audio for Surround Mixing
- Multichannel Audio Tracks
- Multichannel Signal Routing
- Paths in Surround Mixes
- Example Paths and Signal Routing for a Surround Mix
- Introduction to Pro Tools Surround Panning
- Output Windows
- Surround Panner Controls
- Panning Modes
- Divergence and Center Percentage
- LFE Faders in Multichannel Panners
- Pan Playlists
- Surround Scope Plug-In
- Video Features
- Included Plug-Ins
- Index
Complete Production Toolkit 2 Guide38
To AutoMatch a pan control or the controls for an
individual insert or send:
1 Press the switch in the Channel Strip Mode
controls to display the Pan controls or the top
level of Inserts or Sends for the channel.
2 Hold Control (Windows) or Command (Mac)
and press the Rotary Encoder Select switch for
the control you want to AutoMatch:
• For Sends, the Send level, pan, and mute
will AutoMatch.
• For Inserts, all automated controls will Au-
toMatch.
• For Pan, all pan sliders on the channel will
AutoMatch.
To AutoMatch all controls for a plug-in displayed in
the Dynamics or EQ section:
Hold Control (Windows) or Command (Mac)
and press the Auto switch in the Dyn or EQ sec-
tion of the console.
Prime Controls for Writing
Automation in Latch Mode
If a track is in Latch or Touch/Latch automation
mode, you can prime individual controls for
writing automation while the transport is
stopped. This Latch Prime capability lets you pre-
pare for an automation pass before starting play-
back.
To prime controls for writing automation in Latch
mode while the transport is stopped:
1 Choose Setup > Preferences and click Mixing.
2 Under Automation, select Allow Latch Prime in
Stop.
3 Click OK to close the Preferences window.
4 In the Automation window, make sure the
controls you want to automate are write-en-
abled.
5 Click the Automation Mode selector on the
track where you want to write automation and
do one of the following:
• Choose Latch mode to allow priming of all
automation-enabled controls on the track.
– or –
• Choose Touch/Latch mode to leave the
main Volume fader in Touch mode and al-
low priming of all other automation-en-
abled controls.
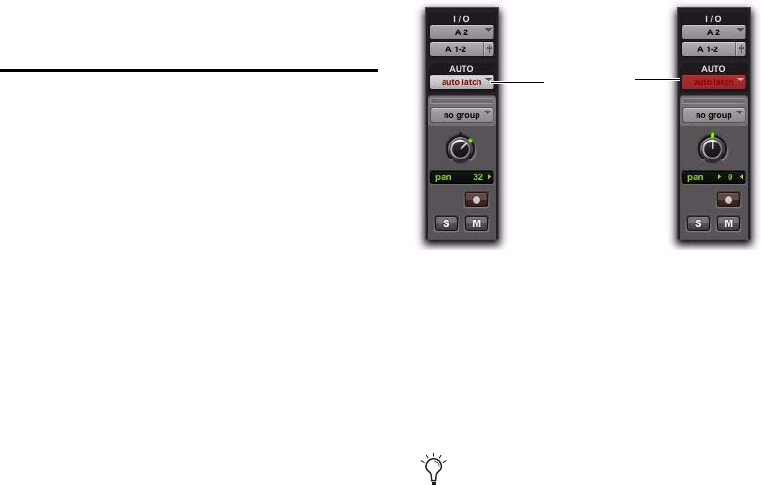
6 While the transport is stopped, touch or move
the controls you want to start writing at the be-
ginning of the automation pass. When at least
one control on a track is primed, the Automa-
tion Mode selector displays in red.
7 Start playback. All primed controls begin writ-
ing automation at their primed values.
8 Stop playback to finish the automation pass.
All tracks are taken out of their Latch Prime
state.
Automation mode indicator before (left) and after
priming of latched controls (right)
You can use the Write to Punch command
at the end of your automation pass to write
the current value back to the start of the
pass.
Automation
Mode
selector