
Specifications


Table Of Contents
- Contents
- Introduction
- Installation and Authorization
- Session and Track Features
- Advanced Editing Features
- Advanced Automation Features
- AutoJoin with Latch Mode
- Touch/Latch Mode
- Trim Mode
- Composite Automation Playlist
- Copy Track Automation to Sends
- AutoMatch
- Prime Controls for Writing Automation in Latch Mode
- Glide Automation
- Trim Automation
- Write Automation to the Start, End, or All of a Track or Selection
- Write Automation to the Next Breakpoint or to the Punch Point
- Overwrite or Extend Mute Automation
- Snapshot Automation
- Preview Automation
- Capture Automation
- VCA Master Track Automation
- Surround Features
- Pro Tools Audio Connections for 5.1 Mixing
- Configuring Pro Tools for Multichannel Sessions
- Default I/O Selectors in I/O Setup
- 5.1 Track Layouts, Routing, and Metering
- Routing Audio for Surround Mixing
- Multichannel Audio Tracks
- Multichannel Signal Routing
- Paths in Surround Mixes
- Example Paths and Signal Routing for a Surround Mix
- Introduction to Pro Tools Surround Panning
- Output Windows
- Surround Panner Controls
- Panning Modes
- Divergence and Center Percentage
- LFE Faders in Multichannel Panners
- Pan Playlists
- Surround Scope Plug-In
- Video Features
- Included Plug-Ins
- Index
Complete Production Toolkit 2 Guide16
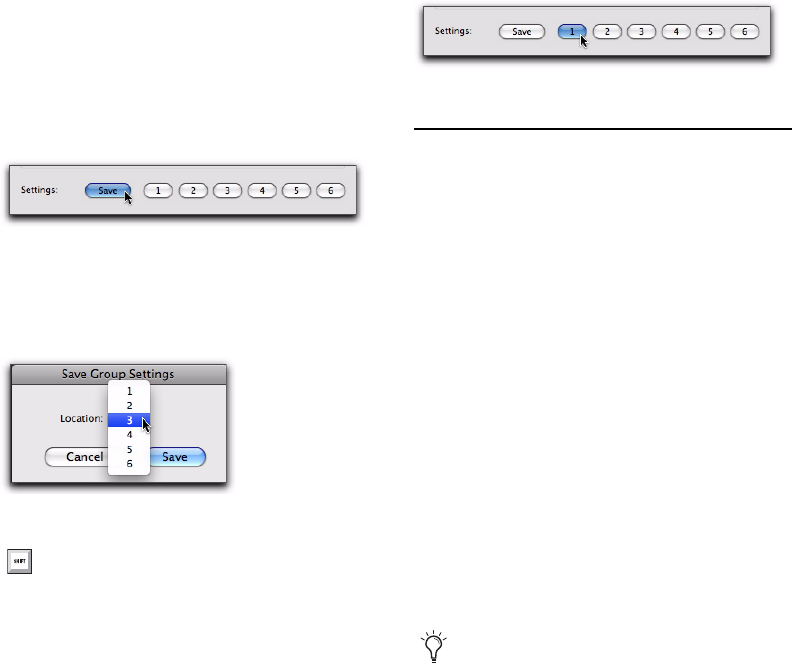
Saving Group Attribute Presets
You can define six Group presets that can be re-
called on either the Attributes or Globals page
whenever you are creating or modifying a Mix
or Mix/Edit Group.
To save the current attribute settings as a Group
preset:
1 In the Groups dialog, click Save. (Follow
Globals must be unchecked to save a setting
from the Attributes page.)
2 In the Save Group Settings dialog, select one
of the six preset locations from the Location pop-
up menu, and click Save.
To recall a Group preset:
Click the corresponding Preset button (1–6) in
the Groups dialog. (Follow Globals must be un-
checked to recall a setting in the Attributes
page.)
Momentary Solo Latch Option
With Momentary Solo Latch enabled, Solo but-
tons are not sticky. A track is soloed only when
its Solo switch is held down.
With a qualified control surface, additional
tracks can be soloed by pressing their SOLO
switches (as long as at least one Solo button is
held down). When no SOLO switch is held
down, all soloed tracks will unsolo.
To temporarily latch solos:
1 Choose Options > Solo Mode > Momentary.
2 Press and hold the Solo button on the first
track that will be soloed.
3 While still holding the first Solo button, press
additional Solo buttons. Solo buttons will re-
main soloed as long as one Solo button is held.
Saving a Group preset
Selecting a Group Settings Location
To save the current attribute settings
directly to a preset location, Control-click
(Windows) or Command-click (Mac) the
preset button.
Recalling a Group preset
As long as at least one Solo button is held
down, all the solos will remain latched.