
Specifications


Table Of Contents
- Contents
- Introduction
- Installation and Authorization
- Session and Track Features
- Advanced Editing Features
- Advanced Automation Features
- AutoJoin with Latch Mode
- Touch/Latch Mode
- Trim Mode
- Composite Automation Playlist
- Copy Track Automation to Sends
- AutoMatch
- Prime Controls for Writing Automation in Latch Mode
- Glide Automation
- Trim Automation
- Write Automation to the Start, End, or All of a Track or Selection
- Write Automation to the Next Breakpoint or to the Punch Point
- Overwrite or Extend Mute Automation
- Snapshot Automation
- Preview Automation
- Capture Automation
- VCA Master Track Automation
- Surround Features
- Pro Tools Audio Connections for 5.1 Mixing
- Configuring Pro Tools for Multichannel Sessions
- Default I/O Selectors in I/O Setup
- 5.1 Track Layouts, Routing, and Metering
- Routing Audio for Surround Mixing
- Multichannel Audio Tracks
- Multichannel Signal Routing
- Paths in Surround Mixes
- Example Paths and Signal Routing for a Surround Mix
- Introduction to Pro Tools Surround Panning
- Output Windows
- Surround Panner Controls
- Panning Modes
- Divergence and Center Percentage
- LFE Faders in Multichannel Panners
- Pan Playlists
- Surround Scope Plug-In
- Video Features
- Included Plug-Ins
- Index
Complete Production Toolkit 2 Guide104
Video Region Groups
You can include video regions within region
groups for the following operations:
• Creating region groups
• Creating multitrack region groups (includ-
ing audio tracks)
• Editing region groups
• Creating fades and crossfades for audio files
in region groups
• Importing and exporting region group files
Browsing Video in the Video
Universe Window
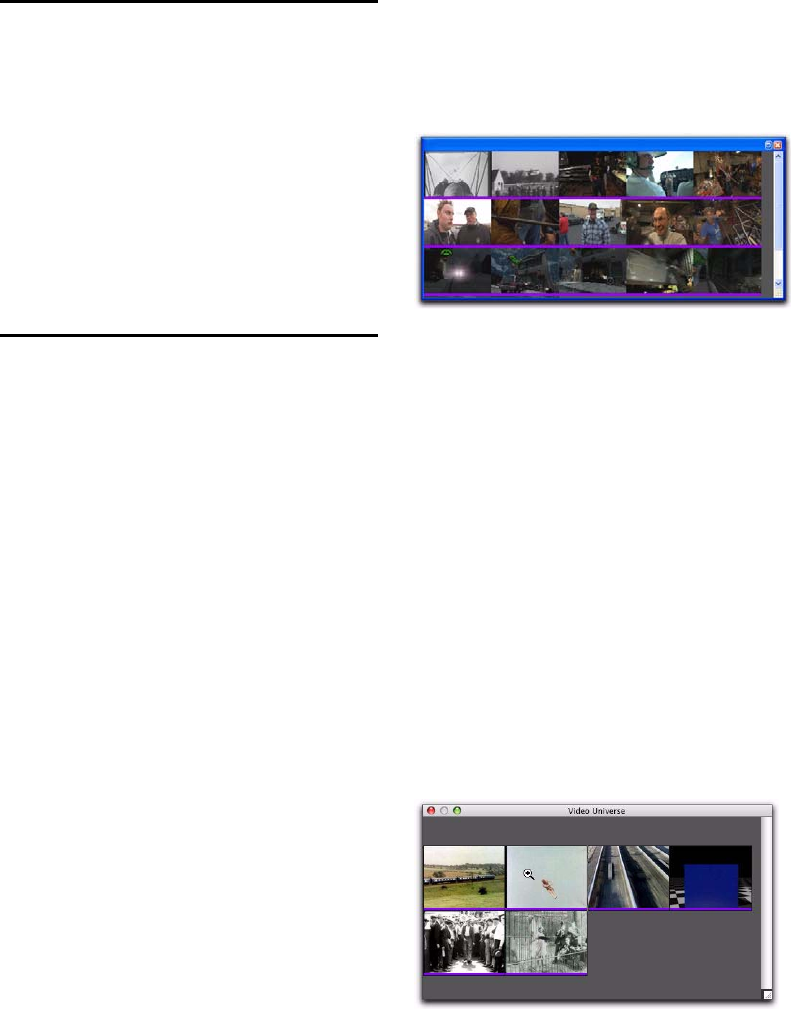
The Video Universe, lets you view, navigate,
zoom, and select video regions on the main
video track.
The Video Universe window displays the center
video frame of each video region in the main
video track. Video frames are ordered sequen-
tially according to their order in the Timeline,
and the colored strip under each frame repre-
sents the color coding for that region.
To display the Video Universe window:
1 Make sure the Video Online button in the
main video track is set to online status (blue).
2 Choose Window > Video Universe.
Increasing or Decreasing the Size of
Video Frames
To increase or decrease the size of video frames in
the Video Universe window:
Right-click (Windows or Mac) or Control-click
(Mac) anywhere in the Universe, and select In-
crease or Decrease.
Selecting Zoom Resolutions in the
Video Universe
When you move the cursor over the top half of
a video frame in the Video Universe, it displays
and behaves as a zoom tool. This tool lets you
zoom in on one or more video regions to fill the
entire Edit window display.
Video Universe with video frames representing video
regions on the main video track
Video frame with zoom tool