
Setup guide

Chapter 2 Configuring the Windows Ethernet Client
26
3. Click MediaNetwork Components.
4. Click Install Ethernet Attached Client.
The InstallShield Wizard dialog box opens.
5. Accept the default values presented by the InstallShield Wizard.
6. When prompted, type the IP address of the Ethernet attached server to
which the client is connected in the IP address text box.
7. Continue by accepting the default values presented by the InstallShield
Wizard.
8. Click Finish.
The Windows Ethernet client software is installed.
9. Reboot the client.
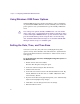
Installing Ethernet Client Software over the Network
The Windows Ethernet client software installer might be available on the
PortServer Pro system or the LANserver as part of the MediaNetwork
installation.
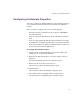
n
For security reasons, the internal drive on the PortServer Pro or the
LANserver is not shared by default. If you want to allow network
installation of client software from the PortServer Pro or the LANserver,
you must configure the PortServer Pro or the LANserver Ethernet client
installer directory for sharing. For more information, see the Avid Unity
MediaNetwork PortServer Setup Guide or the Avid Unity LANserver EX
Setup Guide.
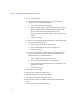
To install the Windows Ethernet client software from a PortServer Pro
system or a LANserver over the network:
1. Double-click the My Network Places icon, navigate to the PortServer
Pro or the LANserver folder on drive:\Avid Technology\AvidUnity,
and open the Ethernet Client Setup folder containing the Ethernet
client software installer.
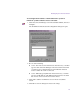
2. Double-click Setup.
The Ethernet Client Installer window opens.