
Specifications
Lotus Redbooks Wiki – IBM Lotus Notes and Domino V8.5 Deployment Guide
118
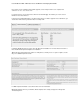
To define a fixed path, right-click on the Destination Computer entry in the Destination computer's folder
pane and select Add, then enter the directory name of your choice (e.g."Lotus".) subfolders can be created
in the same way. Before adding any files via drag and drop, make sure the newly created folder is selected.
Registry
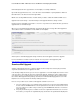
The Source Computer Registry View, which is the top left of the four panes, displays the different registry
hives on the local workstation, which is used to create the custom installation package. The Destination
Computer Registry view shows the different registry hives on the destination machine upon which the Lotus
Notes client will be upgraded. By default, the destination view contains -- in read mode only -- the following
hives: HKEY_CLASSES_ROOT, HKEY_CURRENT_USER, HKEY_LOCAL_MACHINE, HKEY_USERS and
HKEY_USER_SELECTABLE.
It is possible to use these to create associated registry keys and values in the same manner as one would
with the help of the Registry Editors that come with Windows (e.g.,RegEdit.exe and RegEdt32.exe).
Alternatively, it is possible to copy or drag and drop existing keys from the Source Computer Registry Data
pane. Furthermore, a .reg file can be used by using the registry import wizard. It is also possible to modify or
delete registry keys that are part of the installation. If new keys are added here in the package, they will be
added every time the custom installation package is used.
One must be careful when creating new registry keys so as to avoid situations where unfavorable results
crop up. It must be specific whether the key should be created at install time, removed at uninstall time or
both. These options are mutually exclusive and are available when right-clicking on a key. The explanation
of each of these options is provide below:
• Create Key at Install - Creates registry keys during the installation if the key doesn't exist on the
destination machine.
• Delete Key at Uninstall - Deletes the key during uninstallation, no matter whether the key existed
prior to the installation via the .msi. This means that this key and all sub-keys associated to it will be
deleted no matter whether or not other applications are associated to it. This can have a major
aspect on other applications; it is thus necessary to use this option with the greatest of care and
prudence and only if you are sure that only the key is associated with this .msi and nothing else.
• Both Create and Delete - Both scenarios above with occur.
Shortcuts
Provides a visual method for adding shortcuts and program folders to the customer installation package
Existing shortcuts can be added or removed. The shortcuts can also be placed in folders already predefined
in the installation package. These standard folders are predefined in the Windows installer, but there is the
flexibility to add new folders as needed. Each shortcut has many properties that indicate the target
application, the keyboard key combination, the icon and any other needed information to ensure the proper
execution of the application. When you define a new shortcut, it will be created every time the customer
installation kit is used.
INI Files
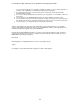
Provides a graphical method to add, modify or delete entries in a specific .ini file.
It displays the content of the IniFile table of the custom client installation package based on the transform
file. The view itself is composed of the tree structure of the where the .ini is found and what it is (or will be)
called. The other part of the screen, to the left, shows the keys (or parameters) and associated value to be
processed in the specified .ini file. The values of the Windows installer and those from the transform file are
differentiated by different icons in this section. There is a pane in the bottom right-hand corner, but it simply
explains how data needs to be entered in the table above.