AH * oon FOC DECLARATION This device coracles with Part 13 of the FOC Rules. Operation is subject to the following “two conditions: (1) This devise may not cause harmful interference, 2nd (2) This devise must accept any interference received, including interference that may cause desired exasperating, Warning: Changes or modifications to this unit not expressly approved by the party responsible for compliance sold void the user's authority to operate the equipment.
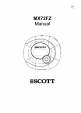
Getting Started INTRODUCTION Digital Ado Player (DAP) MX 722 Your Digits) Audio Player is a device halt stores and plays multi-format digital audio files including MP3, WMA and WAV files. Downloading hours of music from your PC, transfer sheer into your DAT ov use i for voles recording. Please road this manual carefully before using this product for the first time, KEY FEATURES Multi-format player supports: MP3, WMA and WAV files. TSE data trams fer.
PARTS DESCRIPTION §. Navigation Control 7. 8EQ Repeat Button 2, Display & Mode Bunion 3. Handheld Seep older &, Power On/Off Button (Straps) nol included) Stop { Mw )/Play( 4, Built-in Microphone 10. USB Port 5. Lock Switch 11. Battery Compartment (Rear of Unity 6. [headphone Jack CONTROLS Key Functions Tress fo access into the Main Menu, Cross and hdd to access into the Settings Mona. Side to the right to lock al keys functions, Slide to the left to unlock all keys selections.
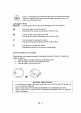
There is a joystick key in the center that can be used to control several key functions. Press the button top, down, left, right or pressing it down will achieve the following actions: In Navigation Mode: NAVE f™ Push the button down Io nieces the Navigation mode of the folders. Push lo the right to select the next file. Push and hold to the right to fat-forward within the files, Push fo the left to select the previous file.
Downloading and Transferring Files USB DRIVER INSTALLATION For Windows ME, 2008 or XP: These versions of Windows will automatically select your DAP after connecting with the USB cable and the computer. (Please make sure the DAP is formed ONL) For Windows 9851: Windows 98SE will not recognize the player until you have installed the driver using the included installation CD-ROM.
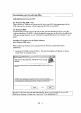
2. Follow the on screen instruction to install the software. Please install) the software under the dignitary us prompted. Select installation Folder Th inline HTL ADI PLAYER 4 he fyi foo Tosca ins tbl, chick Ba Tail ei ere he Warning: DO NOT change the installation path. Otherwise, the Player driver may not ron properly. ~ 3. Arr successfully installing the driver sunflowers click “Close to Fxit®. ! Select installation Folder Th ital i ho OUGHT SLU FAYER thy loosing iz.
TRANSFERRING FILES Connect the DAT by using the supplied USB cable to the computer. Press the [MM button 10 turn the player ON. The following will be displayed on the LCD screen of your DAP: MASS el STORAGE A “Removable Disk” will be added in My Computer. Open the “Removable Disk” folder Testes the files you wish te copy from your computer to your player. Drag and drop MP3, WMA or WAV files on your computer into the “Removable Disk™ folder. These files will sow be copied Into your DAP.
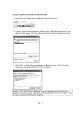
SAFELY REMOVE HARDWARE PROCEDURE 1. Double click the “Safely Remove Hardware™ icon on the task bar: 2. From the “Safely Remove Hardware™ window, select “USE Mass Storage Device” and click the “Stop” button. The “Stop a Hardware Device” window will pop up es shown: dnc go ions lamentation oe ric, are een click Some Char rn Tan wi Click “OK”. A “Safe to Remove Hardware” window will pop up. Now, iris safe to remove the USE Cable and the DAY from the computer.
operation LISTENING TO MUSIC Alter you have transformed MPS, WMA or WAY files from the computer to the DAP player, vou gan start listening 10 music while vou learn how to use the vest of the features. button to teen the on keys {0 Insert the earphones into the earphone jack of the player; prods the |W payer an, The first song will immediately begin to play. Use then. forward, reverse, stadium the volume and recess to Navigation rode. USING THE MAIN MENU Press the [nods button to access the MAT MENU.
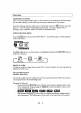
Repeat Button Press the | WEES | button repeatedly to select different repeat mode scoliosis. As each mode fe selected, the following icons will displayed on the right upper part of the LCD serene on your player: Play ail the files in the player once. Randomly play all the files in the player once. Randomly play ull the [Tes in the player continuous. Plays a single file repeatedly. ’ fx] Play all the files repeatedly in the consecutive order. pans and plays one section repeatedly.
VOICE RECORDER Use your DAP to record Buick reminder memos or oven lengthy business meetings or features. Frogs the button and use the [ie] or the [B] button to highlight the Voice Recorder icon as shown. EEE Moms Ails Pesos to confirm md enter the Solos Recorder made. Recording a Vance Message Press the WEQ/9] button to start recording. Press the [WI] button to stop recording. = The ordered te is saved 58 8 WAY format, Listening to the Recorded File « Press the {Mp | button to listen the recorded file.
{ Customizing the Player USING THE SETTING MENU The Melting Menu provides the options to change the player settings, displays, and resolution. Frost and hold the Mode button to display the SETTING MEETS en the LCT screen, EE sir ae lade] 1 GE Press the [3 or the [HH] button to defect one of the following scatting options: Play List, Rewording Resolution, Contrast, Generalize, Play Timer ov Light Timer.
Recording Resolution Setting EAE i cameraman Push or to select one of the three voices recording resolution: Tow, Normal, or High Prams NAVE / @ to confirm the resolution selection. Contrast Setting z 2 »1 Press the 0 or the [8 button to adjust the TOT contrast level. Press NAVE! ® to confirm the contrast level. Die Selling 20 ul 1 Push ov button to select one of the six music equalizer effects: Normal, Rock, Lire Bass, Jar, Pop, or Classical, Press NAV ® to confirm the equalizer mode.
| Additional Information PRECAUTIONS Copyright » Nuking copies of MP3 tracks or files without permission is » violation of the international copyright Jaws. Safety «Vibration experienced during walking or exercising will not affect the player. However, dropping the player or dropping a heavy object on the player may result in damage or sound distortion. Avoid spilling any liquid sate or into the player.
CE Warning “The exclamation point within the tangle Is a warning sign alerting the user of A important instructions accompanying the product, GP This unit must not be exposed 10 moss or min. 555 Ensure ull connections ane properly made before operating the unit.
TROUBLE SHOOTING Should any problem persist traffic you have checked these symptoms, consult your dealer. Symptom Possible Reason Actions Wo Power Chock whether the battery Replace the battery. is exhausted. Wo Sound from Check whether the sapience Re-insert the earphones, Earphones arg detached from the unit Check whether the volume Increment the volume. ix sed 10 “minimum”, Check whether the battery Replace the battery, is exhausted. Check whether the carillons Clean the earphones jack.
TECHNICAL SPECIFICATIONS Category Item Specification Audio Frequency Range 20Hz —~ kHz Headphones Output »40mW, St ohm (Max. Val} 130mW per channel, Soh S/N Ratio 90db (MP3) File Support MP3 MPEG 1/2/2.5 Layer 3 WMA Windows Media Audio WAY ADP encoding Bit Rate Skips — 320khps Tag nfo 33 Tag Dimension FOE x 65x 24 mm Weight Approx. 42 g {without battery) Battery 1x AAA battery CD Full Graphic with Back tight Language English UBS USB LI Built-in Memory 128MB Max. Playtime Approx.
UPGRADE FIRMWARE PROCEDURE Occasionally, if may a now software (firmware) may be released for this unit benching its functionality. For ore information, please go to the web site at (yww.sudioscoti.oom) for downloading procedure and downloading the latest firmware, EXTERNAL MEMORY CARD 1} Open the battery compartment door by click the button, ry Insert a SEISMIC memory card {not included) up to 512M, facing up as shown. 33 Connect the USB cable ax described previously.
FORMATTING THE MEMORY PROCEDURE 1. Ensure the Digital Audio Player is ON. 2. Use the supplied USE cable to connect between Digital Audio Player and the Computer. 3. Double slick the “My Computer” jun. “Removable Disk” spars in the My computer [odder.
5. The following dialogue hox will appear. Select the FAT fle system only, then dick START to proceed for formatting the dive. Unimportant: Do not select other file systems, it will cause malfunction of the unit CAT file) cincture of OK and formatting) Wastes: All files will hie deleted when the player is formatted.
CARE AND MAINTENANCE Your Digital Audio Player is a precise electronic devices, and should not be subjected to rough handing or exposed to extreme temperatures or moisture. Do not use chemical agents or Bedsides to clean the unit, as they may damage the plastic, Please Retain this Information for Future Referents ‘The manufacturer reserves the right to make any technical! changes situation notice In the interest of progress, Declaration Cur company will not be responsible for any mistakes in (his manual.
INDEX Brie introduction Introduction Key Features Packaging Contents Parts Description Controls Key Functions Charging Battery Downloading and Transferring Files USE Driver Installation Transference Files Safely Remove Hardware Procedure Operation Listening to Muslin Rising the MAIN MENU MUSIC PLAYER NAVIGATION VOICE RECORDER Customizing the Player {Using the SETTING MENU PLAY LIST REC RESOLUTION CONTRAST EQUALIZER PLAY TIMER LIGHT TIMER Additional malformation Precautions Trouble Shooting Technical Specifi