
User's Manual

Add a DN range
Follow this procedure to assign a DN range.
Assigning a DN range manually
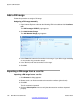
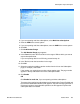
1. Open Internet Explorer and enter the following URL
in the address field: localhost/
cds.
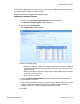
The DAP manager IP DECT page appears.
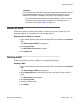
2. Click Add Number Range.
The Add Number Range page appears.
3. In the From field, enter the first number in the range. If you add a range consisting
of one number only
, proceed to step 5.
4. In the To field, enter the last number in the range.
5. Click OK.
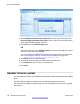
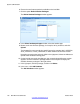
Importing a DN range from a .csv file
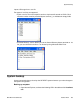
Importing a DN range from a .csv file
1.
Click Browse. A dialog appears.
2. Browse to the .csv file that contains the extension numbers (phone book).
3. Click OK.
The file contents is imported.
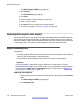
4. Click the Subscriptions menu to verify that the extension numbers imported
properly.
System administration
132 SIP DECT Fundamentals October 2012
Comments? infodev@avaya.com