
User's Manual

Parts and equipment required
• Base card (except the legacy card carrier)
• Trunk daughter card
• 3 stand-off pillars (these are supplied with the trunk daughter card)
Tools required
• 5mm Flat-blade screwdriver
• Anti-static wrist strap and ground point
Installing a trunk daughter card
Procedure
1. Check that correct cards have been supplied.
2. Ensure that you are wearing an anti-static wrist strap connected to a suitable ground
point.
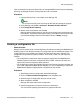
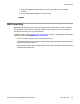
3. On the base card, identify the position of the 3 holes for the plastic pillars for the
trunk daughter card.
These are along the same edge as the card connector.
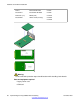
4. Fit the stand-off pillars to the base card.
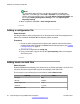
5. If there is a clip-on metal shield over the connector block on the base card, remove
it.
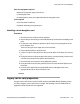
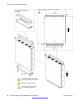
6. Using minimal force and checking that the pins are correctly located, push the trunk
card onto its connector block and the stand-off pillars.
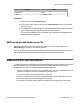
7. Check that the card connector has snapped into position.
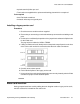
8. Using the washers and screws provided, secure the metal stand-off pillars to the
base card.
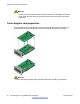
9. From the set of labels that are supplied with the trunk daughter card, fit the
appropriate label to the front of the base card.
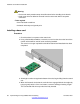
Legacy carrier card preparation
A legacy carrier card can be used to fit VCM cards into the B5800 Branch Gateway control
unit. Up to 2 legacy carrier cards can be inserted. The following trunk and VCM cards are
supported. Cards not listed are not supported.
Base and trunk card installation
Implementing the Avaya B5800 Branch Gateway November 2011 55