
Configuration manual


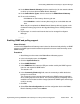

3. On the Elements page, click New.
4. On the New Elements page, in the Type drop-down box, select B5800 Branch
Gateway.
5. On the New B5800 Branch Gateway page, in the Name field, enter a name for this
B5800 Branch Gateway.
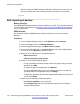
6. In the Type drop-down box, select B5800 Branch Gateway.
7. In the Description field, enter a description to help identify this B5800 Branch
Gateway.
8. In the Node field, enter the IP address of the B5800 Branch Gateway.
9. Click the Attributes tab.
10. For the SNMP Attributes Version, click V1.
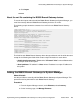
11. In the Read Community field, enter the community to which the device belongs for
read access.
12. In the Write Community field, enter the community to which the device belongs for
write access.
13. In the Service Password field, enter the service password. The default service
password is the same as the Service Login (SMGRB5800Admin).
14. In the Confirm Service Password field, enter the service password again.
15. Click Commit.
16. Repeat steps 3 to 15 for each branch that is to be managed from System
Manager.
Enabling WebLM licensing for the branch
About this task
If you are going to use WebLM licensing, you must enable the WebLM licensing feature for the
branch. See Licensing on page 16 for more information.
Procedure
1. From the System Manager console, select the B5800 Branch Gateway device and
click Edit to edit the system configuration for the device. IP Office Manager will be
launched on your PC. For more information, see Editing a B5800 Branch Gateway
system configuration from System Manager on page 157.
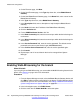
2. In the left navigation pane, click PLDS license.
3. Click the check box for Enable WebLM to select this option.
Initial branch configuration
130 Implementing the Avaya B5800 Branch Gateway for an Avaya Aura
®
Configuration October 2012
Comments? infodev@avaya.com