
Installation and Maintenance Manual


Avaya B179 SIP Conference Phone Installation and Administration Guide
37
HEADSET AND PA INSTALLATION AND SETTINGS
PA SETTINGS
To match several types of situations and equipment, there are some settings available in
the Avaya B179 menu.
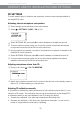
Activating internal microphone and speakers
These settings are not available via the web interface.
Select > SETTINGS > BASIC > PA (6,1,6).
Select INTERNAL MIC and press OK to switch between on (shaded box) and off.
To ensure maximum audio quality, do not use the internal microphone and external
microphones connected via the PA box at the same time.
Only the internal microphone is turned off. Any external microphones connected to the
Avaya B179 are still turned on.
Select INTERNAL SPKR and press OK to switch between on (shaded box) and off.
To ensure maximum audio quality, do not use the internal speakers and external
speakers connected via the PA box at the same time.
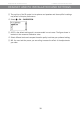
Adjusting microphone volume from PA
During a call, select > PA > PA MONITOR.
Adjust the microphone volume from the mixer so that the level on the display screen is
around 10–12 when speaking in a normal tone.
Adjusting PA calibration manually
It is possible to calibrate the duplex performance of the conference phone when it is con-
nected to a PA system. The calibration level can be set automatically by the Avaya B179
or adjusted manually to any value between 0 and 5 (0 being full duplex).
• Increase the calibration if the other party experiences disturbing echo.
• Decrease the calibration if the other party experiences low duplex, i.e. your voice is
muted or clipped when the other party is speaking.