
Deployment Guide


Avaya Video Conferencing Manager Deployment Guide 62
You cannot edit or delete the three predefined roles. Read more about access to specific functionality for
each of these roles at User Role Access.
NOTE The superuser created during Avaya Video Conferencing Manager installation
can edit and delete all user accounts, including administrators. Read more at
User Authentication.
In Avaya Video Conferencing Manager Administrator, administrators can create additional custom roles
and choose which page-level tasks a custom role can be authorized to perform. From the Devices page,
an administrator can then assign device-level tasks to custom roles by grouping devices into folders,
selecting a custom role to assign to the folder, and then choosing the tasks that the custom role is
authorized to perform on devices in that folder. For more information about creating custom roles, refer to
Role Management Settings. For more information about choosing device-level tasks for a custom role,
refer to Managing Device Permissions Groups for Custom Roles.
NOTE Users of a third party scheduler can affect scheduling of calls. With Microsoft
Exchange Server integrated, users can add external devices to Avaya Video
Conferencing Manager without having a Avaya Video Conferencing Manager
user account. Refer to Integrating a Third Party Scheduler.
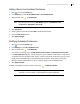
Adding a User Account
Click on the navigation bar to manage user accounts. A list of defined registered users for Avaya Video
Conferencing Manager appears.
New users are automatically assigned the Operator role. Refer to Modifying a User Account for details
about changing roles.
Avaya Video Conferencing Manager categorizes defined users for Windows-based authentication.
Depending on the type of user authentication you chose when installing the application, different options
for user management appear.
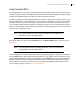
Importing Users from Active Directory
If you chose Active Directory for user authentication when you installed Avaya Video Conferencing
Manager, you can import Active Directory users by completing the following steps:
1. In Actions, choose Import Active Directory users and click Submit.
The Import Active Directory users dialog box lists the first 100 users.
2. Import selected users in the list by clicking the names of the users you want to import. Use the Search
box to search for a specific username and click Submit. You can also change any user account
information (such as name, role, location, email, or contact number) by clicking Next after selecting the
user and before completing the import.