
Deployment Guide


Avaya Video Conferencing Manager Deployment Guide 53
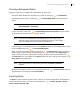
Overriding the Default Directory Group
Follow these steps to override the default directory group on an individual video system, if one is set, or to
specify a directory group on an individual system:
1. On the Devices page, browse for the device to which you wish to assign a directory group.
2. Click the device entry.
3. Click , Configuration, and View details.
4. In the Device details page, ensure that the System information tab is selected.
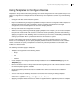
5. In Corporate directory, click the name of the directory group that you wish to appear as the
hierarchical group on the directory screen for this device when the user chooses to browse the
directory hierarchically.
6. Click Save.
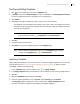
Managing Device Permissions Groups for Custom Roles
Follow these steps to place devices in folders, assign a custom role to the folder, and choose which tasks
the role is authorized to perform on those devices:
1. On the Devices page, click .
2. In the Device groups window, click Manage IT group.
3. In the Manage IT group window, click the IT Group folder.
4. Click and Create folder.
5. Enter the name of the folder.
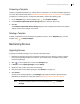
6. Select the devices that you wish to include in the folder. Use Search to search for a device in the
current list.
NOTE A device can reside in only one folder. A device appears unavailable if it is
already assigned to another folder. Mouse over the unavailable device to view
text that identifies the folder to which the device is assigned. Click the
checkbox to override the assignment and assign the device to the currently
selected folder.