ESM-QM57 Intel Core i7/ Celeron COM Express Module User’s Manual 1st Ed – 6 April 2011 Part No.
ESM-QM57 FCC Statement THIS DEVICE COMPLIES WITH PART 15 FCC RULES. OPERATION IS SUBJECT TO THE FOLLOWING TWO CONDITIONS: (1) THIS DEVICE MAY NOT CAUSE HARMFUL INTERFERENCE. (2) THIS DEVICE MUST ACCEPT ANY INTERFERENCE RECEIVED INCLUDING INTERFERENCE THAT MAY CAUSE UNDESIRED OPERATION. THIS EQUIPMENT HAS BEEN TESTED AND FOUND TO COMPLY WITH THE LIMITS FOR A CLASS "A" DIGITAL DEVICE, PURSUANT TO PART 15 OF THE FCC RULES.
User’s Manual Life Support Policy Avalue Technology’s PRODUCTS ARE NOT FOR USE AS CRITICAL COMPONENTS IN LIFE SUPPORT DEVICES OR SYSTEMS WITHOUT THE PRIOR WRITTEN APPROVAL OF Avalue Technology Inc. As used here in: 1.
ESM-QM57 If you still cannot find the answer, gather all the information or questions that apply to your problem, and with the product close at hand, call your dealer. Our dealers are well trained and ready to give you the support you need to get the most from your Avalue’s products. In fact, most problems reported are minor and are able to be easily solved over the phone. In addition, free technical support is available from Avalue’s engineers every business day.
User’s Manual Product Warranty Avalue warrants to you, the original purchaser, that each of its products will be free from defects in materials and workmanship for two years from the date of purchase. This warranty does not apply to any products which have been repaired or altered by persons other than repair personnel authorized by Avalue, or which have been subject to misuse, abuse, accident or improper installation.
ESM-QM57 Contents 1. Getting Started ............................................................................................................ 9 1.1 Safety Precautions .................................................................................................... 9 1.2 Packing List ............................................................................................................... 9 1.3 Document Amendment History ...........................................................................
User’s Manual 3. BIOS Setup ................................................................................................................... 36 3.1 Introduction ............................................................................................................. 37 3.2 3.3 3.4 3.5 3.6 Starting Setup ......................................................................................................... 37 Using Setup ..............................................................................
ESM-QM57 3.6.3.1.1 CAS # Latency (tCL) ......................................................................................................................... 67 3.6.3.1.2 RAS # Active Time (tRAS) ............................................................................................................... 67 3.6.3.1.3 Row Precharge Time (tRP) ............................................................................................................... 67 3.6.3.1.4 RAS# to CAS# Delay (tRCD).............
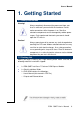
User’s Manual 1. Getting Started 1.1 Safety Precautions Warning! Always completely disconnect the power cord from your chassis whenever you work with the hardware. Do not make connections while the power is on. Sensitive electronic components can be damaged by sudden power surges. Only experienced electronics personnel should open the PC chassis. Caution! Always ground yourself to remove any static charge before touching the CPU card. Modern electronic devices are very sensitive to static electric charges.
ESM-QM57 1.
User’s Manual 1.4 Manual Objectives This manual describes in detail the Avalue Technology ESM-QM57 Single Board. We have tried to include as much information as possible but we have not duplicated information that is provided in the standard IBM Technical References, unless it proved to be necessary to aid in the understanding of this board. We strongly recommend that you study this manual carefully before attempting to interface with ESM-QM57 series or change the standard configurations.
ESM-QM57 1.5 System Specifications System CPU Intel Core i7 620LE (2.00GHz) / 620 UE (1.06GHz) BIOS AMI 8 MBit Flash BIOS System Chipset Intel QM57 I/O Chip N/A System Memory Two 204-pin SODIMM sockets up to 8GB DDR3 800/1066 SDRAM Expansion TPM LPC, 4 PCI (PCI Rev. 2.3 compliant), 6 PCIe x1, 1 PCIe x16 (shared with SDVO, HDMI & Displayport) Nuvoton WPCT200A I/O 2 MIO 1 x EIDE (Ultra DMA 100), LPC, SMbus/I C Bus, 4 x SATA USB 8 x USB 2.
User’s Manual Operating Temp. 0~60°C Storage Temp. -40 ~ 75°C Operating Humidity 0%~90% relative humidity, non-condensing Size (L x W) 5" x 3.7" (125 mm x 95 mm) Weight 0.44 lbs (0.
ESM-QM57 1.
User’s Manual 2.
ESM-QM57 2.
User’s Manual 2.2 Installation Procedure This chapter gives you the instructions on how to setup your system. 1. Turn off the power supply. 2. Insert the SODIMM module (be careful with the orientation). 3. Insert all external cables for hard disk, floppy, keyboard, mouse, USB etc. except for flat panel. A CRT monitor must be connected in order to change CMOS settings to support flat panel. 4. Connect power supply to the board via the ATXPWR. 5. Turn on the power. 6.
ESM-QM57 2.2.1 Main Memory ESM-QM57 provides two 204-pin SODIMM sockets up to 8GB DDR3 800/1066 SDRAM SODIMMS Make sure to unplug the power supply before adding or removing SODIMMs or other system components. Failure to do so may cause severe damage to both board and components.
User’s Manual Locate the SODIMM socket on the board. Hold two edges of the SODIMM module carefully. Keep away from touching its connectors. Align the notch key on the module with the rib on the slot. Firmly press the module into the socket which automatically snaps into the mounting notch. Do not force the SODIMM module in with extra force as the SODIMM module only fits in one direction.
ESM-QM57 2.3 Connector List You can configure your board to match the needs of your application by setting jumpers. A jumper is the simplest kind of electric switch. It consists of two metal pins and a small metal clip (often protected by a plastic cover) that slides over the pins to connect them. To “close” a jumper you connect the pins with the clip. To “open” a jumper you remove the clip. Sometimes a jumper will have three pins, labeled 1, 2, and 3. In this case, you would connect either two pins.
User’s Manual 2.4 Setting Jumpers & Connectors 2.4.1 AT/ATX mode selector (SW1) AT/ATX mode AT mode OFF 1 ON 2 ATX mode* OFF 1 ON 2 *Default 2.4.1.1 Signal Description –AT/ATX mode selection AT/ATX mode Description AT mode This Mode supports AT power supply, no need to press Power button to enable power on/off ATX mode This Mode supports ATX power supply.
ESM-QM57 2.4.2 COM Express Connector 1 (CN2A) Signal (Rear side) Signal GND A1 B1 GND PCIE_MDI3- A2 B2 PCIE_ACT# PCIE_MDI3+ A3 B3 LPC_FRAME# PCIE_LINK100# A4 B4 LPC_AD0 PCIE_LINK1000# A5 B5 LPC_AD1 PCIE_MDI2- A6 B6 LPC_AD2 PCIE_MDI2+ A7 B7 LPC_AD3 PCIE_LINK# A8 B8 LPC_DRQ0# PCIE_MDI1- A9 B9 LPC_DRQ1# PCIE_MDI1+ A10 B10 CLK_LPC_33M GND A11 B11 GND PCIE_MDI0- A12 B12 PWRBTN# PCIE_MDI0+ A13 B13 SMB_CLK LAN_1.
User’s Manual (Rear side) Signal PIN PIN Signal GND A31 B31 GND HAD_BIT_CLK A32 B32 HAD_SPKR HAD_SDOUT A33 B33 I2C_CLK BIOS_DISABLE# A34 B34 I2C_DAT PM_THRMTRIP# A35 B35 ETX_THRM# USB_PN6 A36 B36 USB_PN7 USB_PP6 A37 B37 USB_PP7 USB_OC67# A38 B38 USB_OC45# USB_PN4 A39 B39 USB_PN5 USB_PP4 A40 B40 USB_PP5 GND A41 B41 GND USB_PN2 A42 B42 USB_PN3 USB_PP2 A43 B43 USB_PP3 USB_OC23# A44 B44 USB_OC01# USB_PN0 A45 B45 USB_PN1 USB_PP0 A46 B46 USB_PP1 RTC_VCC A47 B47
ESM-QM57 (Rear side) Signal PIN PIN Signal PCIE3_TX+ A61 B61 PCIE3_RX+ PCIE3_TX- A62 B62 PCIE3_RX- ETX_GPIO45 A63 B63 ETX_GPIO15 PCIE2_TX+ A64 B64 PCIE2_RX+ PCIE2_TX- A65 B65 PCIE2_RX- GND A66 B66 PCIE_WAKE# ETX_GPIO46 A67 B67 PM_RI# PCIE1_TX+ A68 B68 PCIE1_RX+ PCIE1_TX- A69 B69 PCIE1_RX- GND A70 B70 GND LVDSA_DATA0 A71 B71 LVDSB_DATA0 LVDSA_DATA#0 A72 B72 LVDSB_DATA#0 LVDSA_DATA1 A73 B73 LVDSB_DATA1 LVDSA_DATA#1 A74 B74 LVDSB_DATA#1 LVDSA_DATA2 A75 B75 LVDSB
User’s Manual Signal (Rear side) PIN PIN Signal CLK_PEG_A+ A91 B91 CRT_GREEN CLK_PEG_A- A92 B92 CRT_BLUE ETX_GPIO09 A93 B93 CRT_HSYNC GPIO06 A94 B94 CRT_VSYNC GPIO07 A95 B95 CRT_DDC_CLK GND A96 B96 CRT_DDC_DATA +12V A97 B97 NC +12V A98 B98 NC +12V A99 B99 NC GND A100 B100 GND +12V A101 B101 +12V +12V A102 B102 +12V +12V A103 B103 +12V +12V A104 B104 +12V +12V A105 B105 +12V +12V A106 B106 +12V +12V A107 B107 +12V +12V A108 B108 +12V +12V A1
ESM-QM57 2.4.2 Signal Description – COM Express Connector 1 (CN2A) 2.4.2.1 Audio Signals Signal Signal Description AC_SYNC 48kHz fixed-rate, sample-synchronization signal to the CODEC(s) AC_RST# Reset output to AC97 CODEC, active low. AC_SDIN[0:2] Serial TDM data inputs from up to 3 CODECs. AC_BITCLK 12.228 MHz serial data clock generated by the external CODEC(s) AC_SDOUT Serial TDM data output to the CODEC. 2.4.2.
User’s Manual 2.4.2.4 Flat Panel LVDS Signals Signal Signal Description BIASON Controls panel contrast voltage. DIGON Controls panel digital power. ENBKL# Controls backlight power enable. 2 2 2 I C_DAT, I C_CLK I C interface for panel parameter EEPROM. This EERPOM is mounted on the LVDS receiver. The data in the EEPROM allows the EXT module to automatically set the proper timing parameters for a specific LCD panel. 2.4.2.
ESM-QM57 2.4.2.8 Power Signals Signal Signal Description Standby power input: +5.0V nominal. See Electrical Specifications for allowable VCC_5V_SBY input range. If VCC5_SBY is used, all available VCC_5V_SBY pins on the connector(s) must be used. Only used for standby and suspend functions. May be left unconnected if these functions are not used in the system design. VCC_RTC Real-time clock circuit-power input. Nominally +3.0V. See Electrical Specifications section for details. 2.4.2.
User’s Manual 2.4.2.10 SATA Signals Signal Signal Description SATA[0:3]_TX +/- Serial ATA Channel 0-3 transmit differential pair. SATA[0:3]_RX +/- Serial ATA Channel 0-3receive differential pair. ATA_ACT# ATA (parallel and serial) activity indicator, active low. 2.4.2.11 VGA Signals Signal VGA_RED VGA_GRN VGA_BLU Signal Description Red for monitor. Analog DAC output, designed to drive a 37.5-Ohm equivalent load. Green for monitor. Analog DAC output, designed to drive a 37.5-Ohm equivalent load.
ESM-QM57 2.4.
User’s Manual Signal PIN PIN Signal GND C31 D31 GND PCI_AD14 C32 D32 PCI_PAR PCI_CBE#1 C33 D33 PCI_SERR# PCI_PERR# C34 D34 PCI_STOP# PCI_LOCK# C35 D35 PCI_TRDY# PCI_DEVSEL# C36 D36 (Rear side) PCI_FRAME# PCI_IRDY# C37 D37 PCI_AD16 PCU_CBE#2 C38 D38 PCI_AD18 PCI_AD17 C39 D39 PCI_AD20 PCI_AD19 C40 D40 PCI_AD22 GND C41 D41 GND PCI_AD21 C42 D42 PCI_AD24 PCI_AD23 C43 D43 PCI_AD26 PCU_CBE#3 C44 D44 PCI_AD28 PCI_AD25 C45 D45 PCI_AD30 PCI_AD27 C46 D46 INT_PIRQC# P
ESM-QM57 (Rear side) Signal PIN PIN Signal PEG_RX3 C61 D61 PEG_TX3 PEG_RX#3 C62 D62 PEG_TX#3 DDPB_AUX+ C63 D63 DDPC_AUX+ DDPB_AUX- C64 D64 DDPC_AUX- PEG_RX4 C65 D65 PEG_TX4 PEG_RX#4 C66 D66 PEG_TX#4 HDMIC_CTRL_CLK C67 D67 GND PEG_RX5 C68 D68 PEG_TX5 PEG_RX#5 C69 D69 PEG_TX#5 GND C70 D70 GND PEG_RX6 C71 D71 PEG_TX6 PEG_RX#6 C72 D72 PEG_TX#6 SDVO/ HDMIB_CTRL_DATA SDVO/ C73 D73 HDMIB_CTRL_CLK PEG_RX7 C74 D74 PEG_TX7 PEG_RX#7 C75 D75 PEG_TX#7 GND C76 D76 GND
User’s Manual (Rear side) Signal PIN PIN Signal PEG_RX12 C91 D91 PEG_TX12 PEG_RX#12 C92 D92 PEG_TX#12 GND C93 D93 GND PEG_RX13 C94 D94 PEG_TX13 PEG_RX#13 C95 D95 PEG_TX#13 GND C96 D96 GND HDMIC_HPD C97 D97 NC PEG_RX14 C98 D98 PEG_TX14 PEG_RX#14 C99 D99 PEG_TX#14 GND C100 D100 GND PEG_RX15 C101 D101 PEG_TX15 PEG_RX#15 C102 D102 PEG_TX#15 GND C103 D103 GND +12V C104 D104 +12V +12V C105 D105 +12V +12V C106 D106 +12V +12V C107 D107 +12V +12V C108
ESM-QM57 2.4.3 Signal Description – COM Express Connector 2 (CN2B) 2.4.3.1 IDE Signals Signal Signal Description IDE_D[0:15] Bidirectional data to / from IDE device. IDE_A[0:2] Address lines to IDE device. IDE_REQ# IDE Device DMA Request. It is asserted by the IDE device to request a data transfer. IDE_IOW# I/O writes line to IDE device. Data latched on trailing (rising) edge. IDE_ACK# IDE Device DMA Acknowledge. IDE_IRQ Interrupt request from IDE device. IDE_IORDY IDE device I/O ready input.
User’s Manual 2.4.3.3 PCI Signals Signal PCI_AD[0:31] PCI_PME# Signal Description PCI bus multiplexed address and data lines PCI Power Management Event: PCI peripherals drive PME# to wake system from low-power states S1–S5. PCI_GNT[0:3]# PCI bus master grant output lines, active low. PCI_REQ[0:3]# PCI bus master request input lines, active low. PCI_RESET# PCI Reset output, active low.
ESM-QM57 3.
User’s Manual 3.1 Introduction The BIOS setup program allows users to modify the basic system configuration. In this following chapter will describe how to access the BIOS setup program and the configuration options that may be changed. 3.2 Starting Setup The AMIBIOS™ is immediately activated when you first turn on the computer. The BIOS reads the system information contained in the CMOS and begins the process of checking out the system and configuring it.
ESM-QM57 3.3 Using Setup In general, you use the arrow keys to highlight items, press to select, use the PageUp and PageDown keys to change entries, press for help and press to quit. The following table provides more detail about how to navigate in the Setup program using the keyboard.
User’s Manual 3.4 Getting Help Press F1 to pop up a small help window that describes the appropriate keys to use and the possible selections for the highlighted item. To exit the Help Window press or the F1 key again. 3.5 In Case of Problems If, after making and saving system changes with Setup, you discover that your computer no longer is able to boot, the AMIBIOS™ supports an override to the CMOS settings which resets your system to its defaults.
ESM-QM57 3.6 BIOS setup Once you enter the AMIBIOS™ CMOS Setup Utility, the Main Menu will appear on the screen. The Main Menu allows you to select from several setup functions and two exit choices. Use the arrow keys to select among the items and press to accept and enter the sub-menu. Note that a brief description of each highlighted selection appears at the bottom of the screen. 3.6.
User’s Manual Note: The BIOS setup screens shown in this chapter are for reference purposes only, and may not exactly match what you see on your screen. Visit the Avalue website (www.avalue.com.tw) to download the latest product and BIOS information. 3.6.2 Advanced Menu This section allows you to configure your CPU and other system devices for basic operation through the following sub-menus.
ESM-QM57 3.6.2.
User’s Manual Maximum Payload Auto[Default] Set Maximum Payload for PCI Express 128/256/512/1024/2048/4096 Device or allow System BIOS to select Bytes Auto[Default] Maximum Read Request 128/256/512/1024/2048/4096 Bytes the value Set Maximum Read Request for PCI Express Device or allow System BIOS to select the value Disabled[Default] ASPM Support Auto Set ASPM level Force L0 Extended Synch Enabled Disabled[Default] If Enabled, allows generation of Extended Synchronization patterns ESM- QM57 U
ESM-QM57 3.6.2.2 ACPI Settings You can use this item to configure ACPI Item Enable ACPI Auto Configuration Options Description Disabled [Default] Enables or Disables BIOS ACPI Auto Enabled Configuration. Enables or Disables System ability to Disabled, Enable Hibernation Enabled[Default] Hibernate (OS/S4 Sleep State). This option may be not effective with some OS.
User’s Manual 3.6.2.
ESM-QM57 3.6.2.4 S5 RTC Wake Settings Use the S5 RTC wake setting to set system wake in fixed time. Item Wake system with fixed time 46 ESM- QM57 User’s Manual Options Disabled[Default] Enabled Description Enables or Disables wake on alarm event. When enabled, system will wake on the specified hr:min::sec.
User’s Manual 3.6.2.5 CPU Configuration Use the CPU configuration menu to view detailed CPU specification and configure the CPU. Item Options Description Enabled for Windows XP and Linux (OS optimized for Hyper-Threading Technology) Hyper-threading Disabled, Enabled[Default] and Disabled for other OS (OS not optimized for Hyper-Threading Technology). When Disabled only one thread per enabled core is enabled.
ESM-QM57 Disabled, Power Technology Energy Efficient [Default] Enable the power management features. Custom Turbo-XE Mode Processor TDC Limit in TDC Limit 0 1/8 A granularity. 0 means using the factory-configured value. Turbo-XE Mode Processor TDP Limit in TDP Limit 0 1/8 W granularity. 0 means using the factory-configured value.
User’s Manual 3.6.2.6 SATA Configuration It allows you to select the operation mode for SATA controller. The choices: Item Option Description Disabled, SATA mode IDE mode, AHCI mode, It allows you to select the operation mode for SATA controller. RAID mode Disabled, Serial-ATA Controller 0 Enhanced [Default] Compatible Serial-ATA Controller 1 Disabled, Enhanced[Default] Enabled/ Disabled Serial ATA Controller 0. Enabled/ Disabled Serial ATA Controller 0.
ESM-QM57 3.6.2.7 Intel IGD SWSCI OpRegion configuration Item DVMT/ Fixed Memory Option 256MB [Default] This feature allows you to select 128MB, the memory size of DVMT/BOTH Maximum CRT+LVDS [Default] IGD – Boot Type DVI(HDMI), CRT+DVI(HDMI) 50 ESM- QM57 User’s Manual Description operating mode. This feature allows you to select the display device when you boot up the system.
User’s Manual VBIOS 640x480 18/1, 800x600 18/1, 1024x768 18/1 [Default] 1280x1024 24/2, 1024x600 18/2, 1400x900 24/2, 1600x1200 18/2, LCD Panel Type 1280x768 18/1, 1680x1050 24/2, 1920x1080 24/2, This feature allows you to select Panel Resolution that will be displayed depending on the LCD Panel. 1024x768 24/1, 1366x768 24/1, 800x400 18/1, 1280x800 18/1, 1280x720 24/1, 2048x1536 24/2 Auto [Default] Panel Scaling Force Scaling, Off, Maintain Aspect Ratio.
ESM-QM57 3.6.2.8 Intel TDT (AT-p) Configuration This section allows you to configure Intel TDT (AT-p) Item TDT TDT Recovery 52 ESM- QM57 User’s Manual Option Description Enabled, Enable/ Disabled TDT in BIOS for Disabled[Default] 3 testing only. Set the number of times Recovery attempts will be allowed.
User’s Manual 3.6.2.9 Intel TXT (LT) Configuration Item Option Enabled, Secure Mode Extensions (SMX) Disabled [Default] Description Interface for system software to support trust decisions by end user Intel TXT (LT) Support Enabled, Disabled [Default] Hardware extension intended to provide a higher level of trust and control.
ESM-QM57 3.6.2.10 USB Configuration The USB configuration menu is used to read USB configuration information and configure the USB setting. 3.6.2.10.1 Legacy USB support Use the Legacy USB Support BIOS option to enable USB mouse and USB keyboard support. Normally if this option is not enabled, any attached USB mouse or USB keyboard does not become available until a USB compatible operating system is fully booted with all USB drivers loaded.
User’s Manual 3.6.2.10.4 Device Reset timeout USB mass storage device start Unit command timeout. Options: 10, 20, 30, 40 sec. 3.6.2.10.5 Device Power-up delay This refers to the amount of Time taken by a device to properly report itself to the Host controller. Options: Auto, Manual 3.6.2.10.6 Mass Storage Devices This item will show you the connected USB device at booting. Example: USB 2.0 Flash Disk 1100. 3.6.2.
ESM-QM57 Voltage CPUVCORE GFX core 1.05V 3.
User’s Manual 3.6.2.12 Super IO Configuration You can use this item to set up or change the Super IO configuration for FDD controllers, parallel ports and serial ports.
ESM-QM57 3.6.2.12.1 Floppy Disk Controller Configuration Item Floppy Disk Controller Option Description Enabled, Enable or Disable Floppy Disk Disabled Controller. Auto IO=3F0h;IRQ=6;DMA=2; Change settings IO=3F0h;IRQ=3,4,5,6,7,10,11,12;DMA=2,3; IO=370h;IRQ=3,4,5,6,7,10,11,12;DMA=2,3; 58 ESM- QM57 User’s Manual Select an optimal setting for Super IO device.
User’s Manual 3.6.2.12.2 Serial Port 0 Configuration Item Serial Port Option Description Enabled, Use the Serial port option to Disabled enable or disable the serial port. IO=3F8h; IRQ=4, Change Settings IO=3F8h; IRQ=3,4,5,6,7,10,11,12 Use the change Settings option to IO=2F8h; IRQ=3,4,5,6,7,10,11,12 change the serial port IO port IO=3E8h; IRQ=3,4,5,6,7,10,11,12 address and interrupt address.
ESM-QM57 3.6.2.12.3 Serial Port 1 Configuration Item Option Serial Port Description Enabled, Use the Serial port option to Disabled enable or disable the serial port. IO=2F8h; IRQ=3, Change Settings IO=3F8h; IRQ=3,4,5,6,7,10,11,12 Use the change Settings option to IO=2F8h; IRQ=3,4,5,6,7,10,11,12 change the serial port IO port IO=3E8h; IRQ=3,4,5,6,7,10,11,12 address and interrupt address.
User’s Manual 3.6.2.12.4 Parallel Port Configuration Item Parallel Port Change Settings Option Description Enabled, Enable or disable Parallel Port Disabled (LPT/LPTE) Auto IO=3F8h; IRQ=5 Select Optimal setting for Super IO device STD Printer Mode SPP Mode EPP-1.9 and SPP Mode Device Mode EPP-1.7 and SPP Mode Change Printer port mode ECP Mode ECP Mode and EPP-1.9 ECP Mode and EPP-1.
ESM-QM57 3.6.2.13 Thermal Configuration 3.6.2.13.
User’s Manual Item ME SMBus Thermal Reporting SMBus Buffer Length Thermal Reporting EC PEC Option Disabled, Enabled Description Enabled/ Disabled ME SMBus Thermal Reporting Configuration. 1, 2, 5, 9, SMBus Block Read message length 10, 14, 20 for EC. Disabled, Enable Packet Error Checking (PEC) Enabled for SMBus Block Read.
ESM-QM57 3.6.2.13.2 Intelligent Power Sharing The section helps configure Intelligent Power Sharing. Item MCH Turbo PPEC Config Option Enabled, Disabled 0 Description Enable or disable MCH Turbo. Processor Power Error Correction. DRIVER, IPS Policy PROCESSOR, BALANCED, Platform BIOS Policy Preference.
User’s Manual 3.6.2.14 AMT Configuration This item allows Advance Power Management configuration Item AMT Unconfigure AMT/ME WatchDog Timer Option Description Enabled, Use AMT option to enable/ Disabled disable the Intel® AMT function. Enabled, Disabled You can use this item to perform AMT/ME unconfigure without password operation. Enabled, This option will determine watch Disabled dog timer.
ESM-QM57 3.6.3 Advanced Chipset Features This option configures the north bridge, south bridge and ME subsystem.
User’s Manual 3.6.3.1 North Bridge 3.6.3.1.1 CAS # Latency (tCL) This item controls the time delay (in clock cycles - CLKs) that passes before the SDRAM starts to carry out a read command after receiving it. This also determines the number of CLKs for the completion of the first part of a burst transfer. In other words, the lower the latency, the faster the transaction. 3.6.3.1.2 RAS # Active Time (tRAS) It allows controlling the memory bank's minimum row active time (tRAS).
ESM-QM57 3.6.3.1.4 RAS# to CAS# Delay (tRCD) This option allows you to insert a delay between the RAS (Row Address Strobe) and CAS (Column Address Strobe) signals. This delay occurs when the SDRAM is written to, read from or refreshed. Naturally, reducing the delay improves the performance of the SDRAM while increasing it reduces performance. 3.6.3.1.5 Write Recovery Time (tWR) It shows the delay (in clocks cycles) that must elapse after the completion of a valid write operation.
User’s Manual 3.6.3.2 South Bridge Item SMBus Controller GbE Controller Wake on Lan from S5 Option Enabled, Disabled Enabled, Disabled Enabled, Disabled Description SMBus Controller help. GbE Controller help. Wake on Lan from S5 help.
ESM-QM57 3.6.3.2.1 PCI Express Ports Configuration For the PCI Express root ports, the assignment of a function number to a root port is not fixed. This item allows you to re-assign the function numbers on a port by port basis. You can disable/hide any root port and still have functions 0 thru N-1 where N is the total number of enabled root ports. Options: Disable, Enabled, Auto.
User’s Manual 3.6.3.2.2 USB Configuration The USB Configuration menu is used to read USB configuration information and configure the USB settings. Item EHCI controller 1/2 RMH support USB Port Option Description Enabled Enabled/Disabled USB 2.
ESM-QM57 3.6.3.3 ME Subsystem Use the ME Subsystem menu to configure the Intel® Management Engine (ME) configuration options. Item ME Subsystem Option Enabled, Disabled Description Use the ME Subsystem option to enable or disable the Intel® ME subsystem. Use the End of Post Message End of Post Message Enabled, option to enable or disable the Disabled end of post message of the ME Subsystem.
User’s Manual 3.6.4 Boot Use Boot menu to set system boot options. Item Quiet Boot Option Description Enabled, This item can help to select the screen Disabled display when the system boots. Enabled/ Disabled boot with initialization of a Fast Boot Enabled, minimal set of devices required to launch Disabled active boot option. Has no effect for BBS boot options. Number of seconds to wait for setup Setup Prompt Timeout 1 activation key. 65535(0xFFFF) means indefinite waiting.
ESM-QM57 These settings specify the boot priority of hard drive devices. The Boot option 1/2/3 highest priority device is displayed on the main Boot Option Priorities list. Hard drive BBS priorities Use this setting to access the Hard Drive BBS Priorities submenu to re-order or disable bootable hard drive devices. 3.6.5 Security Use the Security menu to set system and user password. 3.6.5.1 Administrator Password This setting specifies a password that must be entered to access the BIOS Setup Utility.
User’s Manual 3.6.6 Save & Exit 3.6.6.1 Save Changes and Exit Use the save changes and reset option to save the changes made to the BIOS options and to exit the BIOS configuration setup program. 3.6.6.2 Discard Changes and Exit Use the Discard changes and Exit option to exit the system without saving the changes made to the BIOS configuration setup program. 3.6.6.3 Save Changes and Reset Any changes made to BIOS settings are stored in NVRAM. The setup program then exits and reboots the controller. 3.
ESM-QM57 3.6.6.6 Discard Changes Any changes made to BIOS settings during this session of the BIOS setup program are discarded. The BIOS setup continues to be active. 3.6.6.7 Restore Defaults This option restores all BIOS settings to the factory default. This option is useful if the controller exhibits unpredictable behavior due to an incorrect or inappropriate BIOS setting. 3.6.6.8 Save as user defaults This option saves a copy of the current BIOS settings as the User Defaults.
User’s Manual 4. Drivers Installation Note: Installation procedures and screen shots in this section are for your reference and may not be exactly the same as shown on your screen.
ESM-QM57 4.1 Install Chipset Driver (For Intel QM57) Insert the Supporting DVD-ROM to DVD-ROM drive, and it should show the index page of Avalue’s products automatically. If not, locate Index.htm and choose the product from the menu left, or link to \Driver_Chipset\Intel\ QM57. Note: The installation procedures and screen shots in this section are based on Windows XP operation system. If the warning message appears while the installation process, click Continue to go on. Step1.
User’s Manual 4.2 Install Display Driver (For Intel QM57) Insert the Supporting DVD-ROM to DVD-ROM drive, and it should show the index page of Avalue’s products automatically. If not, locate Index.htm and choose the product from the menu left, or link to \Driver_Video\Intel\QM57. Note: The installation procedures and screen shots in this section are based on Windows XP operation system. Step 1. Locate「Driver_Video\Intel\ QM57\Setup.exe」.Click Next Step 2. Click Next. Step 3. Click Yes. Step 4.
ESM-QM57 4.3 Install Ethernet Driver (For Intel 82574L/ 82577LM) Insert the Supporting DVD-ROM to DVD-ROM drive, and it should show the index page of Avalue’s products automatically. If not, locate Index.htm and choose the product from the menu left, or link to D:\Driver_Gigabit\Intel\ 82574L or 82577LM. Note: The installation procedures and screen shots in this section are based on Windows XP operation system. Step 1. Locate 「\Driver_Gigabit\Intel\ 82574L or 82577LM」and Click Next Step 2.
User’s Manual 5.
ESM-QM57 Unit: mm 82 ESM- QM57 User’s Manual
User’s Manual Unit: mm ESM- QM57 User’s Manual 83