TG6611_6621NZ(e).book Page 1 Monday, February 14, 2011 8:43 AM Operating Instructions Digital Cordless Phone Model No. KX-TG6611NZ KX-TG6612NZ Digital Cordless Answering System Model No. KX-TG6621NZ KX-TG6622NZ Model shown is KX-TG6611. Before initial use, see “Getting Started” on page 9. Thank you for purchasing a Panasonic product. Please read these operating instructions before using the unit and save them for future reference. This unit is compatible with Caller ID.
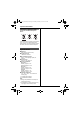
TG6611_6621NZ(e).book Page 2 Monday, February 14, 2011 8:43 AM Table of Contents Introduction Intercom/Locator Model composition. . . . . . . . . . . . . . . . . . . . 3 Accessory information . . . . . . . . . . . . . . . . . 3 Intercom . . . . . . . . . . . . . . . . . . . . . . . . . . . 38 Handset locator. . . . . . . . . . . . . . . . . . . . . . 38 Transferring calls, conference calls. . . . . . . 38 Important Information For your safety. . . . . . . . . . . . . . . . . . . . . . .
TG6611_6621NZ(e).book Page 3 Monday, February 14, 2011 8:43 AM Introduction Model composition Base unit Handset Part No. Part No. KX-TG6611 KX-TG6611 KX-TGA661 KX-TG6612 KX-TG6611 KX-TGA661 2 KX-TG6621 KX-TG6621 KX-TGA661 1 KX-TG6622 KX-TG6621 KX-TGA661 2 Series Model No.
TG6611_6621NZ(e).book Page 4 Monday, February 14, 2011 8:43 AM Introduction Additional/replacement accessories Please contact your nearest Panasonic dealer for sales information. Accessory item Model number Rechargeable batteries HHR-4MRT*1 DECT repeater KX-A405 Battery type: – Nickel metal hydride (Ni-MH) – 2 x AAA (R03) size for each handset *1 Replacement batteries may have a different capacity from that of the supplied batteries.
TG6611_6621NZ(e).book Page 5 Monday, February 14, 2011 8:43 AM Important Information For your safety To prevent severe injury and loss of life/ property, read this section carefully before using the product to ensure proper and safe operation of your product. WARNING Power connection L Use only the power source marked on the product. L Do not overload power outlets and extension cords. This can result in the risk of fire or electric shock.
TG6611_6621NZ(e).book Page 6 Monday, February 14, 2011 8:43 AM Important Information L This product is unable to make calls when: – the handset batteries need recharging or have failed. – there is a power failure. – the key lock feature is turned on. Battery L We recommend using the batteries noted on page 4. USE ONLY rechargeable NiMH batteries AAA (R03) size. L Do not mix old and new batteries. L Do not open or mutilate the batteries.
TG6611_6621NZ(e).book Page 7 Monday, February 14, 2011 8:43 AM Important Information kitchen sink, or laundry tub, in a wet basement or near a swimming pool. 2. Avoid using a telephone (other than a cordless type) during an electrical storm. There may be a remote risk of electric shock from lightning. 3. Do not use the telephone to report a gas leak in the vicinity of the leak. 4. Use only the power cord and batteries indicated in this manual. Do not dispose of batteries in a fire. They may explode.
TG6611_6621NZ(e).book Page 8 Monday, February 14, 2011 8:43 AM Important Information Information on Disposal in other Countries outside the European Union These symbols are only valid in the European Union. If you wish to discard these items, please contact your local authorities or dealer and ask for the correct method of disposal. Specifications ■ Standard: GAP (Generic Access Profile) ■ Frequency range: 1.88 GHz to 1.90 GHz ■ RF transmission power: Approx.
TG6611_6621NZ(e).book Page 9 Monday, February 14, 2011 8:43 AM Getting Started ■ Base unit (KX-TG6621/KX-TG6622) Setting up Hook “Click” Connections L Use only the supplied Panasonic AC adaptor PNLV226AL. L When mounting the unit on a wall, see page 15. Hooks ■ Base unit (KX-TG6611/KX-TG6612) Hook Press plug firmly. “Click” (220-240 V AC, 50/60 Hz) Hooks Use only the supplied telephone line cord. Press plug firmly.
TG6611_6621NZ(e).book Page 10 Monday, February 14, 2011 8:43 AM Getting Started Battery installation L USE ONLY Ni-MH batteries AAA (R03) size. L Do NOT use Alkaline/Manganese/Ni-Cd batteries. L Confirm correct polarities (S, T). Rechargeable Ni-MH ONLY Note when setting up Note for connections L The AC adaptor must remain connected at all times. (It is normal for the adaptor to feel warm during use.) L The AC adaptor should be connected to a vertically oriented or floor-mounted AC outlet.
TG6611_6621NZ(e).book Page 11 Monday, February 14, 2011 8:43 AM Getting Started Battery level Icon Battery level Controls & High Base unit ( Medium ■ KX-TG6611/KX-TG6612 ) Low 0)4 A B Needs charging. Panasonic Ni-MH battery performance (supplied batteries) Operation Operating time In continuous use 15 hours max. Not in use (standby) 170 hours max. Note: L It is normal for batteries not to reach full capacity at the initial charge.
TG6611_6621NZ(e).book Page 12 Monday, February 14, 2011 8:43 AM Getting Started Handset A G H B C D E I J F K L J {ECO/R} ECO: Eco mode shortcut key R: Recall/Flash K Microphone L Charge contacts ■ Control type A Soft keys The handset features 3 soft keys. By pressing a soft key, you can select the feature shown directly above it on the display. B Navigator key – {^}, {V}, {<}, or {>}: Scroll through various lists and items.
TG6611_6621NZ(e).book Page 13 Monday, February 14, 2011 8:43 AM Getting Started Item u d Meaning Base unit display items L When displayed next to the battery icon: Answering system is on.*2 (page 32) L When displayed with a number: New messages have been recorded.*2 (page 34) ■ KX-TG6621/KX-TG6622 Answering system answers calls with a greeting message and caller messages are not recorded.
TG6611_6621NZ(e).book Page 14 Monday, February 14, 2011 8:43 AM Getting Started Icon Action W Erases the selected item or returns to the outside call. 4 Allows you to make an intercom call. (page 38) ^ Erases a number/character. 1 Puts the call on mute. *1 KX-TG6621/KX-TG6622 Turning the power on/off Date and time Important: L When you install the batteries for the first time, the handset may prompt you to set date and time. First press M, then proceed to step 2.
TG6611_6621NZ(e).book Page 15 Monday, February 14, 2011 8:43 AM Getting Started L If you set the repeater mode to “On” (page 29): – One touch eco mode is cancelled. – “Eco Setup” is not shown in the display menu (page 24). ■ Charger 25 mm Screws (Not supplied) Wall mounting Note: L Make sure that the wall and the fixing method are strong enough to support the weight of the unit.
TG6611_6621NZ(e).book Page 16 Monday, February 14, 2011 8:43 AM Making/Answering Calls Making calls 1 Lift the handset and dial the phone number. L To correct a digit, press ^. 2 3 Press {C} or ]. When you finish talking, press {ic} or place the handset on the base unit or charger. Using the speakerphone 1 Dial the phone number and press {s}. L Speak alternately with the other party. 2 When you finish talking, press {ic}. Note: L For best performance, use the speakerphone in a quiet environment.
TG6611_6621NZ(e).book Page 17 Monday, February 14, 2011 8:43 AM Making/Answering Calls Useful features during a call Hold This feature allows you to put an outside call on hold. 1 2 3 Press 8 during an outside call. {r}: “Hold” s M To release hold, press {C}. L Another handset user can take the call by pressing {C}. Note: L If a call is kept on hold for more than 9 minutes, an alarm tone starts to sound and the ringer indicator flashes rapidly.
TG6611_6621NZ(e).book Page 18 Monday, February 14, 2011 8:43 AM Making/Answering Calls Key lock The handset can be locked so that no calls or settings can be made. Incoming calls can be answered, but all other functions are disabled while key lock is on. To turn key lock on, press 8 for about 3 seconds. L & is displayed. L To turn key lock off, press & for about 3 seconds. Note: L Calls to emergency numbers cannot be made until key lock is turned off.
TG6611_6621NZ(e).book Page 19 Monday, February 14, 2011 8:43 AM Making/Answering Calls Note: L During a call with the handset placed on the base unit (power back-up mode), the call may be disconnected if you touch the handset. In such case, try to call back. L The range of the base unit is limited during a power failure. Please use the handset close to the base unit. Making a call using the redial list ■ When only 1 handset is registered: 1 Lift the handset.
TG6611_6621NZ(e).book Page 20 Monday, February 14, 2011 8:43 AM Phonebook 2 Press the dial key () to 9, or () which contains the character you are searching for (page 39). L Press the same dial key repeatedly to display the first entry corresponding to each character located on that dial key. L If there is no entry corresponding to the character you selected, the next entry is displayed. 3 {r}: Scroll through the phonebook if necessary.
TG6611_6621NZ(e).book Page 21 Monday, February 14, 2011 8:43 AM Phonebook 4 Press ] to dial the number. Note: L When storing a calling card access number and your PIN in the phonebook as one phonebook entry, press l to add pauses after the number and PIN as necessary (page 16). Copying phonebook entries You can copy phonebook entries between 2 handsets.*1 *1 Panasonic compatible handset Copying an entry 1 2 3 4 Find the desired entry (page 20).
TG6611_6621NZ(e).book Page 22 Monday, February 14, 2011 8:43 AM Programming Programmable settings You can customise the unit by programming the following features using the handset. To access the features, there are 2 methods. ■ Scrolling through the display menus 1 8 2 Press {V} or {^} to select the desired main menu. s M 3 Press {V} or {^} to select the desired item from the next sub-menus. s M 4 Press {V} or {^} to select the desired setting.
TG6611_6621NZ(e).
TG6611_6621NZ(e).book Page 24 Monday, February 14, 2011 8:43 AM Programming Main menu: c “Initial Setup” Sub-menu 1 Sub-menu 2 Settings Code + Ringer Setup Ringer Volume – Handset*5 0–6: Off–6 <6> #160 16 Ringer Volume – Base Unit*1, *2 0–6: Off–6 <3> #*160 – Ringtone*6, *7 (Handset) #161 – Night Mode – On/Off 1: On 0: #238 26 Night Mode – Start/End <23:00/06:00> #237 26 Night Mode – Ring Delay 1: 30 sec. 2: <60 sec.> 3: 90 sec. 4: 120 sec.
TG6611_6621NZ(e).book Page 25 Monday, February 14, 2011 8:43 AM Programming Settings Code + Base Unit PIN*2 Sub-menu 1 – <0000> #132 28 Repeater Mode*2 – 1: On 0: #138 29 #130 28 Register Sub-menu 2 – Register H.set Cancel Register*3 – Power Failure Language Display #131 28 1: 0: Off – #152 18 #110 14 *1 KX-TG6621/KX-TG6622 *2 If you program these settings using one of the handsets, you do not need to program the same item using another handset.
TG6611_6621NZ(e).book Page 26 Monday, February 14, 2011 8:43 AM Programming 6 L We recommend selecting a different ringer tone from the one used for outside calls. 2 M s {ic} L When the alarm is set, E is displayed. Setting the ring delay Note: L To stop the alarm, press {ic} or place the handset on the base unit or charger. L When the handset is in use, the alarm will not sound until the handset is in standby mode.
TG6611_6621NZ(e).book Page 27 Monday, February 14, 2011 8:43 AM Programming Important: L When the unit receives a call from a number that is stored in the call barred list, the call is logged in the caller list (page 30) with 7 after the call is disconnected. caller list, you can store the area code which you want the unit to delete automatically. Example: You have stored the area code “09”. If you make a call from the caller list to the phone number “09-456-7890”, the unit dials “456-7890”.
TG6611_6621NZ(e).book Page 28 Monday, February 14, 2011 8:43 AM Programming Note: L You can also select a memory location in step 5 as follows: Press 1 to 6. s M 2 Changing the base unit PIN (Personal Identification Number) Important: L If you change the PIN, please make note of your new PIN. The unit will not reveal the PIN to you. If you forget your PIN, contact an authorised service centre. 1 2 8(132 3 Enter the new 4-digit base unit PIN.
TG6611_6621NZ(e).book Page 29 Monday, February 14, 2011 8:43 AM Programming Increasing the range of the base unit You can increase the signal range of the base unit by using a DECT repeater. Please use only the Panasonic DECT repeater noted on page 4. Contact your Panasonic dealer for details. Important: L Before registering the repeater to this base unit, you must turn the repeater mode on. L Do not use more than one repeater at a time. 3 Base unit: To exit the registration mode, press {x}.
TG6611_6621NZ(e).book Page 30 Monday, February 14, 2011 8:43 AM Caller ID Service Using Caller ID service Important: L This unit is Caller ID compatible. To use Caller ID features, you must subscribe to a Caller ID service. Contact your service provider/telephone company for details. L For all local and national incoming calls, your display will show the area code (e.g. 09 for Auckland) or the cellular prefix (e.g. 0274 for Telecom Cellular) followed by the caller’s telephone number.
TG6611_6621NZ(e).book Page 31 Monday, February 14, 2011 8:43 AM Caller ID Service return to the previous screen, press {<}. 3 To call back, press {C}. To exit, press {ic}. 3 4 {r}: “Phonebook” s M To store the name, continue from step 2, “Adding entries”, page 20. Note: L If the entry has already been viewed or answered, “Q” is displayed, even if it was viewed or answered using another handset. L If the call matches an entry in the call barred list, the number is logged with 7 (page 26).
TG6611_6621NZ(e).book Page 32 Monday, February 14, 2011 8:43 AM Answering System – If you recorded your own greeting message, the same message is still announced to callers even though their messages are not recorded. Answering system Available for: KX-TG6621/KX-TG6622 The answering system can answer and record calls for you when you are unavailable to answer the phone.
TG6611_6621NZ(e).book Page 33 Monday, February 14, 2011 8:43 AM Answering System Greeting message When the unit answers a call, a greeting message is played to callers. You can use either: – your own greeting message – a pre-recorded greeting message Recording your greeting message 1 8(3)2 2 {r}: “Yes” s M 3 After a beep sounds, hold the handset about 20 cm away and speak clearly into the microphone (2 minutes and 30 seconds max.). 4 5 Press O to stop recording.
TG6611_6621NZ(e).book Page 34 Monday, February 14, 2011 8:43 AM Answering System Listening to messages using the handset When new messages have been recorded, u is displayed on the handset with the total number of new messages. 1 To listen to new messages: 8(323 To listen to all messages: 8(324 2 When finished, press {ic}. Note: L To switch to the receiver, press {C}.
TG6611_6621NZ(e).book Page 35 Monday, February 14, 2011 8:43 AM Answering System 1 2 8(3)6 3 M s {ic} To turn on remote operation, enter the desired 3-digit remote access code. Deactivating remote operation Press * in step 2 on “Remote access code”, page 34. L The entered remote access code is deleted. Using the answering system remotely 1 Dial your phone number from a touchtone phone. 2 After the greeting message starts, enter your remote access code.
TG6611_6621NZ(e).book Page 36 Monday, February 14, 2011 8:43 AM Answering System messages (page 35), you know that there are no new messages when the phone rings for the 3rd time. You can then hang up without being charged for the call. 1 2 8(211 {r}: Select the desired setting.
TG6611_6621NZ(e).book Page 37 Monday, February 14, 2011 8:43 AM Voice Mail Service Voice mail service To receive Call Minder or Message Mailbox messages, please note the following: “Call Minder” and “Message Mailbox” are automatic answering services offered by your service provider/telephone company. After you subscribe to this service, your service provider/telephone company’s voice mail system answers calls for you when you are unavailable to answer the phone or when your line is busy.
TG6611_6621NZ(e).book Page 38 Monday, February 14, 2011 8:43 AM Intercom/Locator Intercom Intercom calls can be made between handsets. Note: L If you receive an outside call while talking on the intercom, you hear 2 tones. To answer the call, press {ic}, then press {C}. L When paging the handset, the paged handset beeps for 1 minute. Making an intercom call 1 8s4 2 {r}: Select the desired unit. s M L To stop paging, press {ic}. 3 When you finish talking, press {ic}.
TG6611_6621NZ(e).book Page 39 Monday, February 14, 2011 8:43 AM Useful Information Character entry The dial keys are used to enter characters and numbers. Each dial key has multiple characters assigned to it. The characters that can be entered depend on the character entry mode (page 39). – Press {<} or {>} to move the cursor left or right. – Press dial keys to enter characters and numbers. – Press ^ to erase the character or number highlighted by the cursor.
TG6611_6621NZ(e).
TG6611_6621NZ(e).book Page 41 Monday, February 14, 2011 8:43 AM Useful Information Error messages Display message Cause/solution Base no power or No link. Reconnect AC adaptor. or No link. L The handset has lost communication with the base unit. Move closer to the base unit and try again. L Unplug the base unit’s AC adaptor to reset the unit. Reconnect the adaptor and try again. L The handset’s registration may have been cancelled. Reregister the handset (page 28). L When “No link.
TG6611_6621NZ(e).book Page 42 Monday, February 14, 2011 8:43 AM Useful Information Troubleshooting If you still have difficulties after following the instructions in this section, disconnect the base unit’s AC adaptor and turn off the handset, then reconnect the base unit’s AC adaptor and turn on the handset. General use Problem Cause/solution The handset does not turn on even after installing charged batteries. L Place the handset on the base unit or charger to turn on the handset.
TG6611_6621NZ(e).book Page 43 Monday, February 14, 2011 8:43 AM Useful Information Problem Cause/solution I cannot register a handset to a base unit. L The maximum number of handsets (6) is already registered to the base unit. Cancel unused handset registrations from the base unit (page 28). L You entered the wrong PIN. If you forget your PIN, contact an authorised service centre. Battery recharge Problem Cause/solution The handset beeps and/or ) flashes. L Battery charge is low.
TG6611_6621NZ(e).book Page 44 Monday, February 14, 2011 8:43 AM Useful Information Problem Cause/solution The base unit does not ring.*1 L The ringer volume is turned off. Adjust ringer volume (page 24). I cannot make a call. L The handset is too far from the base unit. Move closer and try again. L Another unit is in use. Wait and try again later. L Answering system is being used.*1 Wait and try again later.
TG6611_6621NZ(e).book Page 45 Monday, February 14, 2011 8:43 AM Useful Information Answering system (KX-TG6621/KX-TG6622) Problem Cause/solution The unit does not record new messages. L The answering system is turned off. Turn it on (page 32). L The message memory is full. Erase unwanted messages (page 33). L The recording time is set to “Greeting Only”. Change the setting (page 36). L If your own greeting message is not recorded properly, callers are unable to leave a message.
TG6611_6621NZ(e).book Page 46 Monday, February 14, 2011 8:43 AM Useful Information Warranty Panasonic New Zealand undertakes to: Repair or at its option, replace without cost to the owner, either for material or labour, any part which is found to be defective within two years of the date of purchase. THIS EXPRESS WARRANTY DOES NOT COVER: 1) Pick up and delivery. 2) Batteries. 3) Repairs when the product has not been used in accordance with the Operating Instructions Manual or has been modified.
TG6611_6621NZ(e).
TG6611_6621NZ(e).book Page 48 Monday, February 14, 2011 8:43 AM For your future reference We recommend keeping a record of the following information to assist with any repair under warranty. Serial No. Date of purchase (found on the bottom of the base unit) Name and address of dealer Attach your purchase receipt here. Customer Care Centre Tel. No.: (09) 272 0178 or website www.panasonic.co.