
2010

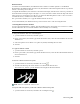

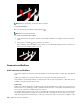
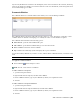


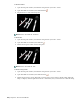
Table Of Contents
- Contents
- Welcome to Autodesk Navisworks Review 2010
- Installation
- Quick Start to Stand-Alone Installation
- Prepare for Installation
- Install and Run Autodesk Navisworks Review 2010
- Move to Autodesk Navisworks from a Previous Release
- Install Autodesk Navisworks for Multiple Users
- Quick Start to Network Administration and Deployment
- Set Up a Deployment
- Installation Troubleshooting
- General Installation Issues
- How can I check my graphics card driver to see if it needs to be updated?
- When performing a Typical installation, what gets installed?
- Why should I specify the Project Folder and Site Folder?
- How do I share the Autodesk Navisworks settings on a site and project basis?
- Where are my product manuals?
- How do I register and activate Autodesk Navisworks?
- Deployment Issues
- Licensing Issues
- Networking Issues
- Uninstall and Maintenance Issues
- When adding or removing features, how can I tell what features get installed by default?
- Is it possible to change the installation folder when adding or removing features?
- When should I reinstall the product instead of a repair?
- Do I need my original disk to reinstall my software?
- When I uninstall my software, what files are left on my system?
- General Installation Issues
- Quick Start to Stand-Alone Installation
- Quick Start
- Get a Whole-Project View
- Work with Files
- Native File Formats
- Compatible CAD Applications
- Use File Readers
- 3DS File Reader
- ASCII Laser Scan File Reader
- Bentley AutoPLANT File Reader
- CIS2 File Reader
- DWG/DXF/SAT File Reader
- DWF File Reader
- DGN File Reader
- Faro Scan File Reader
- IFC File Reader
- IGES File Reader
- Inventor File Reader
- JTOpen File Reader
- Leica Scan File Reader
- MAN File Reader
- PDS File Reader
- Riegl Scan File Reader
- RVM File Reader
- SketchUp SKP File Reader
- STEP File Reader
- STL File Reader
- VRML File Reader
- Z+F Scan File Reader
- Use File Exporters
- Manage Files
- Explore Your Model
- Control Model Appearance and Render Quality
- Review Your Model
- Use Viewpoints and Sectioning Modes
- Record and Play Animations
- Work Within a Team
- Share Data
- Work with Files
- TimeLiner Playback
- Autodesk Navisworks Reference
- File Options Dialog Box
- File Units and Transform Dialog Box
- New Link Dialog Box
- Edit Link Dialog Box
- Edit Viewpoint Dialog Box
- Options Editor
- Default Collision Dialog Box
- Collision Dialog Box
- Convert Object Properties Dialog Box
- Culling Options Dialog Box
- Customize Dialog Box
- Customize Keyboard Dialog Box
- Publish Dialog Box
- Background Settings Dialog Box
- Image Export Dialog Box
- Animation Export Dialog Box
- Glossary
- Index

To toggle the Redline Tools window
■ Click Redline
on the Workspace toolbar.
Menu: Tools ➤ Redline
To add a redline tag
1 Open the Redline Tools window, and click Tag
.
2 In the Scene Area, click the object you want to tag.
3 Click the area where you want the tag label to be located. The redline tag is now added, and both points
arejoined by a leader line.
If the current viewpoint is not already saved, then it will be saved automatically and named 'Tag View X',
where X is the tag ID.
4 In the Add Comments dialog box, enter the text to be associated with the tag, set the tag Status from the
drop-down list, and click OK.
Menu: Review ➤ Redline ➤ Tag
To add text
1 Open the Viewpoints window, and click the viewpoint that you want to review.
2 Open the Redline Tools window, and click Text
.
3 In the Scene Area, click the location where you want to place the text.
4 Enter your annotation into the box provided, and click OK. The redline is added to the selected viewpoint.
NOTE Text can only be added in a single line with this redline tool. To display text on multiple lines, write each
line individually.
5 If you want to move the annotation, right-click the redline, and click Move. Clicking a different location
in the Scene Area moves the text there.
6 If you want to edit the annotation, right-click the redline, and click Edit.
Menu: Review ➤ Redline ➤ Text
Add Comments and Redlines | 219