
2009
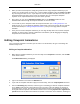

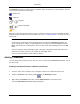

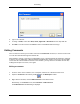

Table Of Contents
- Autodesk NavisWorks Review 2009
- Contents
- Part 1. Welcome to Autodesk NavisWorks Review 2009
- Part 2. Installation
- Chapter 3. Quick Start to Stand-Alone Installation
- Chapter 4. Move to NavisWorks from a Previous Release
- Chapter 5. Install NavisWorks for an Individual User
- Chapter 6. Install NavisWorks for Multiple Users
- Quick Start to Network Installation
- System Requirements for a Deployment
- Creating Network Deployments
- Preliminary Tasks for a Network Deployment
- Use the Installation Wizard to Set Up a Deployment
- Start the Deployment Process
- Create a Deployment
- Enter Product and User Information
- Specify Log File Locations
- What Is Silent Mode?
- Customer Involvement Program (CIP)
- Select a License Type (optional)
- Select the Installation Type (optional)
- Final Review and Complete Setup
- Register the Product
- Modify a Deployment (optional)
- Point Users to the Administrative Image
- Uninstall the Program
- Chapter 7. Installation Troubleshooting
- What are the minimum system requirements?
- How can I check my graphics card driver to see if it needs to be updated?
- What is the difference between a stand-alone license and a network license?
- What is the benefit to using a network licensed version of the software?
- When performing a Typical installation, what gets installed?
- Where are my product manuals?
- Deployment Issues
- Networking Issues
- Maintenance Issues
- Part 3. Basic NavisWorks Functionality
- Chapter 8. Overview
- Chapter 9. File Management
- Chapter 10. Converting Files
- File Readers
- NWF Files
- NWD Files
- NWC Files
- DWG and DXF Files
- DWF Files
- Bentley AutoPLANT Files
- 3DS Files
- DGN and PRP Files
- MAN Files
- PDS Files
- IGES Files
- STEP Files
- Inventor Files
- VRML world files
- Riegl Scan Files
- Faro Scan Files
- Leica Scan Files
- Z+F Scan Files
- ASCII Laser Scan Files
- STL Stereolithography files
- AVEVA Review RVM and RVS files
- IFC files
- Sketchup SKP files
- File Exporters
- CAD Previewing
- File Readers
- Chapter 11. Publishing
- Chapter 12. Navigating
- Chapter 13. Selecting Items
- Chapter 14. Finding
- Chapter 15. Editing
- Chapter 16. Display Modes
- Chapter 17. Viewpoints
- Chapter 18. Sectioning
- Chapter 19. Animation
- Chapter 20. Reviewing
- Chapter 21. Object Manipulation
- Chapter 22. Interface
- Chapter 23. Tools
- Chapter 24. Options
- Chapter 25. DataTools
- Chapter 26. Getting Help
- Part 4. Using TimeLiner Playback
- Glossary
- Index

the Comments control bar, showing the time and date, author, ID and status of each comment. The icon
on the far left represents the source type:
- selection set.
- search set.
or - viewpoint.
or - viewpoint animation.
- tag.
With many comments attached to many sources in a model, you may want to find a particular comment
without having to manually search each possible source. See “ Finding Comments ” for details on how to
achieve this.
Note:
The first line of a comment is what is displayed in the top half of the Comments control bar and
can be treated like its "subject". To get multiple lines in a comment, hold down Control and press
Enter. This will give you a carriage return in the text box, rather than simulating a press of the OK
button.
Any new comments will automatically be given a unique ID, along with the date and author of the
comment and a status can be set. All of these are searchable criteria.
Once a comment is added, it can be edited or deleted.
Adding Comments
You can add as many comments as you wish to a source, either from the Comments control bar, or from
the source itself.
Adding a comment from the Comments control bar:
1. Go to the source of the comment, be it a viewpoint, selection set or Clash Detective result.
2. Open the Comments control bar by clicking on the Workspace toolbar.
3. Right-click the Comments control bar, and click Add Comment on the shortcut menu.
An empty Add Comment resizable dialog is displayed.
Reviewing
228