
2010
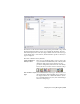


Table Of Contents
- Contents
- Part 1 Tubes and Pipes
- 1 Get Started with Tube & Pipe
- 2 Route Basics
- 3 Set Styles
- 4 Create Rigid Routes and Runs
- Workflow for Rigid Routes
- Create Auto Route Regions
- Manually Create Parametric Regions
- Automatically Dimension Route Sketches
- Create Segments With Precise Values
- Define Parallel and Perpendicular Segments
- Snap Route Points to Existing Geometry
- Place Constraints On Route Sketches
- Create Bends Between Existing Pipe Segments
- Create Pipe Routes With Custom Bends
- Create Bent Tube Routes
- Realign 3D Orthogonal Route Tool
- Control Dimension Visibility
- Populated Routes
- 5 Create and Edit Flexible Hose Routes
- 6 Edit Rigid Routes and Runs
- 7 Use Content Center Libraries
- 8 Author and Publish
- 9 Document Routes and Runs
- Part 2 Cable and Harness
- 10 Get Started with Cable and Harness
- 11 Work With Harness Assemblies
- 12 Use the Cable and Harness Library
- 13 Work with Wires and Cables
- 14 Work with Segments
- 15 Route Wires and Cables
- 16 Work with Splices
- 17 Work with Ribbon Cables
- 18 Generate Reports
- 19 Work With Nailboards and Drawings
- Part 3 IDF Translator
- Index

The Cable & Harness Library dialog box remains open during the import.
5 On the Import Library Wires dialog box, click the Browse buttons to
navigate to the Tutorial Files\Cable & Harness\Wire Library folder where
you installed Autodesk Inventor, and then open the following files:
Data File (.csv): LibraryGXLWires.csv
Configuration File (.cfg): WireLibrary.cfg
NOTE The files listed previously use the comma delimiter, which is commonly
used in the United States to separate values. Other locales may use a
semi-colon. Versions of the files that use the semi-colon delimiter are also
provided. For this example use the listed files. Typically you use the file version
with the delimiter specified in the Microsoft Windows regional or language
settings for your locale.
6 Click OK to add the wire data to the open library.
A dialog box appears indicating the status of the import and confirms
the name and location of the log file. The log file contains details of the
import, including updates to wires, and errors associated with the import.
7 Click Close on the confirmation dialog box.
The Cable & Harness Library dialog box is updated with the GXL data
after the import.
8 On the Cable & Harness Library dialog box, click Close.
Export Library Data
When exporting data from a library, you set the name and location for the
output file, and then the system writes the data to the comma-separated data
file as specified. The data file includes information for each wire or cable
contained in the library, and respects the locale-specific list separator for the
column delimiter. The configuration file specifies which properties to export.
All property values are exported using the unit preference settings. The same
data file (.csv) used for export (along with the corresponding configuration
file) can be used for import, which constitutes a complete round trip from
and to the library.
Export Library Data | 247