
2010


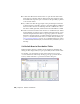


Table Of Contents
- Contents
- Part 1 Tubes and Pipes
- 1 Get Started with Tube & Pipe
- 2 Route Basics
- 3 Set Styles
- 4 Create Rigid Routes and Runs
- Workflow for Rigid Routes
- Create Auto Route Regions
- Manually Create Parametric Regions
- Automatically Dimension Route Sketches
- Create Segments With Precise Values
- Define Parallel and Perpendicular Segments
- Snap Route Points to Existing Geometry
- Place Constraints On Route Sketches
- Create Bends Between Existing Pipe Segments
- Create Pipe Routes With Custom Bends
- Create Bent Tube Routes
- Realign 3D Orthogonal Route Tool
- Control Dimension Visibility
- Populated Routes
- 5 Create and Edit Flexible Hose Routes
- 6 Edit Rigid Routes and Runs
- 7 Use Content Center Libraries
- 8 Author and Publish
- 9 Document Routes and Runs
- Part 2 Cable and Harness
- 10 Get Started with Cable and Harness
- 11 Work With Harness Assemblies
- 12 Use the Cable and Harness Library
- 13 Work with Wires and Cables
- 14 Work with Segments
- 15 Route Wires and Cables
- 16 Work with Splices
- 17 Work with Ribbon Cables
- 18 Generate Reports
- 19 Work With Nailboards and Drawings
- Part 3 IDF Translator
- Index

■ Double-click Table in the Model browser to open the iPart Author table.
Verify all part occurrences that are defined for the iPart. Each row in the
iPart Author table represents a part occurrence for the part family to publish
to the Content Center.
■ If you must customize the pipe length of the part when placed from the
Content Center at a later time, specify it as Custom Parameter Column in
the iPart Author table before authoring. Click the column head to select
the entire column, right-click, and then select Custom Parameter Column.
■ Each row in the iPart Author table can have its own material style. When
needed materials for an iPart are not available in the Styles Library, routes
and runs using this material cannot be properly populated. To add new
materials to the Styles Library, you must enable the Styles Library for your
project. For detailed instructions on how to enable the Styles Library, see
Set Up Projects For Exercises on page 11. For detailed instructions on how
to add and modify material styles, see the Index entry “material styles” in
the Help.
Set Default Rows in iPart Author Tables
Each iPart Author table has a default row. The default row determines the
library part that displays when you open a part family in the Content Center.
For instance, open the sample pipe iPart Autodesk\Inventor Professional
<version>\Tutorial Files\Tube & Pipe\Example_iparts\pipe.ipt. In the Model
browser, double-click Table to open the iPart Author dialog box:
164 | Chapter 8 Author and Publish