
Technical data


Creating a Grading Object
19
To create a grading object using the Grading Wizard (continued)
Steps
Use to look up
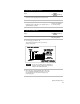
5 On the Corners sheet, choose a global corner
treatment, or enter corner treatments for
individual corners.
Configure the Grading
Corners Settings
6 On the Accuracy sheet, select a method for spacing,
and enter increment values for the projection lines.
Configure the Grading
Accuracy Settings
7 On the Appearance sheet, select the color, visibility,
and linetype for the grading object components and
select the grips you want visible in the drawing.
Configure the Grading
Appearance Settings
NOTE
The sheets in the Grading Wizard correspond to the tabs in the
Grading Properties and Settings dialog boxes.
To create a grading object using grading settings
Steps
Use
to look up
1 From the Grading menu, choose Slope
Grading ➤ Settings.
Create a Grading Object
using the Grading Settings
2 Select the tabs at the top of the dialog box to enter
settings for the footprint, targets, slopes, corner
treatments, accuracy, and appearance.
Overview of Configuring
the Grading Settings
3 From the Grading menu, choose Slope
Grading ➤ Apply Grading to apply the settings and
create a grading object.
Create a Grading Object
using the Grading Settings
For more information about grading settings, use to look up
“Overview of Configuring Grading Settings” in the online Help.