
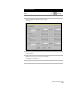
Technical data

Working with Parcels
221
Working with Parcels
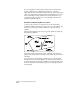
When you create base maps or do subdivision work, you define parcels
of land. Parcel boundaries define the area and the limits of each
parcel. You can define parcels from survey figures, points, lines,
curves, or polylines. If you are creating parcels by area, then you can
use the Parcel Sizing commands to create parcels of exact areas.
Like alignments, parcel definitions are stored in an external database
so multiple people can access them. Because their definitions are
stored externally, you can delete the geometry in the drawing and still
reference the parcel.
When defining parcels, you have the option of labeling the parcels
with a parcel number, area, and description. To manage parcels, use
the Parcel Manager command on the Parcels menu. You can use this
command to report mapcheck and inverse data, as well as to import,
delete, and rename parcels.
After you define a parcel, you can calculate its volumes using the grid
and composite volume methods.
You may want to use the AutoCAD Map commands to create a
database of parcel numbers, owners, cost, and so on to help manage
parcel maps. For more information, see Chapter 8, “AutoCAD Map
and AutoCAD Land Development Desktop.”
Drawing Parcel Geometry
To draw the parcel boundaries, you can use the commands in the
Lines/Curves menu, or other CAD commands such as LINE or PLINE.
You can also define parcel boundaries from points.
NOTE
Do not use spirals in parcel boundaries. Spirals cause incorrect areas
to be reported.
If you have Autodesk Survey, then you can also draw parcel
boundaries as Autodesk Survey Figures either in the field using the
Autodesk Survey Command Language to input the data in a data
collector, or on the Autodesk Survey Command Line.
NOTE
Be sure to draw the parcels as closed regions. If any of the joining
lines has a break, then you cannot calculate areas.