
Technical data

Chapter 4 Working with Drawing and Editing Tools
140
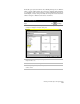
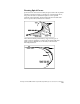
Paper Space and Layout Mode
After you complete your drawing in model space, you can arrange a
layout of the drawing views to be printed or plotted. Switch to a
layout by clicking a Layout button at the bottom of the drawing
screen, or by clicking MODEL on the status bar. In a layout, you can
create and arrange floating viewports that contain views of the
drawings that you created in model space.
Tiled viewports differ from the viewports arranged in paper space.
Paper space viewports, also known as floating viewports, are used to
establish a final layout for a drawing. They can overlap and be plotted
at the same time. For more information about paper space viewports,
use the Find tab to look up “Creating Floating Viewports” in the
online Help.
When you choose a Layout tab for the first time in a drawing session,
a single viewport is displayed, and a sheet with margins indicates the
paper size of the currently configured plotter and printable area of the
paper. AutoCAD Land Development Desktop displays the Page Setup
dialog box, in which you specify layout and plot device settings.
Setting the plot settings and using Preview, you can visualize the
resulting layout without actually plotting. The layout settings you
specify are stored with the layout.
You use the same commands from the View menu by choosing
Viewports ➤ New Viewports, to create viewports in a layout mode as
you do in model space, but you can also create irregular shaped
polygonal viewports in a layout.
Key Concepts
■
You can place floating viewports anywhere on the drawing sheet in
paper space. By default, each new layout has one floating viewport
that fills the entire display, or you can design a layout sheet with
multiple viewports.
■
When you use paper space to create text and dimensions, you can
apply the correct scaling relations between drawing objects and text
and dimensions.