
Technical data

Chapter 3 Working with COGO Points
106
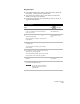
To create points by northing/easting
Steps
Use
to look up
1
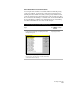
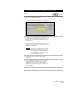
From the Points menu, choose Point Settings.
Overview of Creating Points
2
Click the Point Creation tab to change the Point
Creation settings. These settings determine what
pieces of information you are prompted for, what
information is created automatically for the points,
and whether the points you create are inserted
into the drawing.
Overview of Changing the
Point Creation Settings
3
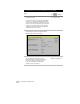
From the Points menu, choose Create Points ➤ By
Northing/Easting.
Create Points at
Northing/Easting
Coordinates
4
Type the northing of the point you want to create.
5
Type the easting of the point you want to create.
6
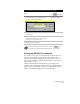
Type the description and elevation for the point if
you are prompted for them.
7
Continue to type northings and eastings for
additional points, or press ENTER to end the
command.
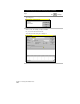
Importing Points
A quick and effective way to place points in a project is to import
them. You can use the Import Points command to import point ASCII
files, import data from a Microsoft
Access database file, and import
points from another project’s point database.
For example, if a surveyor collected point data by using a data
collector, the data can be downloaded as an ASCII file and then
imported into the AutoCAD Land Development Desktop project.
To do this:
■
Download the point data from a data collector as an ASCII text file
using data collector software.
■
Create an import/export format that specifies what information is
in the ASCII file.
■
Import the points using the import/export format.
All points you import are added to the project point database.