Copyright © 1999 Autodesk, Inc. All Rights Reserved This publication, or parts thereof, may not be reproduced in any form, by any method, for any purpose. AUTODESK, INC. MAKES NO WARRANTY, EITHER EXPRESSED OR IMPLIED, INCLUDING BUT NOT LIMITED TO ANY IMPLIED WARRANTIES OF MERCHANTABILITY OR FITNESS FOR A PARTICULAR PURPOSE, REGARDING THESE MATERIALS AND MAKES SUCH MATERIALS AVAILABLE SOLELY ON AN “AS IS” BASIS. IN NO EVENT SHALL AUTODESK, INC.
Contents Chapter 1 Introduction 1 What is AutoCAD Land Development Desktop? 2 AutoCAD Land Development Desktop Features 3 Who Should Use AutoCAD Land Development Desktop? 4 What’s New in AutoCAD Land Development Desktop Release 2 6 Upgrading from Autodesk S8 Civil/Survey Products 7 Where Can You Find the Autodesk S8 Commands You Use Frequently? 9 Customizing AutoCAD Land Development Desktop with the Object Model Interface 11 Using AutoCAD Land Development Desktop to Complete a Project 12 Collecting Data 13
Accessing AutoCAD Land Development Desktop Commands 35 Pull-Down Menus 36 Selecting a Menu Palette 37 Customizing a Menu Palette 38 Toolbars 40 Status Bar 41 Shortcut Menus 42 Command Line 43 Transparent Commands 44 Text Window 45 Using AutoCAD Land Development Desktop with Windows 46 Establishing Settings 48 User Preferences 49 Drawing Settings 51 Prototype Settings 52 Data File Settings 54 Setting Up the Drawing Environment 55 Using the World Coordinate System for Creating Data 59 Working with Projects 59
Using Drafting Settings 85 Using Reference Points in the Drawing 87 Plotting Your Drawings 92 Exiting AutoCAD Land Development Desktop 93 Chapter 3 Working with COGO Points 95 Introduction 96 Point Appearance: Markers and Labels 97 Points and CAD Commands 98 Upgrade Information About Points for Users of S8 Civil/Survey 98 Working with the Project Point Database 100 Setting Up the Point Database 101 Establishing Point Settings 102 Changing the Point Creation Settings 103 Changing the Point Marker Settings 1
Working with AutoCAD Land Development Desktop Drawing Tools to Create Lines and Curves 142 Drawing Spiral Curves 143 Special Lines 144 Working with Basic AutoCAD Commands to Create Objects 145 Lines 145 Construction Lines 146 Polylines 146 Curved Objects 148 Curved Lines 148 Hatch Patterns 149 Working with the Symbol Manager 152 Working with Text 153 Working with Curved Text 154 Attaching Notes to Objects 156 Adding Leaders to a Drawing 157 Digitizing 158 Choosing a Digitizing Method 159 Working with Editin
Building Surfaces 183 Specifying Data for Surfaces 183 Building a Watershed Model 186 Creating Finished Ground Data for Surfaces 190 Editing Surfaces 191 Edit History 192 Working with Surface Output and Visualization Tools 192 Viewing Surface Statistics 193 Dynamically Viewing Elevational Characteristics of a Surface 193 Viewing Quick Sections of a Surface 194 Creating Contours 196 Creating Contours from a Surface 197 Using a Surface Boundary to Contour Around a Building or Pond 199 Comparing Two Surfaces t
Labeling Objects 231 Label Styles 231 Accessing Labeling Commands 232 Editing Label Styles 236 Chapter 8 AutoCAD Map and AutoCAD Land Development Desktop 239 Introduction 240 Using the AutoCAD Map Project Workspace 241 Map Project Workspace Shortcut Menus 242 Dragging Files 242 Map Projects and Drawing Sets 243 When to Create Drawing Sets 243 Drawing Sets and AutoCAD Land Development Desktop Projects 244 Data Storage 244 Defining Queries 248 The Purposes of Queries 249 Saving Queried Data 252 Inserting Geo
1 Introduction In this chapter Using AutoCAD Land Development Desktop, ■ What is AutoCAD Land Development Desktop? ■ Who Should Use AutoCAD Land Development Desktop? ■ What’s New in AutoCAD Land Development Desktop Release 2 you can create, maintain, output, and analyze all of the data in your land development projects.
What Is AutoCAD Land Development Desktop? AutoCAD Land Development Desktop Release 2 is part of the Land Development Solutions II suite of applications for professionals in the land planning and development industries. The Land Development Solutions II suite includes: ■ ■ ■ AutoCAD Land Development Desktop Release 2: This is the AutoCAD for Land Development professionals.
AutoCAD Land Development Desktop Features AutoCAD Land Development Desktop provides the core functionality for the land development professional, including project management, points, geometry creation, plan alignments, terrain modeling, volumes calculations, labeling, and much more. The following illustration shows some AutoCAD Land Development Desktop features.
Who Should Use AutoCAD Land Development Desktop? The land development industry is very broad. It includes all professionals who manage, analyze, or alter the land, specifically surveyors, civil engineers, land planners, environmental designers, forest managers, hydrologists, GIS analysts, landscape architects, resource managers, and more. Land development professionals may require different tools to do their jobs.
Requirements of land development professionals (continued) Professional Requirements Roadway Engineer Land Desktop and the profile and cross-sectional capabilities of Autodesk Civil Design. Transportation Engineer Land Desktop and the profile, cross-sectional, grading, and hydrology capabilities of Autodesk Civil Design. Hydrologist Land Desktop and the run-off analysis capabilities of Autodesk Civil Design.
What’s New in AutoCAD Land Development Desktop Release 2 General ■ ■ ■ ■ ■ ■ ■ ■ Bug fixes (over 300 deferred defects from R1.
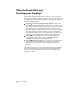
Utilities ■ ■ ■ ■ ■ ■ Object Viewer includes 3D Orbit interface Set Text Style replaced with standard AutoCAD Text Style command Layer Manager now supports AutoCAD 2000 lineweights and plot styles Build Selection Set dialog box now includes Lineweight Curve Solver added to Utilities menu Join 3D Polyline command moved to the Terrain menu Upgrading from Autodesk S8 Civil/Survey Products This section is for people who are upgrading from Autodesk S8 civil/survey products.
The Land Development Solutions suite of products has much of the same functionality. However, the “AutoCAD” part of the equation (AutoCAD Land Development Desktop) now contains substantial baselevel Autodesk S8 Civil/Survey functionality that was in COGO, DTM, Earthworks, Design, and Advanced Design. The eight Autodesk S8 modules were redesigned to meet the needs of different land development professionals. The commands used by everyone in the design process were added to AutoCAD Land Development Desktop.
Where Can You Find the Autodesk S8 Commands You Use Frequently? The following table shows where you can find your familiar Autodesk S8 commands: NOTE Some Autodesk S8 commands, such as Change Programs, are no longer needed. Cross referencing Autodesk S8 and AutoCAD Land Development Desktop commands If you used in Autodesk S8 Civil/Survey…. The commands are in this program... In this menu...
Cross referencing Autodesk S8 and AutoCAD Land Development Desktop commands (continued) If you used in Autodesk S8 Civil/Survey…. The commands are in this program... In this menu...
Cross referencing Autodesk S8 and AutoCAD Land Development Desktop commands (continued) If you used in Autodesk S8 Civil/Survey…. The commands are in this program... In this menu... Autodesk Survey Figure commands Autodesk Survey Analysis/Figures Autodesk Survey Traverse and Sideshot commands Autodesk Survey Analysis/Figures If you are upgrading to AutoCAD Land Development Desktop from to look up “What’s New in AutoCAD Land Autodesk S8, then use Development Desktop” in the online Help.
Using AutoCAD Land Development Desktop to Complete a Project The process of land development is highly iterative. AutoCAD Land Development Desktop makes it easy to add new data at any step of the project. A typical project begins with capturing data in the field. Back in the office, you can use AutoCAD Land Development Desktop to set up an organizational structure for the project, and then you can input the data into the project and drawing.
Collecting Data Points are the most common form of data. While AutoCAD Land Development Desktop cannot help you collect data, it provides easy ways for you to import and create points in the drawing. Autodesk Survey has the data collector support built in, as well as support for our standard .fbk (fieldbook) format. Points are saved automatically to the project point database when you create or import them. Other data sources can include contour maps and raster images.
When you install AutoCAD Land Development Desktop, a project folder (c:\Land Projects R2 by default) is created. Each project is represented by a subfolder of this root project folder. For example, if you create a project named NEWPROJ, then AutoCAD Land Development Desktop creates a \Land Projects R2\newproj folder. Within the project folder, sub folders are created by the program for storing data.
Relationships Between Drawings Another way to organize your data, on the drawing-level, is to use the built-in AutoCAD Map functionality to attach drawings to the Map project by using AutoCAD Map’s Attach command. NOTE The AutoCAD Map “project” is a drawing file that lists and controls the items that are defined for the current work session. It does not manage the AutoCAD Land Development Desktop project data based on the current Land Desktop project that you are working in, and is not project-specific.
Inputting Data into a Drawing and Project The most common way to input data into a project is to import or create points. Other methods include digitizing, drawing geometry, and using xrefs (a drawing attached to another drawing). When you import or create points, the point data is always stored in the point database (points.mdb). You can insert points into the drawing when you create or import the points, or you can insert them at a later time when you need to work with them.
Defining Data to Databases By default, points are always saved to the project point database. But there are other objects that you must define to databases yourself, transforming simple geometry to objects with extended entity data. You can also assign data to objects in your drawing using the AutoCAD Map functionality, and organize topologies in order to analyze spatial relationships. Objects that you can define to databases include alignments, parcels, and breaklines.
If you want to create maps that show spatial relationships, you can define regions and objects as parts of topologies. In the following illustration, the alignment is actually a dividing boundary between buildable land and wetlands. Using the AutoCAD Map topology features, you can assign object data to polygonal areas and query the total area of buildable land.
Compiling Data to Build Surfaces The end result of data collection and input is often a surface model like a TIN (Triangulated Irregular Network) that represents the surface of a parcel of land in three dimensions. This surface is invaluable to anyone evaluating a site. From this surface, you can perform slope analysis and generate watershed models, contour maps, and volumes.
Outputting and Evaluating Data AutoCAD Land Development Desktop has several commands that you can use to list and report object data for evaluation. Surfaces have the greatest variety of analysis and outputting options. After you create a surface, you can use several different methods to evaluate the surface that is created, as illustrated below.
Design Documents After your project is completed, you can create final labels and plot the drawing. If your project is based on AutoCAD Map you can configure the plotter to print the maps in tiles. You can also create legends for the maps that you print. Using Autodesk Civil Design, you can also create automated plan/profile and section sheets for road alignments and profiles with the Sheet Manager commands.
■ ■ ■ AutoCAD Land Development Desktop documentation provides help with commands in the Projects, Points, Lines/Curves, Alignments, Parcels, Labels, Terrain, Inquiry, and Utilities menus. AutoCAD documentation provides help with commands in the File, Edit, View, Insert, Format, Tools, Draw, Dimension, and Modify menus. AutoCAD Map documentation provides help with commands in the AutoCAD Map menu.
If you have never used AutoCAD, then you may want to start by using the AutoCAD Learning Assistance CD to learn the CAD basics of AutoCAD Land Development Desktop. AutoCAD Land Development Desktop has an AutoCAD Map menu that contains all the functionality of AutoCAD Map 2000. If you have never used AutoCAD Map 2000, then you may want to start learning the program by using the mapping tutorials in the AutoCAD Map User’s Guide.
The following sections describe terms that this guide uses when referring to Help files, how to access Help and the tutorials, and what each file looks like. Finding Information In many sections of this guide, you are referred to topics in the online Help for more information. For example: For more information about alignments, use of Horizontal Alignments” in the online Help. to look up “Overview In the example, the Book icon represents that you can find more general information in a Help file.
How to Use Online Help You can access Help files for AutoCAD Land Development Desktop by using the following methods: Accessing Help files Method Result Benefits From the AutoCAD Land Development Desktop R2 program group, select the AutoCAD Land Development Desktop R2 Online Help icon. Displays a Contents tab that lists the Help files and the tutorial for AutoCAD Land Development Desktop. Includes links to AutoCAD Help and AutoCAD Map Help.
When you open a Help file from either the Help menu or the Help icon, the Help Topics window is displayed, as shown in the following illustration. This window has three tabs: Contents, Index, and Find. ■ ■ ■ Click the Contents tab to view the Table of Contents. This tab has books with topic pages listed below each book. To view a topic, double-click the page, or select the page and click Display.
The following illustration shows a typical Help topic. When you view a Help topic, you can use the menus and buttons to control options and to navigate. You can also access a shortcut menu by right-clicking in the Help window. Key Concepts ■ When a topic is open, you can move to other relevant topics or definitions by selecting the green, underlined text. ■ You can click viewed. ■ You can click to return to the Help Topics window.
The following task shows you how to locate a topic title in the Help file. To use the online Help to locate a topic title Steps 1 Start Help by using one of the methods listed in the Accessing Help Files list in “How to Use Online Help” in this chapter. 2 Click . The Help window appears as shown in the following illustration. NOTE If you have not previously used the Find tab, then the Find Setup Wizard prompts you to create a word search database. Click Next to proceed through the wizard.
How to Use the Online Tutorial AutoCAD Land Development Desktop has an online tutorial that you can use to learn the program’s concepts. The online tutorial is an excellent way to become familiar with the program. You can access the tutorial using the following methods: ■ ■ From the AutoCAD Land Development Desktop R2 program group, select the AutoCAD Land Development Desktop R2 Online Help icon. From within the program, choose Help Topics from the Help menu.
2 Getting Started with AutoCAD Land Development Desktop In this chapter ■ Starting AutoCAD Land Development Desktop ■ Accessing AutoCAD Land Development Desktop Commands ■ Using AutoCAD Land Development Desktop with Windows the program. These basics include menu palettes, ■ Establishing Settings and project, prototype, and drawing management.
Introduction This chapter describes how to get started using AutoCAD Land Development Desktop.
When you start AutoCAD Land Development Desktop, the Start Up dialog box is displayed, as shown in the following illustration. You can select a drawing to open from the Most Recently Used list You can create a new drawing You can select an existing drawing to open You can manage projects by accessing the Project Management dialog box If you do not want to see this dialog box every time you open AutoCAD Land Development Desktop, then clear the Show this dialog at startup check box.
The AutoCAD Land Development Desktop Drawing Environment After you initialize AutoCAD Land Development Desktop, the drawing environment appears as shown in the following illustration: Map project workspace Menu bar Model space UCS icon Command line Status bar The menus that are displayed by default are the menus in the AutoCAD Land Development Desktop menu palette. For more information about menu palettes, see “Selecting a Menu Palette” in this chapter.
The AutoCAD Map Project Workspace is shown by default. You can use the Project Workspace to attach drawings to the current Map “project” (which is the current drawing), to define queries, and attach databases. For more information see “Using the AutoCAD Map Project Workspace” in Chapter 8, “AutoCAD Map and AutoCAD Land Development Desktop.
■ AutoCAD Land Development Desktop has additional contextsensitive menus that you can access by selecting an object and right-clicking. For more information, see “Shortcut Menus” in this chapter. For more information about accessing commands, use “Understanding the AutoCAD Window” in the online Help. to look up For more information about the Map Project Workspace, see “Using the AutoCAD Map Project Workspace” in Chapter 8, “AutoCAD Map and AutoCAD Land Development Desktop.
You can access pull-down menus and commands in the following ways: ■ ■ ■ Select a pull-down menu by clicking the menu name to display a list of commands, or press ALT and the underlined letter of the menu name. For example, to access the Points menu, hold down the ALT key and press the s key (hereafter: ALT + S). Select a command on a pull-down menu by clicking its name. You can run some commands by typing the whole command name at the Command prompt.
To select a menu palette (continued) Steps Use to look up 2 Choose a menu palette to load. 3 Under Description, the names of the pulldown menus in that selected menu palette are displayed. 4 After you have selected the menu palette, click Load. A quicker way to load a menu palette is to use a macro. For more information about menu palette macros, look up “AutoCAD Land Development Desktop Macros” in the online Help. For more information, use in the online Help.
To create a menu palette Steps Use 1 On the command line, type menuload to display the Menu Customization dialog box. MENULOAD Command to look up 2 Click the Menu Bar tab, and under Menu Group choose a menu name from the list. For example, if you want to add AutoCAD menus to the menu bar, then choose ACAD. 3 Under Menus, choose a pull-down menu from the list. 4 Under Menu Bar, select a menu name on the list before which you want to place the menu from the Menus list.
Toolbars When you start AutoCAD Land Development Desktop, the following toolbars are displayed: ■ ■ AutoCAD: Modify and Draw AutoCAD Map: Drawing Set and Map To learn how to display the AutoCAD Land Development Desktop toolbars, see the task at the end of this topic. You can display other toolbars with various tool categories. Each toolbar contains a set of tools that represents specific commands in a category. Start a command by clicking a tool. To identify a tool, move your pointer slowly over the tool.
To display AutoCAD Land Development Desktop toolbars Steps Use 1 From the View menu, select Toolbars. TOOLBAR Command to look up You can also move your cursor over any toolbar and then right-click to display a shortcut menu, and then select Customize. 2 In the Toolbars dialog box, under Menu Group, select Land to display specific Land Development Desktop toolbars. 3 Under Toolbars, select a check box on the list to display that toolbar. To close or hide the toolbar, clear the check box.
■ Double-click MODEL/PAPER to switch between paper space and model space when the drawing is in Layout mode. For more information, see “Working in Model Space and Layout Mode” in Chapter 4, “Working with Drawing and Editing Tools.” For more information, use to look up “Understanding the AutoCAD Window” in the online Help. Shortcut Menus Shortcut menus provide quick access to display, editing, and labeling commands.
Key Concepts ■ ■ AutoCAD Land Development Desktop has a shortcut menu for grip editing. Select an object in the drawing to display the grips, select a grip, and then right-click to display the shortcut menu. For more information, see “Working with Editing Tools” in Chapter 4, “Working with Drawing and Editing Tools.” While you are using real-time panning and zooming, you can right-click to display shortcut menus with specific options for those commands.
For more information about dialog box options available on the command line, see “Switching from Dialog Box to Command Line” in the online Help. For a list of abbreviated command names, use to look up “AutoCAD Land Development Desktop Macros” and “Command Aliases” in the online Help. Transparent Commands You can use the command line to access a second command without leaving the first command. To use a command transparently, type an apostrophe (’) before the command name on the command line.
Text Window The text window expands from the command line and you can view a complete history of commands that you used for the current drawing session. You can also use the text window to select options. Press F2 to open the text window, and then press F2 again to return to the drawing window. The text window also displays information whenever you use inquiry commands. For more information, use Window” in the online Help.
Using AutoCAD Land Development Desktop with Windows You can use several commands in the Standard toolbar to edit objects in drawings. You can copy or remove an object from a drawing to the Clipboard and then paste the object from the Clipboard into another document. The following table lists the Windows tools and how you can use them in AutoCAD Land Development Desktop. For example, use Print Preview to view a full page of the plotted drawing in a WYSIWYG window.
Windows tools (continued) Tool Shortcut Key Command Line Description ctrl+s save Saves the current drawing. ctrl+p plot Displays the Plot dialog box. For more information, see “Plotting Your Drawings” in this chapter. preview Displays a preview of the drawing as it would appear on a sheet of paper. Press ESC to return to the drawing. ctrl+x find Displays the Find and Replace dialog box, which you can use to search for text strings and replace them.
Windows tools (continued) Tool Shortcut Key ctrl+z Command Line Description matchprop Copies the properties of one object to one or more objects. undo Reverses the last action. For more information, see “Correcting Mistakes” in Chapter 4, “Working with Drawing and Editing Tools.” ctrl+y redo Restores the most recent change made by the Undo command. For more information, see “Correcting Mistakes” in Chapter 4, “Working with Drawing and Editing Tools.” For more information, use online Help.
User Preferences The User Preferences control three main aspects of the program. You can establish file paths. You can choose to use basic AutoCAD commands. You can select the method you want to use for Drawing Setup. File Paths You can control file paths that include the path for storing menu palettes, prototypes, setup files, and speed tables, among others. To use these items, you must store them in the locations specified in the File Locations settings.
If you clear the Use Land Development Startup check box, then the AutoCAD Startup dialog box is used. If you clear the “New” drawing dialog or “Open” drawing dialog check boxes, then the AutoCAD New and Open dialog boxes are used, as shown in the following illustrations. AutoCAD Startup AutoCAD New AutoCAD Open The following illustrations show the AutoCAD Land Development Desktop Startup, New, and Open dialog boxes.
First Time Drawing Setup The First Time Drawing Setup setting controls what happens when you create a new drawing. You can use the New Drawing Wizard, the Drawing Setup dialog box, or you can automatically load a setup file whenever you create a new drawing. The following illustrations show the New Drawing Wizard, the Drawing Setup dialog box, and an example of the contents of a setup file.
The settings are arranged by program so you can more easily locate the settings that apply to your project. There are settings for AutoCAD Land Development Desktop, Autodesk Civil Design, and Autodesk Survey. These settings are all available elsewhere in the program. The Edit Settings dialog box provides an easy way to change different settings simultaneously and then save them back to a prototype.
The Prototype Settings dialog box is a centralized location from which you can edit prototype settings. To display the Prototype Settings dialog box, select Prototype Settings from the Projects menu, select the prototype you want to edit, and then click OK. 1. Choose the program that has the settings you want to edit. 2. Choose the setting you want to edit. 3. Click the Edit Settings button.
Data File Settings You can use the Edit Data Files dialog box to access data files for AutoCAD Land Development Desktop, Autodesk Civil Design, and Autodesk Survey. This dialog box provides a centralized location from which you can access and edit Import/Export formats, Speed Tables, Label Styles, the Tag Styles, and Contour Styles. To display the Edit Data Files dialog box, choose Data Files from the Projects menu. 1. Choose the program. 2. Select the data file that you want to edit. 3.
If you have Autodesk Survey, you can edit: ■ ■ ■ Command synonyms Equipment settings Figure Prefix Library If you have Autodesk Civil Design, you can edit ■ Sheet Manager label and grid styles Setting Up the Drawing Environment After you install AutoCAD Land Development Desktop, you may want to customize the settings in the Options (formerly Preferences) dialog box. To access the dialog box, select Options on the Tools menu, or type OPTIONS on the command line.
This table gives a brief overview of the settings. Options dialog box settings Tab Function File Specifies the directories in which AutoCAD searches for support, driver, menu, and other files. Also specifies optional, user-defined settings such as which dictionary to use for checking spelling. Display Customizes the AutoCAD display. Open and Save Controls options that relate to opening and saving files in AutoCAD. Plotting Controls options related to plotting.
Window Display Options When you start AutoCAD Land Development Desktop for the first time, the screen colors and other settings conform to the Display settings in the Windows Control Panel. You can change the display colors, fonts, and other settings in the Options dialog box. To change the window display options Steps Use 1 From the Tools menu, choose Options to display the Options dialog box, and then click the Display tab.
Saving a Profile You can customize profiles to accommodate different projects and different users. When you change settings in the Options dialog box, the group of settings is automatically saved as the default profile. Any changes that you make are immediate. You have no warning before you lose the default profile settings.
Using the World Coordinate System for Creating Data When you begin a new drawing in AutoCAD Land Development Desktop using one of the default drawing templates, you are automatically in the World Coordinate System (WCS); the X axis is horizontal, the Y axis is vertical, and the Z axis is perpendicular to the XY plane.
■ ■ ■ ■ You can assign a drawing to only one project, but you can reassociate the drawing if you want to associate it with a different project later by using the Reassociate Drawing command from the Projects menu. Projects can contain multiple drawings. All the drawings in a project share the data files, such as the point database. If you open an existing drawing that is not assigned to a project, then you are prompted to select a project. This assignment is saved when you save the drawing.
Basing a Project on a Prototype When you create a new project, you must specify a prototype (default settings for the project) and a name for the project. AutoCAD Land Development Desktop uses prototypes as a convenient way for you to maintain standard drawing settings for your project drawings. These standards are important and probably vary from project to project. For example, the standards that you use for state projects may be significantly different from the standards for local or town-related jobs.
To display the Project Management dialog box, choose Project Manager from the Projects menu. From the Project Management dialog box, you can: ■ ■ ■ ■ ■ Create new projects. If you are a CAD Manager, then you may want to create the projects from within the Project Management dialog box so that others on the system can start their drawings and reference the same project data. Create new project paths. By default, the project path is c:\Land Projects R2, but you can create new project paths if desired.
Managing Prototypes with the Prototype Management Dialog Box You may need to maintain different prototypes for different clients. You can copy, delete, and rename prototypes by using the Prototype Management dialog box. To display the Prototype Management dialog box, choose Prototype Manager from the Projects menu. Default prototypes for feet and meters are included with AutoCAD Land Development Desktop.
Working with Drawings All AutoCAD Land Development Desktop documents that you work with are called drawings. They are AutoCAD drawings that are saved with a .dwg file extension. This section explains how to create drawings, establish the drawing settings, and open drawings. Creating New Drawings You can create a new drawing from either the Startup dialog box or by selecting the New command from the File menu. When you create a new drawing, you name it and you associate it with a project.
To create a new drawing Steps Use 1 From the AutoCAD Land Development Desktop R2 program group, choose the AutoCAD Land Development Desktop R2 icon. Overview of Starting a Drawing Session to look up The Startup Dialog box is displayed. Or, if AutoCAD Land Development Desktop is already running, choose New from the File menu. 2 Click New to display the New Drawing: Project Based dialog box, as shown in the following illustration. Start a New Drawing Type the name of the new drawing.
Setting up Drawings To create a new drawing without using a Wizard, or to change drawing settings while working on an open drawing, you can use the Drawing Setup dialog box. To display the Drawing Setup dialog box, choose Drawing Setup from the Projects menu. You can use this dialog box to select the current zone, and to adjust the drawing units, the horizontal and vertical scales, the current text style, and other settings.
Drawing Setup Example: Setting a Base Point and North Rotation Before you bring points into your drawing, you may want to set the drawing orientation. The drawing orientation settings include a base point and north rotation. These two settings control the drawing’s coordinate system.
To set up the base point and north rotation Steps Use 1 From the Projects menu, choose Drawing Setup. Set Up a Drawing Using the Drawing Setup Command to look up 2 Click the Orientation tab. 3 Under Base Point, type X, Y coordinates for the base point, or click Pick and select a point from the drawing. Setting a different base point affects the view of the project data only in the current drawing and does not alter the point database coordinates.
To set up the base point and north rotation (continued) Steps Use 4 Under Northing and Easting, type the northing and easting coordinates to associate with the X,Y base point. Change the North Rotation for a Drawing to look up For example, if X,Y is 0,0 (the lower-left corner of your drawing screen), then you can specify the local northing/easting coordinates that were used in a survey of the site, such as 5000,5000. This makes 0,0 equivalent to northing/easting of 5000,5000.
To select the coordinate zone for a drawing Steps Use 1 From the Projects menu, choose Drawing Setup. Change the Current Zone for a Drawing to look up 2 Click the Zone tab. 3 From the Categories list, select the geodetic zone category you want to choose a zone from. Categories include Lat/Longs, different countries, and different states in the United States. 4 Select a zone by clicking on it. The zone details are listed in the lower half of the dialog box.
Opening Drawings You can open an existing drawing using the Startup dialog box, or open a new drawing by selecting the Open command from the File menu. The Most Recently Used list in the Startup dialog box lists the four drawings that you most recently worked on. If you open a drawing that was created with Autodesk S8 Civil/Survey programs and the project exists, then the drawing is linked automatically to that project and the point database and alignment database are converted.
■ Substitute proxy objects so that you can view the objects that were created in AutoCAD Land Development Desktop. When someone opens an AutoCAD Land Development Desktop drawing in another flavor of AutoCAD, the Proxy Information dialog box is displayed. The Proxy Information dialog box lists the missing application and the number of proxy objects in the drawing. It also gives you three options: ■ ■ ■ Do not show proxy graphics: Does not show the proxy graphics.
Key Concepts ■ ■ You can view the drawing or object from a side viewpoint, such as right, left, top, or bottom; from isometric angles; and in an elevation view. To view the drawing in 2D planes (X and Y planes), use plan view in which you view the drawing as if you were directly above and looking down on the drawing. NOTE ■ ■ ■ A benefit of plan view is its fail-safe property. If you have been working in 3D and want to reorient yourself and the drawing, you can always return to plan view.
To view an object in the Object Viewer Steps Use 1 From the Utilities menu, choose Object Viewer. Use the Object Viewer to look up 2 Select the object you want to view in the Object Viewer. 3 Press ENTER to display the Object Viewer dialog box. 4 Use the tools in the Floating Viewer to adjust your view. For more information about the Object Viewer, use the Object Viewer” in the online Help.
Zoom options (continued) Option Description Dynamic Display the drawing within a view box that you can adjust. After you specify the extents of the box, press ENTER and that area becomes the new display. Extents Enlarge the drawing to the tightest zoom possible of everything in the drawing file. Previous Restores the prior view. You can select up to 10 previous views in succession. NOTE If you want to zoom or pan in real time without using commands, select Aerial View from the Tools menu.
Key Concepts ■ ■ ■ To scale a view relative to the current view, use the Scale (X/XP) option of the ZOOM command. Add x after the value that you enter. For example, enter 2x to double the image size. To scale a drawing relative to paper space units, use the Scale (X/XP) option of the ZOOM command, and then enter the “xp” (“times paper space”) factor. For example, if you want 1 inch in paper units to equal 1 foot in drawing units, then 1 in. = 1 ft. Enter the scale factor 12xp at the prompt.
Key Concepts ■ ■ ■ When you save a view, both the viewing position, such as a specific pan or zoom position, and scale are saved. If you work in tiled viewports in model space, then only the view in the current viewport is saved. If you work in paper space, you can save the entire layout, including one or more floating viewports. When you restore a named view in model space, it replaces the active viewport.
Redrawing and Regenerating When the drawing is cluttered with blips or temporary markers, you can clean up the current viewport quickly by using the REDRAW command. It refreshes the screen and redraws objects without updating the drawing database. If you use more than one viewport, you can use the REDRAWALL command. You can also update the drawing screen by regenerating the drawing. The REGEN command reads all the data in the database and calculates the screen coordinates of each object on the screen.
■ ■ By turning layers on and off, you can plot the same drawing to serve different purposes. In lists, layers are sorted alphabetically by name. If you choose layer names carefully, you can sort layers by groups. For example, if you have a set of layers that start with CONTOUR, such as CONTOUR01, CONTOUR02, and so on, then you can sort for CONTOUR to display a list with only those layers. For more information, use online Help.
Object Properties toolbar (continued) Tool Description Locks and unlocks layers. To prevent objects on a layer from being modified, lock the layer. The objects remain visible, and you can use commands that do not alter the objects. Controls the whether layers are plotted. Displays the color assigned to a layer. Makes a color current, displays the color of a selected object, and changes the color of a selected object. The drop-down list contains the colors used most recently.
Working with the Layer Manager In the Layer Manager, you can create, organize, sort, and group layers, as well as save and coordinate layering schemes. You can also implement layering standards to better organize your drawing layers. Key Concepts ■ ■ You can use the Layer Manager to create and manage new layers. You can use the Layer Manager to make a layer current. To make a layer current Steps Use to look up 1 From the Utilities menu, choose Layer Manager.
To create a new layer (continued) Steps Use to look up 5 Select the Make Current check box to make the new layer current. 6 Enter a description, color, and linetype for the new layer. 7 Click OK. For more information about layer management, use “Overview of Layer Management” in the online Help. to look up Working with Layer Groups You can use groups of layers to create working views and backgrounds from large drawings.
To create a user group Steps Use 1 From the Utilities menu, choose Layer Manager. Overview of Creating a Layer Group to look up 2 In the left pane of the Layer Manager, right-click, and select New Group ➤ User. 3 Type a name for the new layer group. 4 To add layers to the new layer group, select a layer in the right pane of the Layer Manager and drag it into the layer group. To create a filter group Steps Use to look up 1 From the Utilities menu, choose Layer Manager.
Working with Layer Snapshots By saving layer and view information in snapshots, you can quickly recall specific layer and view configurations from complex data sets. For example, a land surveyor might create snapshots of individual site plans and buildings, boundaries, and contours to separate this information from a complete site layout. After you create a layer snapshot, you can add and delete individual layers in the snapshot and import it into new drawings to automatically set up a layering scheme.
Using Drafting Settings Several AutoCAD Land Development Desktop tools help you draw with accuracy. For example, for maximum control over your drawing, you can set up a background grid that limits points you specify to points on the grid (snaps). You can also restrict location points on objects, such as the midpoint of a line and the center of a circle (object snaps).
The following table describes the drafting settings. Drafting settings Drafting setting Description Snap Restricts cursor movements to measured intervals, or invisible “snap” points. You can specify snap distances and whether to display a grid that corresponds to the snap points. Grid Displays a web of visible dots that you can use as a guide. The dots are spaced according to the value that you specify in the Snap section of the Drafting Settings dialog box.
Using Reference Points in the Drawing AutoCAD Land Development Desktop provides tools to help you specify points precisely for accurate placement of objects and for reference. Object Snaps You can use object snaps (osnaps) to move the cursor to defined points on objects, for example, the center of a circle, the midpoint of a line, or the intersection of two lines. For example, you can start a new line from the exact endpoint of another line.
The Object Snap tab also controls the use of object snap tracking. With object snap tracking the cursor can track along alignment paths based on other object snap points when specifying points in a command. For more information, see “Object Snap Tab” in the online Help, and “AutoTrack” in this chapter. You can use the Object Snap shortcut menu, shown in the following illustration, to specify a specific object snap to use for a point, even when running Osnaps are not turned on.
AutoSnap After you set snap point locations in the Osnap Settings dialog box, you can select AutoSnap options to preview and confirm locations during a drawing session before using the pointing device to specify a point. To access the AutoSnap settings, choose Options from the Tools menu and click the Drafting tab. When the cursor moves over an object snap location, a marker is displayed (when the Marker check box is selected).
The following illustration shows the marker that is displayed over the endpoint, and the ToolTip that explains which snap point the cursor is snapped to. AutoSnap works even when you set multiple object snaps. Press TAB to cycle through the snap points on an object. For more information, see “Changing Object Snap Settings” in the online Help. AutoTrack AutoTrack is another way to specify a point in relation to existing points by using the pointing device.
To use AutoTrack for object snap tracking Steps Use to look up 1 Start by drawing a line or polyline in your drawing, such as the line shown here. You will use AutoTrack to draw another line based on the snap points of this line. 2 Turn on a running object snap like ENDPOINT by using the Drafting Settings command on the Tools menu. 3 Turn on AutoTrack by depressing the OTRACK button on the Status Bar. Using AutoTrack 4 Run a drawing command, like LINE.
Plotting Your Drawings When you are ready to plot a drawing, set up a layout and configure the settings in the Plot dialog box. These settings include the printer or plotter you want to use, the plot style table, which layout(s) to plot, the plot area, scale, orientation, and other parameters. Plotting has changed significantly for AutoCAD 2000-based programs such as AutoCAD Land Development Desktop Release 2. Additional Help topics and videos have been added to the documentation.
Key Concepts ■ ■ ■ A plot style, a new object property, can change the way a plotted drawing looks. By modifying an object’s plot style, you can override that object’s color, linetype, and lineweight. You can use plot styles if you need to plot the same drawing in different ways. Plot settings are now saved in the drawing. After you establish the settings, you can plot using the same settings the next time you open the drawing.
3 Working with COGO Points In this chapter ■ COGO points are used in almost every project to ■ Working with the Project Point Database ■ Establishing Point Settings ■ Working with Points ■ Managing Points identify locations in space. COGO points contain northing, easting, elevation, and description information that is stored in an external point Upgrade Information About Points for Users of S8 Civil/Survey database.
Introduction Points that identify locations, by using northing, easting, and elevation, are the basis of almost every land development project. The more accurate and thorough your point data is, the more accurate anything that you generate from the points are, such as surfaces, geometry, and so on. Points that AutoCAD Land Development Desktop creates are called COGO points. COGO stands for “Coordinate Geometry.” COGO points are stored in an external database, and are organized by their point numbers.
Point Appearance: Markers and Labels When you create points, you have the option of displaying point markers, point labels, or both. Think of point markers as a working mode for points. Then when you are ready to label the points and insert description key symbols, use point labels. Point markers can stay the same size relative to the AutoCAD graphics window, or they can be a fixed size in the drawing. The following illustration shows point markers that are sized relative to the graphics window zoom level.
Points and CAD Commands The commands in the Points pull-down menu create COGO point objects that have extended entity data. These objects differ from the simple CAD point nodes that you can create with the POINT command. The following illustration shows a CAD point node created with the POINT command on the left. On the right is a COGO point object created with a command on the Points pull-down menu. The COGO points are typically assigned description and elevation data as well as the required point number.
You can create leaders for the points by dragging the point grip away from the point node, or you can turn off this option in the Point Settings dialog box so that leaders aren’t created when you move the markers (a new option in Release 2). ■ ■ ■ ■ ■ ■ The point database is now a Microsoft Access database that you can sort and print from within Microsoft Access. You can now label points by using point labels.
Working with the Project Point Database AutoCAD Land Development Desktop uses a project point database to store the point information for a project. This file is named points.mdb and is stored in the project’s \cogo folder. (For example, c:\Land Projects R2\newproj\cogo\points.mdb.) You are prompted to set up this point database whenever you start a new project.
Because all the point information is stored in the database, you can create a new drawing and insert only the project points that meet specific criteria, such as region, point number range, or description. For example, you can insert points with descriptions associated with the boundary, like iron pipes, corner points, or fence points. You can limit access to the point database to one person or share it with other people.
After you create the point database, you can choose the database “open” mode by running the Point Database Setup command. To run this command, select the Point Database Setup command from the Points ➤ Point Management menu. You can open the database so that only you have write access to it, or you can open it in multi-user mode so that multiple people can open and write to the point database.
Changing the Point Creation Settings The Point Creation settings affect how COGO points are created in a project, and what information you are prompted for when you create points. For example, you can create points with automatic elevations, or you can choose to be prompted for elevations. You can create points that are numbered sequentially, or you can choose to manually number the points that you create. To display the Point Settings dialog box, choose Point Settings from the Points menu.
Changing the Point Marker Settings When you create, insert, or import points into a drawing, the appearance of the points varies depending on the Point Marker settings. You can use a custom marker or the AutoCAD POINT node style for the marker. You can set the size of the marker in absolute units or to a percentage of the screen. You can choose a custom marker style for the point node. You can align the marker with the point text rotation.
Working with Points After you establish the point settings, you can add COGO point data to a project. To add point data to the point database, you can create points, or you can import points either from ASCII text files or from database files. To make it easier to select points to reference, AutoCAD Land Development Desktop includes point filters that you can use to select points using one of three methods: from the graphics screen, by typing northing/easting coordinates, or by typing the point number.
To create points by northing/easting Steps Use 1 From the Points menu, choose Point Settings. Overview of Creating Points 2 Click the Point Creation tab to change the Point Creation settings. These settings determine what pieces of information you are prompted for, what information is created automatically for the points, and whether the points you create are inserted into the drawing. Overview of Changing the Point Creation Settings 3 From the Points menu, choose Create Points ➤ By Northing/Easting.
Coordinate Zone Transformations You can perform coordinate zone transformations while importing points. For example, if you import points based on lat/longs into a drawing that uses a UTM zone, then you can specify which zone the points are being imported from. When the points are imported, they are converted to the drawing’s coordinate zone. For more information about performing coordinate zone transformations see “Performing Geodetic Transformations on Points” in this chapter.
To create an import/export format and import points (continued) Steps 2 Click the Add button to display the Select Format Type dialog box. 3 Choose which type of import/export format you want to create. For example, to import an ASCII file, select User Point File and click OK. The Point File Format dialog box is displayed.
To create an import/export format and import points (continued) Steps Use to look up 4 Click the column headings (the buttons) to establish the format. The Select Column Name dialog box is displayed. 5 Select the name of the column. For example, if the first column in an ASCII file contains the point number, then the first column must be set up for point numbers. Each column must be unique—after you use one column name option, it is removed from the list of available column names.
To create an import/export format and import points (continued) Steps Use 9 From the Points menu, choose Point Settings and click the Create tab. Add Points to the Drawing as Points Are Created to look up If you want to import the points into the database only, then clear the Insert to Drawing as Created check box. This significantly increases the speed of the import.
To create an import/export format and import points (continued) Steps Use 12 From the Points menu, choose Import/Export Points ➤ Import Points to display the Format Manager - Import Points dialog box. Import Points into the COGO Point Database to look up 13 Select the source format and the file that you want to import. 14 Select the Add Points to Point Group check box to add the imported points to a point group, then select or create a point group. 15 Click OK to import the points.
Exporting Points To export points from the COGO point database to an ASCII text file, you must set up an import/export format. The export format should reflect the point information that you want to export. For example, you can set up an export format to export point number, northing and easting, elevation, description, and latitude and longitude to an ASCII text file.
Key Concepts ■ ■ ■ Point filters remain active until you turn them off by typing the filter again, or until you select another filter. You can use the .P filter to select points that are in either the drawing or in the project database. Points must be displayed in your drawing in order to use the .G graphical selection filter. To use point filters Steps Use 1 Select a command that prompts you to select points. For example, from the Lines/Curves menu, choose Line.
Editing Points You can edit COGO points in two ways. The method that you use depends upon your preferences, as well as whether the points are in the point database only or located in the drawing as well. The recommended method is to use the Edit Points commands on the Points menu. These commands update the project point file, as well as the points in the drawing.
To edit points using AutoCAD Land Development Desktop commands Steps Use 1 With points in the drawing (or in the point database only), select a point editing command, such as Move, from the Points ➤ Edit Points menu. Overview of Editing Points to look up 2 Select the points you want to move. 3 Select a base point and a point of displacement to move the point(s). To edit points using CAD commands Steps Use 1 With points in the drawing, select a CAD editing command like ERASE.
Whenever you want to change the drawing so that it matches the project point database, or if you want to change project points to match the drawing, you can use the Check Points commands on the Points menu. These commands are invaluable for managing the project point database and drawing points. You can use these commands to Add project points to the drawing. Add drawing points to the project. Remove drawing points from the project. Remove project points from the drawing.
Key Concepts ■ ■ ■ ■ ■ The State Plane coordinates are expressed as grid northing and grid easting coordinates. Local northing and local easting coordinates, the assumed coordinates, are equivalent to the COGO point coordinates in the point database. The Geodetic Calculator supplies “missing” information related to the current zone. For example, if you know the latitude and longitude of a point, then you can type this information into the calculator to compute the grid northing/easting coordinates.
To calculate State Plane coordinates from GPS data Steps Use 1 From the Projects menu, choose Drawing Setup to display the Drawing Setup dialog box. Change the Current Zone for a Drawing to look up 2 Click the Zone tab and select the current zone for the drawing. 3 From the Points menu choose Point Utilities ➤ Geodetic Calculator to display the Geodetic Calculator dialog box. 4 Type the latitude and longitude of the first point that you observed with your GPS into the dialog box.
To calculate State Plane coordinates from GPS data (continued) Steps Use to look up 5 Type the latitude and longitude of the second point that you collected and make a note of the grid northing and grid easting coordinates. You can now use these grid northing and easting coordinates to set the transformation settings for the drawing. 6 From the Projects menu choose Transformation Settings to display the Geodetic Transformation Settings dialog box.
To calculate State Plane coordinates from GPS data (continued) Steps Use to look up 8 Into the Reference Point section, type the grid northing and grid easting coordinates for the first point that you calculated with the Geodetic Calculator. Type the local northing and easting coordinates for the same point. Or, if you already placed that point in your drawing, you can click the Reference Point button and select the point from your drawing.
Managing Points After you create or import points into the project, you can manage the points in several different ways: ■ ■ ■ ■ ■ ■ ■ To control which points are in the drawing and project, you can check for discrepancies between the project points and the points in the drawing. Whenever you want to view the project points, you can insert them into the drawing using a variety of selection methods. To prevent points from being edited, you can lock selected points.
■ If more than one person is working on the project and adding points to the point database, then the points in your drawing may not match the project points. You can update the drawing with the project points by using the Modify Drawing command from the Points ➤ Check Points menu.
Working with Point Groups Point groups are named collections of point numbers that you can select when editing and inserting points, and when choosing points to add to a surface. By saving a collection of points with a name, you do not need to manually select the points each time you perform an operation. A point group does not store point information; the point database always handles point storage. The point group feature lets you organize the points into smaller, more manageable groups.
To create and use point groups Steps Use 1 From the Points menu, choose Point Management ➤ Point Group Manager to display the Point Group Manager dialog box. Create a Point Group 2 From the Manager menu, choose Create Point Group or click to display the Create Point Group dialog box. 3 Type a name for the point group.
To create and use point groups (continued) Steps Use to look up 4 Click Build List to display the Point List dialog box. 5 Use the selection options to build the list. There are simple options and advanced options for building a point list. To use the advanced options, click the Advanced button. 6 Click OK twice to create the point group and then close the Point Group Manager. 7 From the Points menu, choose Lock/Unlock Points ➤ Lock Points.
To create and use point groups (continued) Steps Use to look up 9 Type the name of the group that you just created, or type Dialog to display the Select a Point Group dialog box, from which you can select the point group. The points in the group that you selected are now locked. 10 From the Points menu, choose Lock/Unlock Points ➤ Locked #s to see the list of points that were locked. For more information about point groups use “Overview of Point Groups” in the online Help.
AutoCAD Land Development Desktop includes many symbols that you can use for description keys. These symbols are stored in the c:\Program Files\Land Desktop R2\data\symbol manager\cogo folder. You can also create a custom symbol to use in your drawing, and then use the WBLOCK command to save the block to the symbol folder. If you edit description keys, you can update the drawing with the new settings by using the Modify Drawing command from the Points ➤ Check Points menu.
The point label style controls whether description key matching is on or off, whether full descriptions are substituted for raw descriptions, and whether description key symbols are inserted. The following illustration shows the options on the Point Label Styles tab (select Labels ➤ Edit Label Styles) that control the description keys.
Adding a Utility Pole Description Key The following example shows how you can create a description key using a symbol included with AutoCAD Land Development Desktop. The scenario: You want to create points that represent utility poles and use a prefix of “UP” for all these points. For example, UP5A, UP4B, and so on. By using wild card characters, you do not need to create a description key for each point description—you just create a description key that references the “UP” prefix.
To create description keys (continued) Steps Use 6 From the Manager menu, choose Create Create a Description Key to look up Description Key or click to display the Create Description Key dialog box. 7 For this example, type UP* as the DescKey Code. The asterisk (*) matches any point description that starts with UP. For example, UP5A, UP5B. 8 Type $* as the Description Format.
To create description keys (continued) Steps Use to look up 12 Click OK, and then close the Description Key Manager dialog box. 13 From the Labels menu, choose Edit Label Styles and then click the Point Label Style tab. 14 In the Name box, type Desckey style. 15 In the Data list, choose Point Number and click the Text button. 16 After {Number} in the text box, press ENTER to insert a carriage return. 17 In the Data list, choose Description and click the Text button.
To create description keys (continued) Steps Use to look up 27 Pick the location for a new point. 28 When you are prompted for the description, type UP1A. The description, UP1A, and the utility pole symbol are placed with the point, and the point and the symbol are placed on the specified layers. For more information about description keys use “Overview of Description Keys” in the online Help.
Key Concepts ■ ■ ■ ■ Data substitution in point groups with XDRefs is limited to point name, point label style, description, and elevation. However, you can add any data you want to point labels. XDRefs never actually change the point database information. They only substitute information for what exists in the database or append data to the labels. However, if you use elevations from an external file, then those elevations are used when creating a surface, not the elevations within the point database.
To use XDRefs to label points (continued) Steps Use 6 From the Manager menu, choose Create XDRef to display the Create External Data Reference dialog box. Create an External Point Data Reference 7 Type a name for the external data reference. This name should indicate what type of information you are linking to. For example, if you are linking to description data for boreholes, you can name the XDRef “Borehole-Desc1.” to select the database to use.
To use XDRefs to label points (continued) Steps Use to look up 11 From the Column Name list, select Desc1. This list shows all the columns that exist in the table that you selected. The dialog box should appear as shown in the following illustration. 12 Click OK to create the external reference. 13 From the Labels menu, choose Edit Label Styles. 14 Click the Point Label Styles tab. Edit Point Label Style Properties 15 In the Name box, type a new name to create a new label style, such as Borehole.
To use XDRefs to label points (continued) Steps Use to look up 17 Click the Text button to add that XDRef to the label style. For a borehole label, you may want to label the points with multiple descriptions and elevations. You can also add any other point data, such as point number, to the label style. The upper-left section of the dialog box should appear similar to the following illustration: 18 Click Save to save the style, then exit the dialog box. 19 From the Points menu, choose Point Settings.
4 Working with Drawing and Editing Tools In this chapter ■ Working in Model Space and Layout Mode ■ Working with AutoCAD Land Development Desktop Tools to Create Lines and Curves ■ Working with Basic AutoCAD Commands to Create Objects ■ Working with Text ■ Digitizing ■ Working with Editing Tools ■ Modifying Drawing Objects ■ Grouping Objects Together ■ Attaching External Drawings To increase your productivity, take some time to learn the AutoCAD Land Development Desktop drawing and editin
Introduction This chapter describes how to use the geometry creation and editing tools in AutoCAD Land Development Desktop.
In model space you can work in one or multiple viewports. To make it easier to work on more than one portion of a drawing without having to constantly zoom or restore views, you can configure model space to use multiple, or tiled, viewports. Only one viewport is active at a time. Click a viewport to make it active and to work in it. To create tiled viewports Steps Use 1 From the View menu, choose Viewports ➤ New Viewports to display the Viewports dialog box.
Paper Space and Layout Mode After you complete your drawing in model space, you can arrange a layout of the drawing views to be printed or plotted. Switch to a layout by clicking a Layout button at the bottom of the drawing screen, or by clicking MODEL on the status bar. In a layout, you can create and arrange floating viewports that contain views of the drawings that you created in model space. Tiled viewports differ from the viewports arranged in paper space.
To create an irregular viewport in paper space Steps Use 1 To change to a layout in paper space, click a layout tab or click MODEL on the status bar. Switching Between Model Space and Paper Space 2 From the View menu, choose Viewports ➤ Polygonal Viewport. Creating a New Viewport with Irregular Boundaries to look up 3 Draw the viewport shape on the layout. You can use straight line segments or curves to draw the viewport.
■ ■ ■ If you plan to plot viewports with different scales, it is recommended that you add dimensions in paper space. You can put dimensions and annotations on another layer, and you can make that layer visible or invisible. You can turn off viewports that you do not want to plot. You can also turn off a viewport when you move or resize it to avoid regenerating the drawing. For more information, use to look up “Controlling Visibility in Floating Viewports” in the online Help.
Drawing Spiral Curves Spiral curves are often used in roadway design to achieve more gradual transitions. Instead of having a constant rate of curvature like an arc, the spiral’s curvature is adjusted throughout—a more gradual curvature at the beginning, and then increasing the curvature until the SC (spiral-to-curve) intersection is reached. AutoCAD Land Development Desktop supports four types of spirals: Clothoid, Quadratic, Cosinusoidal, and Sinusoidal.
For most purposes, you can use the Clothoid spiral. However, when designing for extremely high-speed travel, such as for the high-speed rail systems of Europe and Japan, use spirals with quadratic, cosinusoidal, or sinusoidal curvature functions. Key Concepts ■ ■ Do not try to create spiral curves from the ARC or POLYLINE commands. You must use the spiral commands to create spirals. You can create spiral curves using Speed Tables.
Working with Basic AutoCAD Commands to Create Objects You use basic AutoCAD drawing tools to create lines, polylines, curved objects, hatched areas, and text. Key Concepts ■ ■ ■ In general, each basic drawing tool displays prompts for specifying a start point and an endpoint. You can specify these points with the pointing device or by entering coordinate values on the command line. As you use the drawing tools, it is important that you pay attention to the command line.
■ ■ As you draw lines, use drafting settings such as object snaps or grid snaps. Use ORTHO mode to ensure true horizontal and vertical lines and 90-degree corners. Press ENTER or ESC to end the LINE command at any time. If you press ENTER twice, the LINE command is interrupted, and you can start a new line. For more information, use Help. to look up “Drawing Lines” in the online Construction Lines You can use construction lines as visual references when creating and placing other drawing objects.
Key Concepts ■ ■ To make a curved segment in the polyline, select the Arc option and then use the pointing device to specify the arc endpoints. To return to drawing straight line segments, type L (Line) on the command line. To change the width of the polyline segment, select the Width option and specify a width greater than 0. You can also taper the width within each polyline segment by selecting the Halfwidth option. Specify a width at both the start point and the endpoint of the segment.
Curved Objects You can use various methods to create curved objects, such as circles, arcs, ellipses, and donuts. The method you use depends on the information that you have available. Key Concepts ■ ■ ■ ■ ■ Create a circle by specifying a center point, radius or diameter, or tangent points. Choose a method to create circles depending on how you want to control the sequence of point selection.
To draw a curved line (continued) Steps Use to look up 3 Press ENTER, and you are prompted for the start tangent and end tangent. These points determine how the spline is displayed. 4 Return the cursor to the start point of the spline to locate the start tangent point, and then do the same for the end tangent point. You may have to experiment with the placement of the start and end tangent points. After you draw a spline curve, you can edit it with grips. For more information, use the online Help.
■ ■ To create complex boundaries for hatching, create a closed polyline or region, or any closed object. You can use advanced hatching options to detect any areas (islands) inside the boundary and control whether they are hatched. When you edit the hatch boundary, the hatch object adjusts to fit. To hatch an area Steps Use 1 From the Draw menu, choose Hatch to display the Boundary Hatch dialog box.
To hatch an area (continued) Steps Use to look up 2 In the Boundary Hatch dialog box, click the pattern that is displayed in the Swatch box. The Hatch Pattern Palette dialog box is displayed. 3 Select a pattern, and then click OK to return to the Boundary Hatch dialog box. Using Hatch Patterns 4 To hatch an enclosed area, click Pick Points. To hatch objects, click Select Objects. Hatching Areas 5 Specify a point inside a closed boundary, or select an object.
Working with the Symbol Manager There are over 700 symbols accessible via the Symbol Manager that you can insert into your drawings. Symbols are an important element in the preliminary design phase, in site drawings, and in completed as-built road plans. As a working tool, symbols, such as fire hydrants and benchmarks, can be placed in a site plan to produce the finished drawing.
Working with Text An important part of drawing documents is information that you can add to it, such as specifications, labels, titles, and other annotation. To create text in AutoCAD Land Development Desktop, you can choose different fonts in addition to the STANDARD font style. Each font has associated styles, heights, and any special effects, such as inserting text upside down or backwards.
■ ■ ■ You can adjust the slant of the text by specifying the oblique settings for the text. For example, you can place text on a line drawn at a 30-degree angle by entering 30 for the oblique value of the text. When you want to insert short, simple text entries, use single-line text (TEXT command). Use multiline text (MTEXT command) for longer text entries. You are prompted to define a rectangular area to indicate the text’s position in the drawing.
To create text on a curve Steps Use 1 From the Utilities menu, choose Curve Text ➤ Draw Curve Text, or type ctext on the command line. Draw Text on a Curve to look up 2 Select the curve or circle object that you want to label. 3 Press ENTER to display the Curve Text Editor dialog box. 4 In the Text Above box, type the text you want placed above the curve. 5 In the Text Below box, type the text you want placed below the curve. 6 Select a Text Style.
Attaching Notes to Objects Using Notes, you can attach either text or an external reference document to any AutoCAD object in a drawing. In the Notes dialog box, select the Text Notes tab to attach text to an object and select the Reference Documents tab to attach an external reference document. Key Concepts ■ ■ You can use the Notes command to add detailed information to a selected AutoCAD object.
Adding Leaders to a Drawing Leaders are lines that you add to drawings to connect annotation with drawing objects. You can insert leaders that have text or symbols attached to them. There are two methods for adding leaders to your drawing. You can define the attributes of a leader with the annotation settings and then insert the leader in your drawing, or you can insert a predefined leader. Key Concepts ■ ■ ■ You can insert a leader with attributes that you define by changing the Leader Settings.
To insert a predefined leader Steps Use 1 From the Utilities menu, choose Leaders ➤ Predefined Leaders to display the Leaders dialog box. Insert Leaders with Variable Pointers to look up 2 Select the leader that you want to insert and click OK. 3 Depending on the leader that you select to insert, specify the leader attributes. For more information about leaders, use Using Leaders” in the online Help.
For example, if you have a raster image of contour lines, then you can insert the image into the drawing (at world coordinates and correct scale) and then use the Digitize Contours command on the Terrain ➤ Contour Utilities menu to trace the raster image on screen. If you have a paper contour map, then you can use a tablet and a digitizer puck to trace the contours, creating polylines on screen that you can later turn in to contour objects that you can use when building an existing ground surface.
Key Concepts ■ ■ You can rubber-sheet vectors using the Map ➤ Tools ➤ Rubber Sheet command if their source (raster image or paper drawing) is distorted. For example, you can match points on the new vectors you created to control points in your drawing. You can also match points on an image frame (a vector object) to points in the drawing. For more information see “To Rubber Sheet an Object” in the online Help.
Creating a Selection Set with Filters Using the Build Selection Set command, you can create a selection set by setting up object property filters to specify which objects in your drawing you want to include in your selection set. Objects in your current drawing that do not satisfy the filter criteria will not be a part of your selection set. Key Concepts ■ ■ You can specify the object properties that you want to include in the filter by name.
Editing with Grips The standard way to select objects in the drawing is to use grips. Grips are small boxes displayed at various points on a selected object that you can use as “handles” to edit the object. Each AutoCAD Land Development Desktop object contains grips that you can use to stretch, copy, move, rotate, and change the height of an object. NOTE To make sure that grips are turned on, choose Options from the Tools menu, and then click the Selection tab. Under Grips, select Enable Grips.
To edit with grips Steps Use 1 To display grips, press ESC twice to clear any commands. Selecting Objects First 2 Click the object that you want to edit, and then click the specific grip with which you want to work. Grip Mode Cursor Menu to look up 3 Right-click to display the grip editing shortcut menu, and choose an editing command. NOTE Some commands prompt you to enter further options on the command line. 4 After you finish editing, press ESC twice.
Correcting Mistakes You can correct errors in several ways. Most editing commands require that you select drawing objects either before or after the editing process. However, the Undo, Redo, and Oops commands rely only on the previous actions that you have taken. The following table describes the most frequently used methods of correcting mistakes. Frequently used editing commands Command Access Description undo Edit ➤ Undo, or type u on the command line.
Modifying Drawing Objects In AutoCAD Land Development Desktop, you can easily revise drawings. You can either use the commands on the Modify menu, or you can use several editing commands in combination with grips. Select a specific grip, and then right-click to display the grip editing shortcut menu. By using the shortcut menu, you can move, mirror, rotate, scale, and stretch objects. The following sections describe the most common commands used to modify objects.
Moving Objects To move objects, select the objects and specify a start point (base point) and an endpoint (point of displacement). Key Concepts ■ ■ ■ ■ The MOVE command is similar to the basic COPY command, but it does not leave the original object in place. You can use various methods to move objects accurately in the drawing, such as snaps, coordinate values, and object snaps. You can move objects without changing their size or orientation.
■ ■ ■ If you want an object to end precisely at an implied boundary (construction line) or another object, you can extend the object. You can cut an object so that it does not overlap another object by trimming it to the first object. To define the edge at which you want to trim the object, select a line, polyline, arc, circle, or other object.
Using the Utilities Edit Commands With the Utilities Edit commands, you can change blocks, text, and properties of objects. You can also perform a quick scale of an object or a layer, as well as erase all objects on a layer. Key Concepts ■ ■ You can make blocks and text in your drawing smaller or larger. You can change Z coordinates of selected objects to a specified value. To rescale blocks and text Steps Use 1 From the Utilities menu, choose Edit ➤ Rescale Blocks/Text.
Grouping Objects Together Creating Blocks A block is a group of objects that you can define as one object, or block definition. For example, you could use individual objects such as lines and curves to draw a symbol, and then you can define those objects as a block that you can reuse from drawing to drawing. If at some point you must edit the individual objects within the block, then you can explode the block.
To create a block definition Steps Use 1 From the Draw menu, choose Block ➤ Make to display the Block Definition dialog box. Defining Blocks to look up 2 In the Name box, type a name for the block. 3 Click Select Objects. Use any object selection method to select the objects that you want to include in the block definition, and then press ENTER to return to the Block Definition dialog box.
To insert a block Steps Use 1 From the Insert menu, choose Block. Inserting Blocks 2 In the Insert dialog box, click Block to insert an internal block, or click File to insert a block that has been saved as a drawing file. DDINSERT Command 3 Specify the insertion point, scale, and rotation, and then press ENTER to insert the block. INSERT Command TIP To view the insertion point for the block, enter blipmode on the command line. For information, use online Help.
To attach an xref drawing Steps Use 1 From the Insert menu, choose External Reference to display the Select Reference File dialog box. Attaching Xrefs 2 Select the drawing file, and then click Open to display the External Reference dialog box. External Reference Dialog Box to look up 3 Select Attachment and specify the external reference parameters, and verify that under Insertion point, the Specify On-screen check box is selected. 4 Click OK to select the insertion point in the drawing.
5 Working with Surfaces In this chapter ■ Working with the Terrain Model Explorer ■ Creating Surface Data ■ Building Surfaces ■ Editing Surfaces ■ Working with Surface Output and Visualization Tools You can use points, contours, breaklines, and boundaries to generate a model of the earth’s surface for a particular parcel of land. From this model, you can create contours and sections, and by comparing two models, you can calculate volumes.
Introduction After you have input data into a project, you can create a surface model from that data. A surface model is a three-dimensional geometric representation of the surface of an area of land. Surface models in AutoCAD Land Development Desktop are made up of triangles, which are created when AutoCAD Land Development Desktop connects the points that make up the surface data. The triangles form a “triangulated irregular network” (TIN) surface.
Using Point, Contour, Breakline, and Boundary Data in Surfaces Random point data, points taken at a variety of elevations and coordinates as opposed to interpolated contour data, often makes the best surface data. To use points for a surface, you can select point groups or import point files. You can create point groups from the points in the COGO point database. Point files can be ASCII text files or Microsoft Access database files.
Surface Accuracy When gathering data for the surface model, you need to be very thorough so that the model you create is accurate enough for your intended purpose. At the beginning of a project, you can make a quick surface model by digitizing a contour map of the existing site, and create the surface model based on the contours only. If the project is more advanced, and you already have survey data, then you can use the point data from that survey to create a more accurate surface model.
Use the shortcut menus to add the surface data to the surface folder, and then build the surface. In the Volume folder, the Terrain Model Explorer stores information about grid and composite volume surfaces that are created from the volume calculations commands on the Terrain menu. Using the Terrain Model Explorer, you can view properties about the volume surfaces, as well as open, close, and view volume surfaces.
You can keep the Terrain Model Explorer open while you use other commands. Use the buttons in the upper-right corner of the dialog box to minimize, maximize, and close the Terrain Model Explorer. When the Terrain Model Explorer is maximized, the buttons in the upper-left corner appear as shown in the following illustration: Use the first button to minimize the window, use the middle button to return the window to its default state, and use the last button to close the window.
When you add the surface data into the Terrain Model Explorer, you are determining which objects to include in the current build of the surface. These objects can be point groups, point files, breaklines, contours, and boundaries. Key Concepts ■ ■ ■ ■ To create or import point data you must either have point groups defined and points in the COGO point database, or an external point file to import.
The following illustration shows a surface triangulation that does not accurately interpolate the surface elevations, as shown by the cross sections cut from different locations. By defining breaklines, you can control how the triangulation will occur with regard to abrupt changes in the terrain. You can define three types of breaklines. ■ ■ ■ Proximity breaklines: Defines breaklines using the points in the database nearest to the breakline that you draw. You do not have to snap to exact points.
Creating Contours to Use in Surface Generation You can use vector contours, either polylines or contour objects, in surface generation. However, information obtained from a contour map differs greatly from data taken randomly in the field. Since contour map data is interpolated, the information may be less accurate than direct field data. The accuracy of the final surface model depends on the quality of both your contour map and the contour interval.
Creating Boundaries to Use in Surface Generation Boundaries can help eliminate certain surface editing tasks. ■ ■ Boundaries control how the surface TIN lines extend to the surface’s outer limits. Boundaries mask internal areas of the surface to prevent triangulation from occurring.
Building Surfaces After you choose which information to include in a surface, you can build the surface. When you build a surface, all the surface data is processed and the program calculates the surface triangulation. The triangulation is calculated by combining the breakline, contour, and boundary data with the surface point data and interpolating the results. Specifying Data for Surfaces Not all data in your drawing and project must be used in a surface model.
To build a surface Steps Use 1 From the Terrain menu, choose Terrain Model Explorer to display the Terrain Model Explorer dialog box. Create a New Surface to look up 2 Right-click the Terrain folder and choose Create New Surface. 3 Open the new surface folder to display the data tree. 4 Add the data that you want to include in the surface. This data can be points, contours, boundaries, or breaklines. To add a point group to the surface, Right-click the Point Groups icon and select the point group.
To build a surface (continued) Steps Use 5 After you add all the surface data, Right-click the surface name and choose Build Surface to display the Build Surface dialog box. Build a Surface to look up 6 Type a description for the surface. 7 Choose which surface data to use in the surface by modifying the Surface Data Options. You can also choose to build the watershed model, calculate extended statistics, and create an error file when building the surface. 8 Click OK to build the surface.
Building a Watershed Model You can build a watershed model of the current surface either while building the surface or after building the surface. The program uses the surface TIN lines to calculate the channels where water would flow along the surface. From these channels, the command then determines the watershed subareas, also known as catchment areas or regions.
Watershed subareas can have different types of drain targets. Drain targets of some subareas can be based on a boundary point, the point where the channel of water would drain off the surface. Drain targets of other subareas can be depression areas where the water will flow. Key Concepts ■ ■ If the Watershed command determines that water from one TIN surface triangle could flow into more than one watershed subarea, then it splits the TIN triangle to make two triangles.
To build a watershed model (continued) Steps Use to look up 4 Set the watershed model options. You can specify a minimum depression and minimum area to ignore. 5 Click OK to calculate the watershed. 6 Right-click the Watershed icon and choose Import Watershed Boundaries to display the Watershed Display Settings dialog box.
To build a watershed model (continued) Steps Use to look up 7 Use the options in the upper part of the dialog box to control the appearance of the watershed boundaries that are imported. Select Fill With Solids to import solid fill areas, or leave this check box unselected to import polyline boundaries. When you import polyline boundaries, you may also want to select the Display ID Numbers check box to insert the watersheds’ ID numbers within the polyline boundaries.
Creating Finished Ground Data for Surfaces AutoCAD Land Development Desktop has many commands that you can use for creating finished ground data to use for surfaces. The following table summarizes a few of the point, 3D polyline, and contour grading methods you can use for creating finished ground surface data.
Editing Surfaces After building a surface, you should evaluate its accuracy. Did the TIN lines generate as expected? If not, you can go back and define new surface data like points, breaklines, and boundaries. Or, if the changes are small, you can edit the surface TIN directly.
Edit History Whenever you rebuild a surface, you must reapply the edits that you made to it. To save time, all edits that you make to a surface are saved in the Edit History folder in the Terrain Model Explorer. The Edit History folder stores all the edits that you make to a surface so you can automatically repeat them later, when you rebuild the surface. You can open the Edit History folder to view the edits you have made to a surface, as shown in the following illustration.
Viewing Surface Statistics Statistics for each surface are visible by clicking the surface name icon in the Terrain Model Explorer. The following illustration shows the statistics for a surface, including the Extended Statistics. If you want a dynamic display of the elevational characteristics of a surface, see the following section, “Dynamically Viewing Elevational Characteristics of a Surface.” Dynamically Viewing Elevational Characteristics of a Surface When a surface is open, it is loaded into memory.
Key Concepts ■ ■ ■ The surfaces does not need to be drafted in the drawing to obtain elevational information from it. Make sure that the proper surface is set as current. The elevation values are displayed in the status bar at the bottom of the screen. To dynamically display surface elevations Steps Use 1 From the Terrain menu, choose Set Current Surface to make the desired surface model current. Make a Surface Current 2 From the Inquiry menu, choose Track Elevations.
You can use commands in the section window’s Section menu to save the sections as Windows metafiles, copy the sections to the clipboard, and modify the section properties, such as vertical exaggeration, tick increment, and colors. You can also access commands from the section shortcut menu by selecting the section line in the drawing and right-clicking. Key Concepts ■ ■ ■ ■ If you grip edit the section line, the quick section views are dynamically updated.
To view a section of a surface (continued) Steps Use 6 To display a different section view, you can move an existing section line using grips. Grip Edit Quick Section Lines to look up Click a section line to display the grips, select a grip, and then move it to a new location to edit the section line. The section in the window is updated automatically. Creating Contours Contours make it easy to recognize the elevational values of a surface at a glance.
Creating Contours from a Surface When you create contours from a surface, you use a contour style that controls how the contour and contour labels appear. For example, a contour style controls smoothing, grip display for editing contours and their labels, the text style used for labels, and the label position. When you create contours, you choose a style to use and you can also specify elevation ranges, contour intervals, and whether to create the contours as AEC contour objects or polylines.
■ ■ You can use the Manage Styles tab to save contour styles to an external file and also to load contour styles from an external file. This is helpful when you want to use the same contour styles in more than one drawing or in different projects. You can click in the Preview window on the Contour Style Manager and adjust the view angle of the previewed contours by moving your pointing device.
To create contours from a surface (continued) Steps Use to look up 6 Under Properties, choose whether you want to create contour objects or polylines. 7 Under Properties, click Style Manager to display the Contour Style Manager dialog box. Overview of Managing Contour Styles 8 Use the Contour Style Manager dialog box to smooth contours, and to specify the contour appearance, the text style for contour labels, and the label position.
Key Concepts ■ ■ No elevational information for the surface is available while an area is hidden by a boundary. Depending on how well the surface follows the boundary polygon, you may want to make the surface boundary act as a nondestructive breakline in order to trim the triangles exactly at the edge of the boundary. To contour around a pond by using a surface boundary Steps Use 1 Select the current surface.
To contour around a pond by using a surface boundary (continued) Steps Use to look up 8 Press ENTER at the Select polyline for boundary prompt to end the command. The vertices on the boundary are added to the triangulation. The elevations for the breakline are retrieved from the surface model. 9 Use the Create Contours command on the Terrain menu to create contours from the surface. As the contours are generated, you can see that they are not drafted within the polygonal boundary.
Key Concepts ■ ■ ■ ■ The volume results are only as good as the surface definitions. The more complete the surface data, the better the volume calculations. The grid method offers a quick volume result. Because it is a grid, however, you can potentially miss surface irregularities, such as a curb or depressions, which would affect your volume results. This method creates a volume surface that you can view and manage from the Terrain Model Explorer.
To calculate volumes (continued) Steps Use to look up 5 Calculate cut/fill volumes for the site. Volumes are calculated based on the method that you choose. To use the grid method, select Terrain ➤ Grid Volumes ➤ Calculate Total Site Volume. To use the composite method, select Terrain ➤ Composite Volumes ➤ Calculate Total Site Volume. To use the section method, select Terrain ➤ Section Volumes ➤ Calculate Volume Total.
■ ■ You can create a range map that displays the cut areas in one color and the fill areas in another. You can create cut/fill contours on a volume surface. The volume surface Z value is the cut/fill depth instead of an elevational value. To present volumes results Steps Use 1 Select the volume surface as the current surface. Make a Surface Current 2 From the Terrain menu, choose Create Contours to create cut/fill contours.
Key Concepts ■ ■ You can draw the range view as 2D solids or 3D faces, and you can view the faces in plan or 3D perspective. When using the banding methods, the program automatically splits surface triangles to properly match the range that you define. In other words, if you created the triangle between points that range from 90' - 120', then the program would break this into individual faces at 90', 100', 110', and 120'. This ensures that the elevational banding is properly presented.
Projecting 2D Lines onto a 3D Grid You can project 2D objects such as lines, curves, and polylines from a flat drawing plane onto a 3D surface grid. This is an effective way to present information such as a road location, building outline, or property boundary. Key Concepts ■ ■ ■ ■ You can project lines, curves, and polylines onto the grid. The objects are drawn on a separate layer. For a smoother site, set the number of “facets” per grid face to a higher number.
6 Creating Cadastral Information In this chapter ■ Working with Alignments ■ Working with Parcels Creating cadastral information with AutoCAD Land Development Desktop is a two-step process. First, you create the geometry—such as the roadway centerlines and parcel boundaries—and then you define the geometry as alignments and parcels.
Introduction You can draft horizontal alignments and parcels at any time during the project process. The project does not need existing surfaces before you create alignments or parcels. You begin by drawing simple objects, like lines, curves, spirals, or polylines to represent the geometry of the alignment or parcel. You then define the alignment or parcel to a database. All the data is stored in an external database, so all drawings in the project can access that data.
Because the alignment definitions are stored outside the drawing in a database, you have added flexibility when managing alignments: ■ ■ ■ If other projects contain alignments that you want to include in the current project, then you can merge the alignment databases and import the alignments into the drawing.
Backwards Compatibility with Single-User Alignment Databases To share the alignment database with someone using Release 1 of AutoCAD Land Development Desktop, you can save the alignment database as a project.adb file, the previous format of the alignment database. To do this, use the Save as .adb command on the Alignments ➤ Alignment Commands menu. For more information about the alignment database, use to look up “Overview of the Horizontal Alignment Database” in the online Help.
To create spirals, use the Spiral commands on the Lines/Curves menu. If you know the intended speed for the alignment, then you can draw spirals using an AASHTO or user-defined speed table, which automatically calculates superelevation information for the alignment. Key Concepts ■ ■ If you use the Lines/Curves menu commands instead of PLINE or LINE, then the lines, curves, and spirals are drawn tangent to their adjacent object. You can define more than one alignment from the same alignment geometry.
Defining an Object as a Road Alignment By defining figure geometry as an alignment, all the individual geometric components (lines, arcs, and spirals) become linked as a single object, and the alignment data is saved to the database in the project folder. By storing this data in an external database, you can access the alignments from all drawings in the project. After you define an alignment, it is not necessary to draft the alignment in your drawing.
Making an Alignment Current When you work with alignments, always make sure that the correct alignment is current. Alignment commands work only with the current alignment. Only one alignment can be current at a time. When you define an alignment, it automatically becomes the current alignment. You can select the current alignment either from the drawing, from the Alignment Librarian, or by alignment number. The following illustration shows the Alignment Librarian.
■ To release a lock on the current alignment, you can make a different alignment current, or you can use the Close Database command on the Alignments ➤ Alignment Commands menu to close the database and release the lock. To make an alignment current Steps Use 1 From the Alignments menu, choose Set Current Alignment. Make an Alignment Current to look up Your cursor turns into a pickbox.
Editing a Road Alignment To edit an alignment, you can either edit the geometry and redefine the alignment, or edit the alignment data from within the Horizontal Alignment Editor. Use the Horizontal Alignment Editor to edit individual curve, tangent, and spiral geometry, and to generate reports based on the alignment. When you save changes, drawing objects are automatically updated, so you do not need to redefine the alignment geometry.
To edit a road alignment Steps Use 1 Select the current alignment. Make an Alignment Current 2 From the Alignments menu, choose Edit to display the Horizontal Alignment Editor dialog box. Overview of Editing Horizontal Alignments 3 To edit a curve, place your cursor in a cell where there is a curve point of intersection (PI), and then click the Edit Curve button.
Use the Import command when you want to bring a defined alignment into a drawing. For example, if you start a new drawing in a project, then you can use the Import command to bring the project’s alignments into the drawing. You can also use the Import command to bring alignments into the drawing after you have merged alignments from another project into the current project’s alignment database.
To delete multiple alignments from the drawing (continued) Steps Use 3 Select one or more Delete Options. You can delete the alignment from the screen, the database, or both. Delete Multiple Horizontal Alignments to look up You can also delete any vertical files that are associated with the alignment. These are the alignment’s profile and cross section files that are created with Autodesk Civil Design. 4 Click Delete to delete the selected alignments. A confirmation dialog box is displayed.
To draft road results Steps Use 1 Select the current alignment. Make an Alignment Current 2 From the Alignments menu, choose Create Offsets to display the Alignment Offset Settings dialog box. Offset Alignments to look up 3 Select the offsets that you want to create and enter names for them. 4 To define offsets to the Horizontal Alignment Database when they are created, select the Define offset alignments check box. 5 Click OK to create the offsets.
To draft road results (continued) Steps Use 6 From the Alignments menu, choose Station Display Format. Change the Station Display Format to look up 7 Select the station format options and click OK. 8 From the Alignments menu, choose Station Label Settings to change the station label settings. Change the Alignment Label Settings 9 From the Alignments menu, choose Create Station Labels to create station labels.
Working with Parcels When you create base maps or do subdivision work, you define parcels of land. Parcel boundaries define the area and the limits of each parcel. You can define parcels from survey figures, points, lines, curves, or polylines. If you are creating parcels by area, then you can use the Parcel Sizing commands to create parcels of exact areas. Like alignments, parcel definitions are stored in an external database so multiple people can access them.
If you use polylines to draw parcel geometry, then you must break crossing polylines before defining the parcels. Also, delete any duplicate lines that you may have drawn where two parcels abut each other. You can break crossing lines and erase duplicate lines by using the AutoCAD Map Cleanup command. For more information, see “Cleaning Up Maps” in Chapter 8, “AutoCAD Map and AutoCAD Land Development Desktop.
Defining Parcels to the Parcel Database As with alignments, you must define parcels to the parcel database so that the individual geometric components points, lines, arcs, or polylines, become linked as a single object. This parcel data is stored in a database in the project folder. When you define parcels to the database, you can label them and perform mapcheck calculations on them, depending on what you specify in Parcel Settings.
To define parcels to the parcel database (continued) Steps Use to look up 4 Under Parcel Numbering, select the Sequential on check box. This option numbers the parcels sequentially. If you clear this check box, then you are prompted for the parcel number each time you define a parcel. You can use alpha-numeric characters for parcel numbers. 5 Under Parcel Numbering, select the Labels on check box. This option labels each parcel with its number.
Managing Parcels You can use the Parcel Manager to import, delete, and rename parcels, as well as report area, inverse, and mapcheck information. Key Concepts ■ ■ ■ ■ ■ Use the Rename option to assign alpha-numeric names to the parcels. You can import parcels into a drawing if you have either erased the parcel lines or want the parcels to be visible in a different project drawing. Erasing the parcels with the ERASE command does not remove the parcel database definitions.
To report parcel areas Steps Use 1 Define the parcel to the parcel database. Overview of Defining Parcels 2 From the Parcels menu, choose Parcel Manager to display the Parcel Manager dialog box. Overview of Managing Parcels to look up 3 In the Select Parcel list, select one or more parcels about which you want to report information. When you select a parcel, it is marked with an asterisk. In the following illustration, the parcels named lot1 and lot2 are selected.
7 Listing and Annotating Plans In this chapter ■ Listing Object Data ■ Labeling Objects To check object characteristics, you can perform inquiries which list object data at the command line or in a dialog box. To label objects with selected information, you can create dynamic and static labels, and you can create object tables that list detailed information about tagged objects in the drawing.
Introduction In a drawing, geometry can be difficult to interpret if it is not given a context, especially when you receive a drawing from someone else. To check object characteristics, you can perform an inquiry on a drawing object. An inquiry shows you information about the selected object on the command line, the status bar, or in a tracking window.
Inquiry commands Command Function Distance Measures the distance between two points. Area Calculates the area and perimeter of objects or defined areas. Mass Properties Calculates and displays the mass properties of regions or solids. List Displays database information of selected objects. ID Point Displays the coordinate values of a location. Time Displays the date and time statistics of a drawing. Status Displays drawing statistics, mode, and extents.
■ ■ ■ List which breaklines are defined in the project by using the List Breaklines command from the Breaklines shortcut menu in the Terrain Model Explorer. Show statistics for a surface model in the Terrain Model Explorer. Create alignment, stakeout, volume, and parcel reports. To track the elevation of a surface Steps Use 1 Build a surface. Build a Surface 2 Make that surface the current surface. Make a Surface Current 3 From the Inquiry menu choose Track Elevation.
To list which alignments are defined in the project Steps Use 1 Define at least one alignment. Overview of Defining Alignments 2 From the Alignments menu, choose Alignment Commands ➤ List Defined. List the Alignments that are Defined in the Current Project to look up The defined alignments are listed in the AutoCAD Text Window. 3 Press any key to continue.
the objects with dynamic labels, then whenever you edit the style, the labels are updated to reflect the edited style. Point label styles control the use of description keys for points, and they can also be formatted to label points with information that is located in external Microsoft Access databases. For more information about label styles see “Editing Label Styles” in this chapter. Accessing Labeling Commands You can access the labeling commands in one of three ways.
Style Properties Dialog Bar You can use the Style Properties dialog bar to choose the current label styles, to switch between tag and normal label styles, to change the label settings, and to edit label styles. To display the Style Properties dialog bar, select Show Dialog Bar on the Labels menu. You can dock the dialog bar either on the top or bottom of the graphics window if desired, but not to the side.
To label lines with dynamic labels (continued) Steps Use to look up icon is displayed. When this 3 Verify that the icon is visible, only regular label styles are displayed in the Current Label Style list. If the icon is displayed, the list of styles shows only tag label styles. You can click the tag icon to display the labels icon. 4 Click the Line tab. 5 Select a style from the list, like direction above, distance below. to display the Label Settings 6 Click dialog box. 7 Click the General tab.
To label lines with tag labels and create a table Steps Use 1 Use the LINE command to draw some lines. LINE Command 2 From the Labels menu, choose Show Dialog Bar to display the Style Properties dialog bar. Select the Current Label Style from the Preferences Dialog Box to look up icon is displayed. When this 3 Verify that the icon is visible, only tag label styles are displayed in the Current Label Style list. If the icon is displayed, then the list of styles shows only regular label styles.
Editing Label Styles AutoCAD Land Development Desktop includes several different default label styles. You can edit these styles if needed, and you can create new styles. A label style controls the appearance of the label text, such as the style, label offset, text layer, and text justification. A label style also controls what pieces of information the label contains, such as direction and distance. These are called data elements.
To edit a line label style (continued) Steps Use to look up 3 From the Name list, choose the name of the Label Style that you want to edit. 4 When you select a style, the Text Above and Text Below sections of the dialog box display the selected data elements. The box on the right shows you a preview of this label. If you want to edit any elements of the selected style, then you can type modifications in the Text Above and Text Below boxes, or delete existing text in these boxes.
8 AutoCAD Map and AutoCAD Land Development Desktop Using the AutoCAD Map commands, you can work with the data in more than one drawing at a time by In this chapter ■ Using the AutoCAD Map Project Workspace ■ Map Projects and Drawing Sets ■ Defining Queries ■ Saving Queried Data ■ Inserting GeoReferenced Images ■ Digitizing Maps ■ Cleaning Up Maps ■ Assigning Data to Objects in a Drawing ■ Performing Zone Conversions Using AutoCAD Map ■ Creating Topologies ■ Creating Overlay Topologies
Introduction AutoCAD Land Development Desktop incorporates the full functionality of AutoCAD Map® 2000. All mapping commands are located in the Map menu. You can use the AutoCAD Map commands to create, manage, analyze, and plot plans that include geographical as well as statistical data. Using the AutoCAD Map commands, you can ■ ■ ■ ■ ■ ■ ■ ■ ■ ■ Access, query, and edit data from multiple drawings, and then save the changes back to the original drawings.
Using the AutoCAD Map Project Workspace You can use the AutoCAD Map Project Workspace to manage attached drawings, queries, databases, topologies, and link path names in the current Map project. NOTE In AutoCAD Map, the current drawing is called a project. A Map project is a drawing file that lists and controls the items that are defined for the current work session. It does not manage the AutoCAD Land Development Desktop project data based on the current Land Desktop project that you are working in.
Map Project Workspace Shortcut Menus Each item in the workspace has its own shortcut menu where you can access commonly used commands. For example, if you click on the Drawings folder and then right-click, the following shortcut menu is displayed. You can place your cursor inside the workspace window, right-click, and select Docked to undock the workspace and move it. To hide the Project Workspace, right-click in the Project Workspace and then select Hide.
Map Projects and Drawing Sets When you use the Map commands, you can work with your drawings in two different ways. Sometimes you open .dwg files directly and work on them. Other times you can attach other drawings to the Map project to create a drawing set. Then you can query objects from the drawing set into the Map project. NOTE In AutoCAD Map, the current drawing is referred to as a project.
Drawing Sets and AutoCAD Land Development Desktop Projects Attached drawings can be associated with any AutoCAD Land Development Desktop project. For example, you can attach Drawing A in Project A and Drawing B in Project B to the same Map project. For example, if you are working on a job that contains two or more AutoCAD Land Development Desktop projects, then you can create a drawing set that shows the drawings in both projects so you can see an overall view of the job.
To set up a Map project Steps Use 1 Create a new drawing. Start a New Drawing NOTE to look up Have at least two existing drawings that you can use as source drawings for this exercise. 2 From the Map menu, choose Drawings ➤ Define/Modify Drawing Set to display the Define/Modify Drawing Set dialog box.
To set up a Map project (continued) Steps Use 3 Click Attach to display the Select Drawings to Attach dialog box. Attach Drawings 4 To attach a drawing, it must be located in a drive alias location. The default drive alias is your c:\ drive. If the drawings that you want to attach are located on another drive, then you must set up an alias.
To set up a Map project (continued) Steps Use 5 Click the Create/Edit Aliases button, as shown below, to display the Drive Alias Administration dialog box. Drive Alias Administration dialog box to look up 6 Define the drive alias. For detailed instructions about how to define the alias, click the Help button on the dialog box. 7 Click OK to return to the Select Drawings to Attach dialog box. 8 Open the folder where the drawings are stored. 9 Select the drawing name and then click Add.
You can now create a query to bring objects from the attached drawings into the Map project. For more information, see “Defining Queries” in this chapter. For more information about Map projects, use Projects” in the online Help. to look up “About Defining Queries A query is a retrieval method. You define what you want to bring into a Map project, and the query brings that data into the drawing from other drawings or databases.
The Purposes of Queries When should you perform a query? ■ When you want to work on data contained in more than one drawing at the same time. You can create a Map project and query the objects from two or more drawings. This type of object query actually copies the source objects into the Map project. You can then edit the objects from different drawings simultaneously, and save the edits back to the source drawing if you want.
The following task describes how to bring objects into a Map project from the source drawings. To define an object query Steps Use 1 Create a new drawing. This is your Map project. Create a Project 2 Attach the source drawings to the Map project. These drawings should contain at least one object that you can query. Attach Drawings 3 From the Map menu, choose Drawings ➤ Zoom Drawing Extents.
To define an object query (continued) Steps Use 7 Click Location to display the Location Condition dialog box. Location Condition dialog box 8 Under Boundary Type, select Window. Boundary Type Area to look up 9 Click Define and draw a window around the objects that you want to query. The Define Query dialog box is displayed. 10 Under Query Mode, select Draw. NOTE Choose a Query Mode You can click Preview to create temporary objects, or you can click Report to create a report.
Saving Queried Data When you work within a Map project, you can save any edits that you made to the back source drawings. The items that you choose to save back are called a Save Set. NOTE This topic describes the save options for only the AutoCAD Map commands, not for the entire AutoCAD Land Development Desktop program. Key Concepts ■ ■ ■ The data that you query from source drawings is readable and writable by default.
To save back objects to the source drawing (continued) Steps Use to look up 4 Click the Save Back tab. 5 Under Save Set, select Add Objects Automatically Without Prompting. 6 Under Save Back to Source Drawings, clear the Erase Saved Back Objects check box. This keeps a copy of the objects in the Map project when you save the objects. If you clear this check box, then any time you save the drawing, the edited objects are removed from the drawing. 7 Click OK.
To save back objects to the source drawing (continued) Steps Use to look up 9 Click Yes to add the object you just edited to the Save Set. You see the message, “1 object(s) added to save set.” 10 From the File menu, choose Save. The Save Objects to Source Drawings dialog box is displayed. 11 Click OK to save the objects back to the source drawings. For more information about saving, use Options” in the online Help.
To insert a Geo-TIFF image into a drawing Steps Use 1 From the Map menu, click Image ➤ Insert to display the Insert Image dialog box. Insert Image dialog box to look up 2 Locate the file you want to insert, and verify that the Modify Correlation check box is selected, as shown in the following illustration. In this example, the image that is selected is a GeoTIFF, an image that has correlation data stored within the image file.
To insert a Geo-TIFF image into a drawing (continued) Steps Use 3 Click Open to display the Image Correlation dialog box. Image Correlation dialog box 4 Select Image File as the correlation source. Or you can change the Insertion Values if required. 5 Click OK to insert the image into the drawing. You may need to use the Extents option of the ZOOM command to locate the image in the drawing.
Digitizing Maps Before you can create a map topology and analyze a map, you must create the underlying map geometry if it doesn’t already exist. To do this, use the Digitize command. Digitizing is the process of creating vector lines by tracing non-vector geometry. The geometry can be supplied in the form of a paper map that you trace using a tablet and a digitizer puck, or in the form of a raster image, such as an aerial photo of a parcel map or a government soils map.
To digitize a raster image (continued) Steps Use 3 From the Map menu, choose Data Entry ➤ Digitize Setup. Set Up for Digitizing to look up Digitize Links and Nodes For digitizing lines, select the Linear option. For digitizing nodes, select the Nodes option. Click the Help button in the dialog box for more detailed information about the settings. 4 From the Map menu, choose Data Entry ➤ Digitize. MAPDIGITIZE 5 Select points (or vertices of polylines if you are digitizing lines) on the raster image.
Using the Cleanup Command to Break Parcel Lines In order to define a parcel with the Parcel commands, or to create a parcel topology, the parcel lines in your drawing cannot cross each other. You must break any parcel lines that cross. For example, the following illustration shows how you might have digitized two adjacent parcels. Polyline A (dashed line) goes around the outer boundaries of both parcels. Polyline B (solid line) is the boundary between the parcels.
To break the polylines, use the Cleanup command. The following illustration shows how the polyline was broken when using the Cleanup command. Polyline A was broken up at the locations marked by ’s so that Parcel 1 and Parcel 2 are made up of discrete polylines. To obtain this result, run the Cleanup command and select both the option to Break Crossing Objects and the option to Correct Automatically.
Checking a Drawing for Crossing Breaklines Use the Cleanup command to check an AutoCAD Land Development Desktop drawing for breaklines that may cross each other. Breaklines that cross each other at the same elevation should not cause any problems when you build a surface. However, if breaklines cross at different elevations, the surface may not be built properly.
To check the drawing for crossing breaklines (continued) Steps Use to look up 4 Click OK to return to the Drawing Cleanup dialog box. 5 Click the Cleanup Options button to display the Cleanup Options dialog box. Cleanup Options dialog box 6 Under Edit Geometry, select the Break Crossing Objects check box. 7 Under Correction Method, select the Correct Manually option. This method does not change anything in your drawing, it only places markers where it locates problems.
To check the drawing for crossing breaklines (continued) Steps Use to look up 10 Type M to draw markers where the command found crossing objects. You can then use the other command line options to break the objects, examine each crossing object, and highlight the markers. For more information about cleaning up maps, use “About Preparing Maps” in the online Help.
For example, define object data for a parcel map and then create a report. Paste the report into Microsoft Access, and then create point objects in the center of each parcel. You can then use the point labels to label the points with parcel number, soil type area, and area of buildable land. Key Concepts ■ ■ You can assign data to objects as you digitize them or later. Object data tables that you create are stored in the drawing. However, you can also attach data from an external database.
To assign object data to points, lines, arcs, or polylines (continued) Steps Use 3 Click New Table to display the Define New Object Data Table dialog box. ADEDEFDATA 4 In the Table Name box, type a name for the table. Table Name box 5 Under Field Definition, type a field name. For example, if you want to assign parcel numbers to a parcel map, type NUMBER as the field name. NOTE to look up Field Definition area This name must have no spaces in it.
To assign object data to points, lines, arcs, or polylines (continued) Steps Use 10 From the Map menu, choose Object Data ➤ Attach/Detach Object Data to display the Attach/Detach Object Data dialog box. Attach Data to an Object to look up 11 From the Table list, select the table that you created. 12 Under Object Data Field, select the field that you want to enter information for, such as “The parcel number.” 13 In the Value box, type the value for that field, such as Parcel 123.
Performing Zone Conversions Using AutoCAD Map You may at times receive drawings of the same region that were created in different coordinate zones. For example, one drawing was created in NAD83 metric, the other in NAD83 feet. To get both of the drawings to line up correctly, you can perform a zone conversion by setting up a Map project, and then specifying the coordinate zones for the source drawing and the Map project. Key Concepts ■ ■ ■ This is a quick way to convert zones.
To perform zone conversions (continued) Steps Use 3 From the Map menu, choose Tools ➤ Assign Global Coordinate System to display the Assign Global Coordinate System dialog box. Assign a Coordinate System to a Drawing or Project 4 Under Active Project, click Select Coordinate System to display the Select Global Coordinate System dialog box.
To perform zone conversions (continued) Steps Use to look up 7 Choose the source drawing, and then click Add. 8 Click OK to return to the Assign Global Coordinate System dialog box. 9 Under Source Drawings, click Select Coordinate System to display the Select Global Coordinate System dialog box. 10 Select the coordinate system of the source drawing and then click OK to return to the Assign Global Coordinate System dialog box. 11 Click OK to close the dialog box.
Node Topologies Node topologies are made up of point nodes. You can create a node topology for borehole data, and then perform a thematic query that shows the core materials at a depth of 10 feet, for example. Network Topologies Network topologies are made up of lines and arcs that are associated with each other, such as a street map or stream network. For example, you can create a network topology out of all the roads in a city.
Creating Polygon Topologies and Assigning Data to the Polygons Unlike points and linear objects, a polygon is an enclosed area that is defined by lines, arcs, or polylines. It is not an object in and of itself and therefore, you cannot assign object data directly to it. However, when you create a polygon topology, centroids are created for the polygons. This centroid acts as the polygon object. After the centroids are created, you can assign object data to the polygons.
To create a polygon topology (continued) Steps Use 6 Under Topology Objects, click the Link Objects button to display the Link Objects dialog box. Link Objects dialog box to look up 7 Under Object Selection, use one of the selection methods to select the polygon geometry. Click Help for more detailed information about selecting objects. 8 Click OK to return to the Create Topology dialog box. 9 Under Polygon Options, select the Create Missing Centroids check box. 10 Click Proceed to create the topology.
Creating Overlay Topologies Overlay topologies show how topologies relate to each other. For example, you can overlay a parcel map topology with a soils map topology. Then, basing your calculations on soil type, you can determine the buildable area on each parcel. An overlay topology includes a source topology and an overlay topology. The results of the overlay topology depend on which topology you choose as the source topology.
Key Concepts ■ ■ After you create an overlay topology, you can shade or hatch specific areas by creating a thematic map. For more information, see “About Thematic Maps” in the online Help. You can create reports on your overlay topologies that you can edit in Microsoft Excel or Microsoft Access. You can then paste the reports into the drawing. To create an overlay topology Steps Use 1 Create a soils map topology. For more information, see “Creating Topologies” in this chapter.
To create an overlay topology (continued) Steps Use 5 Under Input Topology, click Load to display the Load Topology dialog box. Input Topology area to look up 6 Under Topology Location, select the Source Drawings option. 7 Under Topology Name, select the name of the topology that you want to use as the source topology. All the currently defined topologies in the Map project are listed in the Name list, regardless of which source drawing they are located in.
To create an overlay topology (continued) Steps Use 13 Under Result Topology, specify a name, description, and layer for the resulting topology. Result Topology area to look up 14 Click Proceed to create the overlay topology. For more information about topologies, use Two Topologies” in the online Help. to look up “Overlay Plotting Maps To plot maps, you must create a plot map set. This set contains all the information you need to plot a map or a series of maps.
Index alignments, 208 current, 213 deleting and importing, 216 editing, 215 geometry, 210 making into one object, 212 offsetting, 218 stationing, 218 annotation, leaders, 157 APWA symbol standards, 152 arcs, 142, 148 ASCII text files, 111 AutoCAD Land Development Desktop, 2 accessing commands, 35 AutoCAD Map, 240 documentation, 22 exiting, 93 filepath naming conventions, 23 options settings, 55 preference settings, 48, 55 project structure, 12 projects, 59 starting, 32 upgrading from Autodesk S8 Civil/Surve
digitizing (continued) maps, 257 methods, 159 donuts, 148 drag and drop functions project workspace, 242 drawing aids, 85 construction lines, 146 hatch patterns, 149 reference points, 87 snap points, 87 drawing objects, 145 block definition, 169 curved objects, 148 lines, 145 polylines, 146 text, 153 drawing sets, 243 drawing settings points, 102 prototypes, 61 drawing tools lines and arcs, 142 special lines, 144 spiral curves, 143 text, 153 drawings adding external drawings, 171 cleaning up, 258 correcting
notes, 156 object data exporting, 263 listing, 228 Object Enabler, 71 object snaps, 87 Object Viewer, 73 objects and proxy graphics, 72 assigning data, 263 changing properties, 79 custom, 72 editing, 160 labeling, 231 modifying, 165 online Help accessing, 25 printing entire file, 26 printing single Help topic, 28 options, profiles, 58 options, AutoCAD drawing environment, 55 window display, 57 overlay topologies, creating, 273 paper space, 138, 140, 141 parcels, 221 cleaning parcel lines, 259 geometry, 221,
settings drawing environment, 55 point marker, 104 points, 102 profiles, 56 prototypes, 52, 61 window display, 57 shortcut menus, 42 labels, 232 Map workspace, 242 snaps, 87 spiral curves, 143 splines, 148 starting AutoCAD Land Development Desktop, 32 stretch objects with grips, 162 subdivisions parcels, 221 surface cutting cross sections of, 194 data, 178 editing, 191 masking regions, 199 projecting 2D lines onto 3D grid, 206 viewing in 3D, 204 viewing information about, 193 vizualizing, 192 watershed mode