
Technical data


Creating a Production Drawing
30
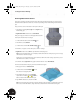
Shading a View
You can also enhance the appearance of your drawing views.
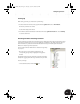
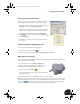
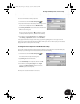
To shade the isometric view:
1. Move the cursor over the isometric view (avoid placing the
cursor over lines in the view), right-click and then choose
Edit View.
2. In the Drawing View dialog box, click the Shaded
button and then click OK.
Adding Dimensions
Next, you can add some dimensions. The dimensioning tools, as well as other drawing annotation tools, are also
conveniently located on the Panel bar.
To display drawing annotation tools on the Panel bar:
• Click the title bar (or right-click the background) on the Panel bar and choose
Drawing Annotation Panel.
Rather than creating dimensions from scratch, you can use the dimensions that
define the 3D part.
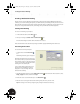
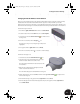
To retrieve the model dimensions for a specific drawing view:
1. Move the cursor in the front view (upper-left corner of the drawing
sheet), right-click, and then choose Retrieve Dimensions.
2. In the Retrieve Dimensions dialog box, click the Select Parts option
and then select any line in the front view.
The model dimensions appropriate for the front view of the part are
displayed.
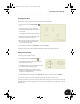
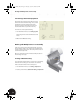
3. In the Retrieve Dimensions dialog box, click Select Dimensions.
4. To identify the dimensions you want to keep, drag a rectangle around all the dimensions in the front view.
5. In the Retrieve Dimensions dialog box, click OK.
The dimensions in your drawing are probably superimposed over the part geometry. You can reorient the
dimensions simply by dragging them to a new location.
You can also use the Zoom All , Zoom Window , and Pan tools to adjust your viewing orientation.
INV8_TD_Book5.book Page 30 Tuesday, October 28, 2003 10:51 AM