
Technical data

Entering the Third Dimension
16
3. Repeat the previous steps for the vertical dimension
using a value of 15.5.
4. To quit the General Dimension tool, press the Esc key
or right-click in the graphics window and then
choose Done.
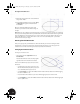
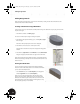
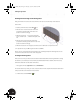
When you are finished defining the values of the
dimension, your sketch should look like the image on
the right.
Note: When you enter a dimension using the keyboard, you need not enter “23 mm”; entering “23” is sufficient
because you have already defined mm as your default unit of measurement. Autodesk Inventor recognizes both
metric and English units of measurement. You can even use both units in the same drawing. Also, there is no
need to fully dimension or constrain the model as is the case in some other CAD systems — just add the
dimensions relevant for your design.
Entering the Third Dimension
Now you are going to turn your 2D sketch into a 3D model. Thus far, you have been viewing the sketch
perpendicular, or normal, to the sketch plane. To better visualize the model, you can change your view
orientation to an isometric view, which gives a better representation for 3D models.
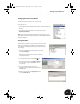
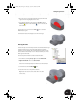
Changing the View Orientation
To change to an isometric view:
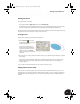
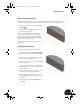
• In the graphics window, right-click and choose
Isometric View.
Notice that the dimension values are always legible
regardless of the view orientation of the sketch.
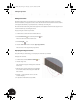
Here are some additional tips if you cannot see all the
dimensions:
• Use the wheel on your mouse to zoom in or out.
Turn the wheel forward (away from you) to zoom
out, or backward (toward you) to zoom in.
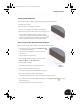
•Use the Zoom tool or press and hold F3, and then hold the left mouse button down while dragging
the cursor to zoom in or out.
• Press and hold the wheel button on your mouse while dragging the cursor to Pan the view.
•Use the Pan tool or press and hold F2, and then hold the left mouse button down while dragging the
cursor to pan the view.
INV8_TD_Book5.book Page 16 Tuesday, October 28, 2003 10:51 AM