
Technical data


Sketching Your First Part
15
Determining the Size of Your Sketch
To determine the size of your sketch, you will need to add some dimensions. Autodesk Inventor can generate
many different dimension types — linear, angular, radial, diameter, and so forth —using one simple
dimensioning tool.
Adding Dimensions
To add dimensions to your elliptical sketch:
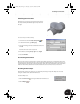
1. On the Panel bar, scroll down and click the General
Dimension tool.
2. Move the cursor over the ellipse. An icon is displayed next to
the cursor for dimensioning the ellipse.
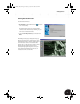
3. To add a horizontal dimension, select the ellipse and then
move your cursor above the ellipse. A preview of the
dimension is displayed.
4. To place the horizontal dimension, click above the ellipse.
The General Dimension tool is still active, which allows
you to continue adding dimensions.
5. To place a vertical dimension on the ellipse, select the
ellipse again and then click to the right of the ellipse to
place the vertical dimension.
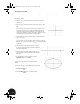
Apart from the values, your results should resemble the image shown above.
Defining the Dimension Values
The value of the dimension depends on the exact location of your mouse-clicks during sketching. We want to
modify the dimension values to be precisely 23 mm for the horizontal value and 15.5 mm for the vertical value.
To define specific values for the dimensions:
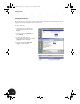
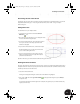
1. Select the horizontal dimension.
A dialog box is displayed showing the current value of the dimension highlighted.
2. Type a value of 23 and click the green check mark on the right of the dialog box (or press Enter) to
accept that value.
Since the Autodesk Inventor software application is adaptive, the geometry of your sketch automatically
adjusts to the new value.
INV8_TD_Book5.book Page 15 Tuesday, October 28, 2003 10:51 AM