
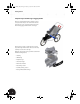
Technical data


Sketching Your First Part
14
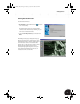
To sketch the ellipse:
1. Move the cursor into the sketch area. The cursor now turns into a
yellow point.
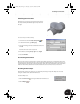
2. Move the cursor over the intersection of the axes as shown on the
right.
As you move the cursor close to the intersection of the two axes,
notice that the yellow point is snapped and held at the point of
intersection. It isn’t necessary for the point to be snapped to this
location, but it will help you later to easily refer to the base location.
You will find out more about this later in this test drive.
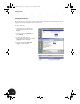
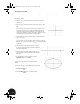
3. Click to define the center point of the ellipse, and then move the
cursor to the right.
As you move the cursor to the right, a dynamic green line appears.
When this line is close to horizontal, a gray icon is displayed next
to the cursor.
4. Move the cursor in a horizontal direction to the right
by about 10 grid boxes and then click. This defines the
principal horizontal axis.
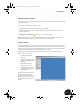
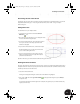
5. Move the cursor up until the elliptical shape of your
sketch is similar to the image shown on the right, and
then click.
6. To quit the Ellipse tool, in the graphics window,
right-click and then choose Done.
You have just created the basic contour of your first
sketch.
If you make a mistake or are not satisfied with your results:
1. Click the Undo tool.
2. Click the Ellipse tool to re-create the ellipse.
INV8_TD_Book5.book Page 14 Tuesday, October 28, 2003 10:51 AM