
Installation guide

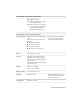


After you click the Configure button, the following dialog boxes and options
are displayed:
■ Select the Installation Type - Typical or Custom. If you choose a Typical
installation (default settings), the product installs the most common
application features. To see which features are included in a Typical
installation, refer to When performing a Typical installation, what gets
installed? on page 38 If you choose Custom, you select specific features to
install.
■ Include a Service Pack - If a service pack is available for your installation,
you can include it.
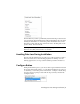
When you have completed your choices, click the Configuration Complete
button. This takes you back to the Review - Configure - Create dialog box,
where you can review your selections and complete the installation process.
NOTE To get a copy of your settings, select the Copy to Clipboard button.
If you do not wish to make configuration changes on the Review - Configure
- Install page, click Install. Then click Yes, to continue installing using the
typical configuration.
Migrating Custom Settings
You can migrate your custom settings and files from previous releases of
AutoCAD LT (<AutoCAD LT 2000> through <AutoCAD LT 2010>). It is
recommended that you migrate custom settings from a previous release right
away. This prevents you from overwriting files or having to keep track of any
custom settings you may make in the new release. Migrating settings overwrites
any new settings.
6 | Chapter 1 Quick Start to Stand-Alone Installation