
User`s guide
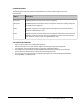
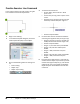
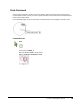

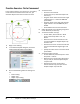
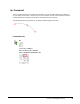
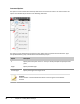
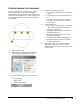
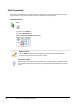
Table Of Contents
- Introduction
- Chapter 1: Taking the AutoCAD Tour
- Chapter 2: Creating Basic Drawings
- Chapter 3: Manipulating Objects
- Lesson: Selecting Objects in the Drawing
- Lesson: Changing an Object's Position
- Lesson: Creating New Objects from Existing Objects
- Lesson: Changing the Angle of an Object's Position
- Lesson: Creating a Mirror Image of Existing Objects
- Lesson: Creating Object Patterns
- Lesson: Changing an Object's Size
- Challenge Exercise: Grips
- Challenge Exercise: Architectural
- Challenge Exercise: Mechanical
- Chapter Summary
- Chapter 4: Drawing Organization and Inquiry Commands
- Chapter 5: Altering Objects
- Lesson: Trimming and Extending Objects to Defined Boundaries
- Lesson: Creating Parallel and Offset Geometry
- Lesson: Joining Objects
- Lesson: Breaking an Object into Two Objects
- Lesson: Applying a Radius Corner to Two Objects
- Lesson: Creating an Angled Corner Between Two Objects
- Lesson: Changing Part of an Object's Shape
- Challenge Exercise: Architectural
- Challenge Exercise: Mechanical
- Chapter Summary

74 ■ Chapter 2: Creating Basic Drawings
Command Options
Arc options can be accessed from the drop-down menu next to the Arc button. The most common Arc
options are indicated by red arrows in the following illustration.
Arc options can be selected from the shortcut menu (right-click) or typed at the Command line. Type
the capitalized letter(s) only and follow the Command line prompts.
Option
Description
C
Specify the center point of the arc. Then you will be prompted to specify the start
point.
Angle
Specify included angle.
chord Length
Specify the length of the angle chord.
Arc Note
Arcsare drawnin a counterclockwise direction unless using the 3-Point default
method.