
User`s guide
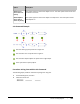
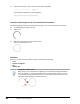
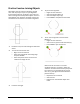
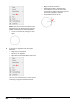
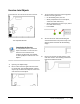

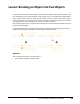
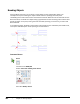
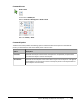

Table Of Contents
- Introduction
- Chapter 1: Taking the AutoCAD Tour
- Chapter 2: Creating Basic Drawings
- Chapter 3: Manipulating Objects
- Lesson: Selecting Objects in the Drawing
- Lesson: Changing an Object's Position
- Lesson: Creating New Objects from Existing Objects
- Lesson: Changing the Angle of an Object's Position
- Lesson: Creating a Mirror Image of Existing Objects
- Lesson: Creating Object Patterns
- Lesson: Changing an Object's Size
- Challenge Exercise: Grips
- Challenge Exercise: Architectural
- Challenge Exercise: Mechanical
- Chapter Summary
- Chapter 4: Drawing Organization and Inquiry Commands
- Chapter 5: Altering Objects
- Lesson: Trimming and Extending Objects to Defined Boundaries
- Lesson: Creating Parallel and Offset Geometry
- Lesson: Joining Objects
- Lesson: Breaking an Object into Two Objects
- Lesson: Applying a Radius Corner to Two Objects
- Lesson: Creating an Angled Corner Between Two Objects
- Lesson: Changing Part of an Object's Shape
- Challenge Exercise: Architectural
- Challenge Exercise: Mechanical
- Chapter Summary

Lesson: Joining Objects ■ 391
Exercise: Join Objects
In this exercise, you use Join to join lines and arcs.
The completed exercise
Completing the Exercise
To complete the exercise, follow the
steps in this book or in the onscreen
exercise. In the onscreen list of
chapters and exercises, click Chapter
5: Altering Objects. Click Exercise: Join
Objects.
1.
Open M_Join-Objects.dwg.
2.
Mirror a door from the right side of the room
to the left side. Use the Mid Between 2 Points
object snap to obtain the midpoint of the room
and erase the source object.
3.
To join the wall lines to the shorter segments
left from removing the door:
■ On the Modify panel, click Join.
■ When prompted for the source object,
select the inside wall line (1).
■ When prompted for the line to join, select
the inside short line (2).
■ Press ENTER.
4.
Join the two outer wall lines following the
same method used in the previous step. Your
drawing should now look like the following
image.
5.
Use Trim to remove the wall sections at the
new door location. Your drawing should now
look like the following image.