
User`s guide
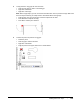
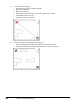
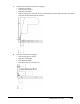
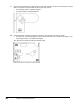
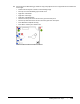
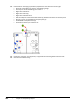
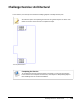

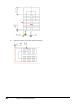
Table Of Contents
- Introduction
- Chapter 1: Taking the AutoCAD Tour
- Chapter 2: Creating Basic Drawings
- Chapter 3: Manipulating Objects
- Lesson: Selecting Objects in the Drawing
- Lesson: Changing an Object's Position
- Lesson: Creating New Objects from Existing Objects
- Lesson: Changing the Angle of an Object's Position
- Lesson: Creating a Mirror Image of Existing Objects
- Lesson: Creating Object Patterns
- Lesson: Changing an Object's Size
- Challenge Exercise: Grips
- Challenge Exercise: Architectural
- Challenge Exercise: Mechanical
- Chapter Summary
- Chapter 4: Drawing Organization and Inquiry Commands
- Chapter 5: Altering Objects
- Lesson: Trimming and Extending Objects to Defined Boundaries
- Lesson: Creating Parallel and Offset Geometry
- Lesson: Joining Objects
- Lesson: Breaking an Object into Two Objects
- Lesson: Applying a Radius Corner to Two Objects
- Lesson: Creating an Angled Corner Between Two Objects
- Lesson: Changing Part of an Object's Shape
- Challenge Exercise: Architectural
- Challenge Exercise: Mechanical
- Chapter Summary

240 ■ Chapter 3: Manipulating Objects
9.
Use the Move and Rotate grip modes again to place the computer and phone onto the desk as shown.
Refer to the previous step if needed for the step-by-step process.
■ The computer object is rotated 45 degrees.
■ The phone object is rotated 90 degrees.
10.
Use Move, Rotate, and Copy grip modes to place the chair object in the office as shown:
■ The desk chair is rotated -45 degrees and the conference table chair is rotated at 45 degrees. The
remaining two chairs are rotated at 90 degrees.
Your office layout should look like the following image.