
User`s guide


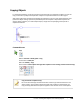
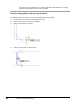
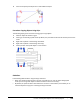
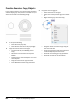
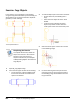
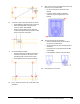
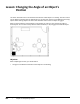
Table Of Contents
- Introduction
- Chapter 1: Taking the AutoCAD Tour
- Chapter 2: Creating Basic Drawings
- Chapter 3: Manipulating Objects
- Lesson: Selecting Objects in the Drawing
- Lesson: Changing an Object's Position
- Lesson: Creating New Objects from Existing Objects
- Lesson: Changing the Angle of an Object's Position
- Lesson: Creating a Mirror Image of Existing Objects
- Lesson: Creating Object Patterns
- Lesson: Changing an Object's Size
- Challenge Exercise: Grips
- Challenge Exercise: Architectural
- Challenge Exercise: Mechanical
- Chapter Summary
- Chapter 4: Drawing Organization and Inquiry Commands
- Chapter 5: Altering Objects
- Lesson: Trimming and Extending Objects to Defined Boundaries
- Lesson: Creating Parallel and Offset Geometry
- Lesson: Joining Objects
- Lesson: Breaking an Object into Two Objects
- Lesson: Applying a Radius Corner to Two Objects
- Lesson: Creating an Angled Corner Between Two Objects
- Lesson: Changing Part of an Object's Shape
- Challenge Exercise: Architectural
- Challenge Exercise: Mechanical
- Chapter Summary

Lesson: Creating New Objects from Existing Objects ■ 193
4.
Copy the line using grips:
■ With the command line blank, click the
line.
■ Select a grip at one of the endpoints.
■ Right-click the grip and click Move.
■ Right-click again and click Copy.
■ Continue to click in the drawing window to
make multiple copies of the line.
■ Press ESC to end the copy procedure.
■ Press ESC to clear the line selection.
Note the following:
■ When using copy with grips, select Copy
after you have selected an option, such as
Move, Mirror, Rotate, Scale, or Stretch.
■ Stretch with grips is the default action.
■ How the object behaves with grips often
depends on which grip you select. For
instance, if you had selected the midpoint
grip of the line instead of the endpoint, it
would have enabled you to move the line
as you copied it.