
User`s guide
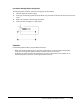
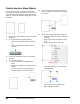
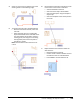
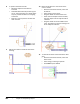
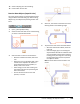
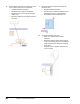
Table Of Contents
- Introduction
- Chapter 1: Taking the AutoCAD Tour
- Chapter 2: Creating Basic Drawings
- Chapter 3: Manipulating Objects
- Lesson: Selecting Objects in the Drawing
- Lesson: Changing an Object's Position
- Lesson: Creating New Objects from Existing Objects
- Lesson: Changing the Angle of an Object's Position
- Lesson: Creating a Mirror Image of Existing Objects
- Lesson: Creating Object Patterns
- Lesson: Changing an Object's Size
- Challenge Exercise: Grips
- Challenge Exercise: Architectural
- Challenge Exercise: Mechanical
- Chapter Summary
- Chapter 4: Drawing Organization and Inquiry Commands
- Chapter 5: Altering Objects
- Lesson: Trimming and Extending Objects to Defined Boundaries
- Lesson: Creating Parallel and Offset Geometry
- Lesson: Joining Objects
- Lesson: Breaking an Object into Two Objects
- Lesson: Applying a Radius Corner to Two Objects
- Lesson: Creating an Angled Corner Between Two Objects
- Lesson: Changing Part of an Object's Shape
- Challenge Exercise: Architectural
- Challenge Exercise: Mechanical
- Chapter Summary

Lesson: Changing an Object's Position ■ 179
Procedure: Moving Objects Using Grips
The following steps provide an overview of using grips to move objects.
1.
Select an object to activate its grips.
2.
Click a grip to activate grip edit mode. By default, this point will also be used as the base point for the
move.
3.
Right-click anywhere in the drawing. Click Move.
4.
Click to position the object in a new location.
Guidelines
Follow these guidelines when using the Move command:
■ When you specify the base point for the move, it should be on or near the object being moved
unless you are using other objects to define a reference vector for the move.
■ By default, the option for Noun-Verb selection is turned on in the software; this enables you to
select the objects to move prior to starting the Move command.