
User`s guide

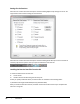


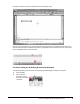
Table Of Contents
- Introduction
- Chapter 1: Taking the AutoCAD Tour
- Chapter 2: Creating Basic Drawings
- Chapter 3: Manipulating Objects
- Lesson: Selecting Objects in the Drawing
- Lesson: Changing an Object's Position
- Lesson: Creating New Objects from Existing Objects
- Lesson: Changing the Angle of an Object's Position
- Lesson: Creating a Mirror Image of Existing Objects
- Lesson: Creating Object Patterns
- Lesson: Changing an Object's Size
- Challenge Exercise: Grips
- Challenge Exercise: Architectural
- Challenge Exercise: Mechanical
- Chapter Summary
- Chapter 4: Drawing Organization and Inquiry Commands
- Chapter 5: Altering Objects
- Lesson: Trimming and Extending Objects to Defined Boundaries
- Lesson: Creating Parallel and Offset Geometry
- Lesson: Joining Objects
- Lesson: Breaking an Object into Two Objects
- Lesson: Applying a Radius Corner to Two Objects
- Lesson: Creating an Angled Corner Between Two Objects
- Lesson: Changing Part of an Object's Shape
- Challenge Exercise: Architectural
- Challenge Exercise: Mechanical
- Chapter Summary

Introduction ■ xi
Completing the Exercises
You can complete the exercise in two ways: using the book or the onscreen version.
■ Using the book: Follow the step-by-step exercises in the book.
■ Onscreen: Click the Learning AutoCAD 2010 icon on your desktop, installed from the CD, and
follow the step-by-step exercises on screen. The onscreen exercises are the same as those in the
book. The onscreen version has the advantage that you can concentrate on the screen without
having to glance down at your book.
After launching the on-screen exercises, you might need to alter the size of your application window to
align both windows.