
Technical information

Importing Points | 45
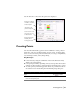
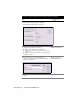
6 Select the name of the column. For example, if the first
column in an ASCII file contains the point number, then
the first column must be set up for point numbers.
Each column must be unique—after you use one column
name option, it is removed from the list of available
column names.
TIP If you cannot remember the order of the information
in the ASCII file, then click Load to load the ASCII file into
the dialog box so you can see the information that it
contains.
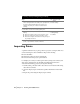
7 Click OK to return to the Point File Format dialog box.
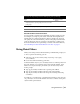
8 Select the Delimited By option and choose the file delimit
method. For example, if you set up the ASCII file so that
each piece of information is separated by commas, then
type a comma (,) in the Delimit box.
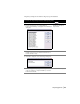
9 Name the format, and then close the Point File Format
dialog box.
10 Click Close to close the Format Manager dialog box.
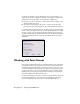
11 From the Points menu, choose Point Settings and click the
Create tab.
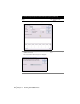
To import the points into only the database, clear the
Insert to Drawing as Created check box. This significantly
increases the speed of the import. You can specify the
points that you can later bring into the drawing from the
project point database by using the Insert Points to
Drawing command from the Points menu.
Adding Points to the
Drawing as Points Are
Created
To create an import/export format and import points (continued)
Steps
Use to locate