
Technical information


178 | Chapter 13 Viewing and Editing Roads in Section View
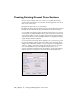
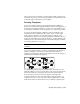
When you use the Edit Template command to add surfaces, it creates two
polylines for each surface: one for the left side and one for the right side. The
command also displays any attached subassemblies. Although they cannot
be modified, subassemblies can be attached to the current template. To use
the Edit Template command, the template and its subassemblies must be in
the folder that you specified with the Set Template Path command.
NOTE Use the Edit Template command for both symmetrical and asymmetri-
cal templates. In symmetrical templates, the command does not mirror the
surface edits from the left to right side. If you want it to remain a symmetrical
template, you must change both sides of the template.
Key Concepts
■ To apply transition and superelevation regions on a template, you must
modify the template after you define it.
■ To insert points into a drawing based on template points, such as the
right-of-way and edge-of-pavement, you can use template point codes.
To work with templates
Steps Use to locate
1 From the Cross Sections menu, choose Draw Template to
draw the finished ground template.
Drawing a New Template
Surface
2 To use a subassembly for a curb or shoulder, use the Draw
Template command to draw the subassembly. Then, from
the Cross Sections menu, choose Templates
➤ Define
Subassembly to define the subassembly.
Defining Subassemblies
3 From the Cross Sections menu, choose Templates
➤ Edit
Material Table to set up the Material Table.
A material table is a collection of surface material names
that you can select as you are defining template surfaces.
Defining and Editing a
Material Table
4 From the Cross Sections menu, choose
Templates
➤ Define Template to define the template.
In this step, you can define the finished ground reference
point, the template geometry, the surface materials, and
the depths of subgrade surfaces. You also attach
subassemblies (optional) to the template at this point.
Defining Templates