
Technical information


Importing LandXML Data | 117
4 Under Data Processing, select the Translate/Rotate check
box to translate or rotate the values in the LandXML file.
Select the Select Region Boundary check box to limit the
import to a specified region in the project.
5 Under Options, click Data to specify the data to be
imported into the drawing, how surface and profile data
are imported, whether point descriptions are imported
using the “code” or “desc” attribute, and the foot type for
imperial drawings.
Changing the LandXML
Data Options
6 Click OK to close the LandXML Import Data Options
dialog box, and then click OK again to continue.
7 Depending on the options you selected and depending
on the file units, the following dialog boxes may be
displayed:
■ LandXML Import Unit Conversion
■ LandXML Import Translate/Rotate
■ LandXML Import Region Selection
Converting Units When
Importing LandXML Data
Translating and Rotating
LandXML Data
Importing LandXML Data
Within a Region
8 Finally, the LandXML Import Comparison Results dialog
box is displayed, which shows you the data in the file that
is new or different compared to the current project. Click
OK to continue.
LandXML Import
Comparison Results
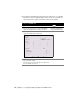
9 In the LandXML Import Selection dialog box, specify the
points, point groups, description keys, surfaces, parcels,
and alignments to import, and then click Import to import
the data.
Selecting LandXML Data to
Import
To import LandXML data (continued)
Steps
Use to locate