
2009


■ An ease curve shifts the time of the original track left or right.
Adjusting the ease curve changes time. The value of the ease curve at a
particular frame is a frame value from the original track. For example, if
the ease curve is 0 at frame 0 and 10 at frame 10, the original track plays
at its original speed. If the ease curve value at frame 10 increases to 20, the
original track plays to frame 20 by frame 10: it has been sped up by a factor
of two.
Once you apply an ease or multiplier curve, you can edit its keys, ranges, and
properties just like any other animation track.
One use of ease and multiplier curves is to blend between the effects of different
controllers. This can be an aid to nonlinear editing.
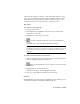
Procedures
To apply an ease curve or a multiplier curve:
1 In the Curve Editor Hierarchy list, highlight the tracks you wish to ease
or intensify.
Not all controller items can receive ease or multiplier curves. For example,
the Path Constraint position controller cannot receive an ease or
multiplier curve, but its subordinate Percent controller can. If the
highlighted controller is incapable of receiving ease or multiplier curves,
nothing happens when you apply the curve.
2 From the Curves menu, choose Apply - Ease Curve or Apply - Multiplier
Curve.
3 In the Controller window expand the highlighted tracks to view the ease
curve.
4 Hold down the Ctrl key and click the ease curve and controller tracks.
5 Adjust the keys on the ease curve and watch the result in the controller
curve.
Use a Multiplier curve to intensify an effect, or an ease curve to make less
of an effect.
TIP Use Step interpolation to use the ease curve to turn tracks on and off.
Curve Editor | 3661