
2008


Track View
Track View provides a visual representation of animation keys, allowing you
to view, edit, copy and adjust one or several keys at a time. This is where you
control the timing of your animation, through the manipulation of keys,
curves and ranges. You can also assign animation controllers to interpolate
or control all the keys and parameters for the objects in your scene.
Track View has two windows, a Controller window and a Key window. The
Controller window shows the hierarchy of linked objects, as well as the
modifier stack and transform tracks. The Key window displays keys, curves
and ranges. Keys are color coded to show what is animated.
Track View uses two different modes.
Curve Editor mode on page 3441 displays
key interpolation as curves, and allows you to edit the curves.
Dope Sheet
mode
on page 3442 displays the animation as a spreadsheet of keys and ranges.
Dope Sheet has two modes, Edit Key and Edit Ranges.
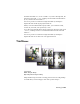
Trackgroup
In the Motion Mixer, motions are placed on tracks, and the tracks are organized
into trackgroups. In other words, each trackgroup is a holder for one or more
tracks. Each trackgroup can be filtered so the tracks within it affect only certain
parts of the biped, such as its arms or legs. Every biped in the Motion Mixer
can have multiple trackgroups, each with its own selection of biped parts. See
Adding Tracks to the Mixer on page 3626 and Filtering Mixer Tracks on page
3637 .
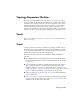
Track View Hierarchy Icons
The Track View hierarchy, as displayed in the Controller window, follows the
traditional example of organizational headings in an outline. The highest
levels of the hierarchy represent the main groupings in 3ds Max of Sound,
Environment, Materials, Render Effects, and Objects. Lower levels of the
hierarchy progress through the details of your scene, such as individual
materials, material maps, and map parameters.
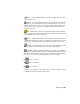
Each type of item in the Track View Hierarchy List is represented by an icon.
You can use these icons to quickly identify what each item represents.
7952 | Glossary