WINCUE USER GUIDE Autocue House Unit 3 Puma Trade Park 145 Morden Road Mitcham, Surrey CR4 4DG Tel: +44 (0) 208 665 2992 Fax: +44 (0) 208 687 4869 Email: info@autocue.co.uk www.autocue.
WINCUE USER GUIDE Notice DISCLAIMER Autocue Ltd. reserves the right to revise this publication and to make changes in it’s content without obligation of Autocue Ltd. to notify any person or persons of such revision. COPYRIGHT Copyright 1996 - 2007 Autocue Ltd. All rights reserved. No part of this publication may be reproduced, stored in a retrieval system, electronic or otherwise, or revealed to a third party, without prior permission of Autocue Ltd. WinCue system version 1.5 2 AUTOCUE LTD.
WINCUE USER GUIDE This manual was updated by Heather Millar of Autocue Group Ltd. on 21 May 2007 How to use this guide This user guide provides detailed information on how to setup, configure and operate the WinCue software. Audience This guide is intended for use by operators and users whose familiarity with computers and software ranges from novice to expert. It is also aimed at technical staff who would be responsible for installing, configuring and supporting WinCue.
WINCUE USER GUIDE Chapter 1 Installing the Hardware This chapter covers the hardware requirements and installation. Chapter 2 Installing the Software This chapter covers the installation of the software. Chapter 3 Connecting the WinCue This chapter covers the connection of the peripherals peripherals required for prompting. Chapter 4 Configuring WinCue This chapter describes the configuration of WinCue.
WINCUE USER GUIDE 1 2 3 Installing the Hardware _______________________________________________9 1.1 Minimum Hardware Requirements_________________________________________ 9 1.2 The WinCue Package____________________________________________________ 9 1.3 Installing the SCSI card_________________________________________________ 10 1.4 The I.M.T. Scroll Card __________________________________________________ 10 1.5 Installing the I.M.T. Card ________________________________________________ 10 1.
WINCUE USER GUIDE 5.4.2 5.4.3 5.4.4 5.4.5 5.4.6 5.4.7 5.4.8 5.5 7 Prompters _________________________________________________________________ 35 The Script Editor ____________________________________________________________ 35 Rundowns _________________________________________________________________ 35 The Scroll Controller _________________________________________________________ 35 WinCue Basics _____________________________________________________36 6.
WINCUE USER GUIDE TABLE OF CONTENTS 8.3 Changing a Presenter’s Settings _________________________________________ 56 8.4 Deleting a Presenter ___________________________________________________ 56 8.5 Presenter Profiles _____________________________________________________ 57 8.5.1 8.5.
WINCUE USER GUIDE TABLE OF CONTENTS Appendix B The I.M.T.
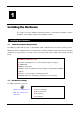
WINCUE USER GUIDE CHAPTER 1 – INSTALLATION OF HARDWARE Chapter 1 Installing the Hardware This chapter covers the minimum requirements with the recommended specifications and the installation of the hardware required to run the WinCue software. 1 Installing the Hardware 1.1 Minimum Hardware Requirements The WinCue prompter will run either on the Windows 2000 or Windows XP Professional operating systems, Windows XP Home or Windows ME are not supported.
WINCUE USER GUIDE 1.3 CHAPTER 1 – INSTALLATION OF HARDWARE Installing the SCSI card Before you install the WinCue prompter software you need to install and configure the SCSI card in accordance with the documentation supplied with it. Information on the issues involved with setting up SCSI cards and how to get round problems can be found in Appendix A of this guide. 1.4 The I.M.T. Scroll Card The I.M.T. scroll card allows WinCue to prompt text in any language.
WINCUE USER GUIDE CHAPTER 2 – INSTALLATION OF SOFTWARE Chapter 2 Installing the Software This chapter covers the installation of the WinCue software. 2 Installing the Software 2.1 Installing the Software on desktop PCs Close all programs running on your computer and insert the CD in the CDROM drive. The Autorun program should load: Click the Setup button at the top left of the window. If Autorun does not run automatically click Start and select Run… 11 AUTOCUE LTD.
WINCUE USER GUIDE CHAPTER 2 – INSTALLATION OF SOFTWARE And in the Run dialog box type D:\SETUP\SETUP in the Open: text box then click on OK. The installation program will load: When the WinCue Setup banner appears click Next > 12 AUTOCUE LTD.
WINCUE USER GUIDE CHAPTER 2 – INSTALLATION OF SOFTWARE You will then be asked for the license diskette. Insert the license diskette and click Next > to accept: 13 AUTOCUE LTD.
WINCUE USER GUIDE CHAPTER 2 – INSTALLATION OF SOFTWARE Warning! The licence disk included with each copy of WinCue is designed to work with the supplied I.M.T. scroll card. It will not work with any other I.M.T. card. You will then see the WinCue Install dialog box appear. Click on the Client button. The files will install with a progress dialog box. When the installation is done it will go back to the WinCue Install window. Click on the Exit button to return to Windows. 14 AUTOCUE LTD.
WINCUE USER GUIDE 2.2 CHAPTER 2 – INSTALLATION OF SOFTWARE Installing the software on Laptops Follow the Installation process on the laptop as above. After WinCue has been installed shutdown and leave switched off until you have connected the prompting peripherals. 15 AUTOCUE LTD.
WINCUE USER GUIDE CHAPTER 3 – CONNECTING WINCUE PERIPHERALS Chapter 3 Connecting the WinCue peripherals This chapter covers the connection of the peripherals required to prompt with WinCue. 3 Connecting the WinCue peripherals 3.1 Desktop PCs 3.1.1 Connecting a Scroll Control The standard scroll control used with WinCue is the I.M.T. scroll control. The I.M.T. scroll control port is the 9 pin analogue port on the back of the I.M.T. card.
WINCUE USER GUIDE CHAPTER 3 – CONNECTING WINCUE PERIPHERALS The rear of the Multibutton Scroll Controller The foot scroll control is used for controlling the speed and direction of the prompted text only. All other functions such as next marker and reset rundown are available by using the buttons of the Multibutton scroll controller. The foot control can also be connected direct to the IMT 9 pin connector for stand alone use The red button is used for changing the direction of the prompted text.
WINCUE USER GUIDE CHAPTER 3 – CONNECTING WINCUE PERIPHERALS The I.M.T. scroll control will not work if it is attached to any other port on your PC. 3.2.2 Connecting a Composite Video Feed The I.M.T. box is made in two versions, one has four BNC composite outputs and the other has one. These ports supply the composite video feed to the prompter screen(s). You can connect your video cable to the BNC output. See Appendix C3 & C4 for further details. 3.2.
WINCUE USER GUIDE CHAPTER 4 – CONFIGURING WINCUE Chapter 4 Configuring WinCue This chapter covers the configuration of WinCue for prompt operation. 4 Configuring WinCue 4.1 Starting WinCue prompter for the first time Note: users of laptops must switch on the I.M.T. box before switching on the laptop to ensure the PCMCIA SCSI card successfully detects the I.M.T. scroll card. Run WinCue by double-clicking on the WinCue icon: 4.
WINCUE USER GUIDE CHAPTER 4 – CONFIGURING WINCUE Enter a name for the new device and click the down arrow to select the type from the drop down list. For the multibutton scroll controller select Hybrid Multibutton. Click OK and you will see the new device listed. Select it by clicking on it and click the Setup button. 4.2.1 Configuring the Controller Mode and Port Select the serial port you are using by clicking on the down arrow and selecting from the drop down menu.
WINCUE USER GUIDE CHAPTER 4 – CONFIGURING WINCUE Configure all the buttons in this way by referring to the table below.
WINCUE USER GUIDE CHAPTER 4 – CONFIGURING WINCUE The blank button is usually configured as the Cue Story button which ensures the cue marker is at the end of the previous prompted story and not inside the next prompted story. This is so that if the next item is dropped the cue marker remains at the correct position in the rundown waiting to cue the actual next story. 4.2.3 The End Stop Table Now click on the End Stop Table window tab. Here you can change the scroll rate.
WINCUE USER GUIDE CHAPTER 4 – CONFIGURING WINCUE The simple serial scroll control sends serial data in the range 0 to 120 to tell WinCue how fast to prompt the text; 0 is stop and 120 is the fastest scroll rate. This scroll rate is determined by the position of the scroll control knob. If the Stop Point is set to 60, scroll rates of less than 60 will prompt the text backwards, scroll rates greater that over 60 will prompt the text forward, and a scroll rate of exactly 60 will stop the text from scrolling.
WINCUE USER GUIDE CHAPTER 4 – CONFIGURING WINCUE Enter the required left and right margin width and select where you want the cue marker. Then click on the hardware window tab. Here you can enable the Genlock port. Now click on the Text Format window tab. 24 AUTOCUE LTD.
WINCUE USER GUIDE CHAPTER 4 – CONFIGURING WINCUE Here you can specify extra line spacing, an end of story gap and the font scale factor. Now click on the demo Options window tab. Here you can select the loop forever option. When you are happy with these settings click on User Interface on the left to open the Prompt tracking window. Here you can specify whether you want to jump the editor to prompt position on speed zero or every prompt line by clicking in the relevant checkbox.
WINCUE USER GUIDE CHAPTER 5 - WINCUE BASICS Chapter 5 How WinCue Works This Chapter introduces WinCue and some of its basic features. It covers the use of the menu system and toolbar buttons to navigate around the system. It covers the layout of the screen and how the window panes can be arranged and configured to suit the user. 5 Introducing WinCue There are several ways to navigate around WinCue. You can use the mouse or keyboard to open menus and select options.
WINCUE USER GUIDE 5.2 CHAPTER 5 - WINCUE BASICS WinCue toolbars and tools Toolbars provide quick access to commonly used commands and tools. When you first start WinCue and open a queue, the Standard and Formatting toolbars are displayed just below the menu bar. You can choose which toolbars you want to display. A full list of all the toolbar buttons is in Appendix D. Click buttons on the toolbars to choose commands. The toolbar is divided into separate toolbars, which are all visible here.
WINCUE USER GUIDE 5.2.7 CHAPTER 5 - WINCUE BASICS Prompt toolbar and Prompt (Advanced) toolbar We will learn more about the prompter toolbars and how to prompt scripts in WinCue later in Section 10. 5.2.8 Status bar This displays information about the language used, and whether you are in Overtype mode, denoted by OVR. On the left of the status bar you have a help description of the options on a menu when they are highlighted. Toolbars provide quick access to commonly used commands and tools.
WINCUE USER GUIDE 5.4 CHAPTER 5 - WINCUE BASICS Using Panes The first thing you’ll notice when you run WinCue is that the screen is divided up into window panes. These panes can be arranged and configured to suit your needs. Each pane is a separate window and you can have as many panes open on the screen as you like, and the user can change this. The active pane has a blue title bar. 5.4.
WINCUE USER GUIDE 5.4.2 CHAPTER 5 - WINCUE BASICS To add a vertical pane What you do Comments/Prompts Right-click in the title bar of the window you wish to add a vertical pane to and select Add Vertical Pane from the pop-up menu. This adds a vertical pane to the window: 30 AUTOCUE LTD.
WINCUE USER GUIDE 5.4.3 CHAPTER 5 - WINCUE BASICS To Zoom a pane You can zoom any pane to fill the screen. What you do Click on the zoom button at Comments/Prompts Zoom button the top left hand corner of the Pane. OR right-click in the title bar of the pane and select Zoom Pane. The keyboard shortcut for this is CRTL+ALT+Z To un-zoom pane click on the UnZoom button OR right-click on title bar of pane and select UnZoom Pane.
WINCUE USER GUIDE 5.4.4 CHAPTER 5 - WINCUE BASICS Removing panes What you do Comments/Prompts Right-click on the title bar of the pane you wish to remove and select Destroy Pane. 5.4.5 Resizing panes What you do Comments/Prompts You can resize any pane by holding the left mouse button down on the border of the pane and border to dragging the the required position.
WINCUE USER GUIDE 5.4.6 CHAPTER 5 - WINCUE BASICS Pane settings You can control what information can be displayed in the pane in Pane settings What you do Comments/Prompts Right-click in the title bar of the pane and select Pane Settings. For each type of queue select whether you want the list of items in a queue or the text of an item or both to be displayed in this pane.
WINCUE USER GUIDE 5.4.7 CHAPTER 5 - WINCUE BASICS Renaming panes What you do Comments/Prompts Right-click in the title bar of the pane and select Rename pane. Enter new name and click OK. 5.4.8 Moving Panes You can move the contents of panes to other panes by holding the left mouse button down on the title bar of the pane and drag and drop the into another pane.
WINCUE USER GUIDE 5.5 CHAPTER 5 - WINCUE BASICS The Principles of Prompting This section aims to provide those who are unfamiliar with prompting systems the basic terms involved. 5.5.1 Prompters The prompter is normally mounted on the front of the camera and displays the scrolling text created by the script editor for the presenter to read. The text from the monitor is reflected onto a special sheet of glass. Thus the presenter can see the text, but the camera looks straight through it. 5.5.
WINCUE USER GUIDE CHAPTER 6 – GETTING STARTED WITH WINCUE Chapter 6 Getting Started with WinCue In this chapter we explore the basic commands and functions you will need to know to begin working with WinCue. We will describe how to use WinCue in four simple steps and start prompting. By the end of this Chapter you will be able to create scripts and prompt them using WinCue. 6 WinCue Basics 6.
WINCUE USER GUIDE 6.2 CHAPTER 6 – GETTING STARTED WITH WINCUE The WinCue main window The screen is divided into window panes which can be configured and organised in a way that suits the user. For more information on Panes and how to configure them see Section 5.4 Using Panes. 6.
WINCUE USER GUIDE CHAPTER 6 – GETTING STARTED WITH WINCUE Select Multicolumn Rundown File and click OK. You will be asked in which pane you would like to open the new rundown in: Select Pane One and click OK. A new blank multi-column rundown will then be displayed: 38 AUTOCUE LTD.
WINCUE USER GUIDE CHAPTER 7 – THE SCRIPT EDITOR Chapter 7 WinCue Script Editor In this Chapter you will learn how to add new scripts to the running order and how to find your way around the Script Editor. The Script Editor is used to create the prompting text and is similar to many Windows based editors. 7 7.1 The Script Editor Creating a new Script in the Rundown Open the Story menu and select New Script… The new script will appear as an item in the rundown.
WINCUE USER GUIDE CHAPTER 7 – THE SCRIPT EDITOR This will open the Script Editor. If this is the first time you have used WinCue since installation the Script Editor will open in the same pane as the Rundown (i.e. Pane One below). If you would like the Script Editor to open in another pane, as shown below, you need to turn one of the global options off.
WINCUE USER GUIDE CHAPTER 7 – THE SCRIPT EDITOR This shows the script being typed whilst the column is scaled to fit the window. WinCue supports both mouse and keyboard controls. A summary of the shortcut keyboard controls is shown below. These keystrokes can be used in conjunction with the mouse and will help you to move around the editor. Text can be deleted using Backspace, the delete key or by highlighting the desired text and pressing delete.
WINCUE USER GUIDE 7.1.2 CHAPTER 7 – THE SCRIPT EDITOR The Word Count (Link time) Box As you type a script WinCue will keep track of the number of words in the script. The current word count appears in the Words box and is constantly updated. 7.1.3 The Script Duration Box The time taken for a person to read a script from the prompter screen will depend on the number of words in the script and how fast that person reads.
WINCUE USER GUIDE CHAPTER 7 – THE SCRIPT EDITOR Select the required presenter and click OK.: The Presenter will then be inserted into the script and the Link time updated if this presenter does not have the default read rate set: 43 AUTOCUE LTD.
WINCUE USER GUIDE 7.3 CHAPTER 7 – THE SCRIPT EDITOR Adding Markers to a Script When prompting it is sometimes useful to be able to jump to specific parts of a script without having to scroll to that point. Markers are placed at points where the operator may need to jump too. To insert a marker move the cursor to the position in the text where it is required, open the Insert menu and select Marker. A flag marker is then inserted in the text.
WINCUE USER GUIDE CHAPTER 7 – THE SCRIPT EDITOR OR use the Save button on the Toolbar: 7.4.2 Saving a Rundown When you have saved scripts you need to save the rundown. To do this open the File menu and choose Save to File: Enter a file name and select the directory to save to and click on Save: 45 AUTOCUE LTD.
WINCUE USER GUIDE 7.5 CHAPTER 7 – THE SCRIPT EDITOR Opening a previously saved rundown To open a previously saved rundown open the File menu and select Open File… Select the Rundown file you want to open and click Open: 46 AUTOCUE LTD.
WINCUE USER GUIDE 7.6 CHAPTER 7 – THE SCRIPT EDITOR Changing the Script Characteristics You can change sections of text in the scripts by highlighting the section of text and use the toolbars to change the characteristic. There are various ways of highlighting the text. 7.6.1 Highlighting Text in the Editor You can highlight text using the mouse or the keyboard.
WINCUE USER GUIDE 7.6.3 CHAPTER 7 – THE SCRIPT EDITOR To change the style and colour of text What you do Comments/Prompts Highlight the section of text you want to change with the mouse and click on the required style Bold button on the toolbar: Underline Italic Click required colour on the toolbar. 7.6.4 Justifying the Text What you do Comments/Prompts Open the Format menu and select Justification. From the sub-menu appears select Left, Centre or Right.
WINCUE USER GUIDE 7.6.6 CHAPTER 7 – THE SCRIPT EDITOR To invert the background colour and the text The default colours of the text in the editor is white text on a black background, you can invert this to black text on a white background. What you do Comments/Prompts Select the section of text to inverse with Inverse button the mouse and click on the Inverse button. If the text was blue on a black background clicking on the inverse button will change the text to black on a blue background. 7.6.
WINCUE USER GUIDE CHAPTER 7 – THE SCRIPT EDITOR 7.6.11 Replacing Words in a Script To replace one or more words within the current script, choose Edit, then Replace. The Replace dialog box will appear. Type the word or phrase you wish to find in the ‘Find what:’ box, and the word or phrase you want to replace it with in the ‘Replace with:’ box. Then use the Find Next and Replace buttons to control the replacements manually, or click the Replace All button to automatically make the changes.
WINCUE USER GUIDE 7.7 CHAPTER 7 – THE SCRIPT EDITOR Printing 7.7.1 Printing Rundowns What you do Comments/Prompts Open the Rundown menu and select Print Rundown. Then from the print dialog box select the required number of copies and print layout and click OK. 7.7.2 Printing the Show There is an option to print the entire show, with all the scripts.
WINCUE USER GUIDE CHAPTER 8 – PRESENTER SETTINGS Chapter 8 Presenter Settings In this chapter we learn how to change the default presenter settings, add presenters to the presenter table, modify their settings and how presenter profiles can be used to copy settings to other rundowns. 8 Presenter Settings and Profiles Presenters settings allows you to customise settings for individual presenters. The font, colour, style and read rate can be allocated for individual presenters.
WINCUE USER GUIDE CHAPTER 8 – PRESENTER SETTINGS The Presenter Table Settings window will open: Presenter attributes must be enabled here before they can be modified set by clicking in the relevant checkbox to select it ( ). Now click on the Presenters tab to display the list of Currently Defined Presenters. To modify the default presenter select Default and click the Modify button: The Attributes tab is then displayed: 53 AUTOCUE LTD.
WINCUE USER GUIDE CHAPTER 8 – PRESENTER SETTINGS In the Read Rate text box, type in the new value for the default read rate e.g. 195 and click OK. 8.1.2 Changing the Default Font and Font Size WinCue can prompt any font installed on your PC. You can change the font used for any new scripts you create by changing the default. This is done the same way as changing the read rate, in the Presenter Attributes window as above.
WINCUE USER GUIDE 8.2 CHAPTER 8 – PRESENTER SETTINGS Adding a New Presenter Open the Rundown menu and select Settings to open the Presenter Table Settings window. Click on the Presenters tab to display the list of Currently Defined Presenters: Click the Add button to open the Presenter Properties window: Enter the presenter’s name e.g. James in the Presenter Name text box and click OK. The presenters name you just added will then be shown in the list of Currently Defined Presenters.
WINCUE USER GUIDE 8.3 CHAPTER 8 – PRESENTER SETTINGS Changing a Presenter’s Settings Select the presenter in the list of Currently Defined Presenters and click the Modify button. 8.4 Deleting a Presenter To delete a presenter select that presenter and click Delete. Please note if you delete a presenter that is in a script the presenter is removed from the script as are all their settings. The default presenter settings are then used instead. 56 AUTOCUE LTD.
WINCUE USER GUIDE 8.5 CHAPTER 8 – PRESENTER SETTINGS Presenter Profiles 8.5.1 Saving Presenter Profiles Open the Rundown menu and choose Edit Presenter table. In the Presenter Table window click on Save As Profile. In the Object Name box and enter a name for the profile and click OK. 8.5.2 Loading Presenter Profiles Open the rundown queue that you want to copy the presenter profile to. Open the Rundown menu and select Edit Presenter Table.
WINCUE USER GUIDE CHAPTER 9 – WINCUE RUNDOWNS Chapter 9 WinCue Rundowns In this chapter we learn more about WinCue rundowns, editing within them, working with multiple rundowns and copying items between them. Also covers configuring the columns in the Script Editor and global window settings. 9 9.1 Working with Rundowns The WinCue Rundown window 58 AUTOCUE LTD.
WINCUE USER GUIDE 9.1.1 CHAPTER 9 – WINCUE RUNDOWNS Features of a WinCue Rundown The Black bar denotes the selected item in the rundown. Break items are in blue. The NO field is the unique ID number for each item/story in the rundown, the TITLE field is the title of the item, The WORDS field displays the word count of words in the script and the LINK field is the calculated time it will take for this script to be presented based on the read-rate set. (The Default read-rate is 180 words per minute).
WINCUE USER GUIDE 9.2.4 CHAPTER 9 – WINCUE RUNDOWNS Moving Stories within the Running Order The stories within a rundown can be reordered very easily using the drag and drop facility in WinCue. Drag-and–drop is the easiest way to move a story within a Rundown. Select the story you want to move by pointing to it and hold down the left-hand mouse button. When the drag and drop pointer appears, drag the dotted insertion point to the new location.
WINCUE USER GUIDE 9.3.4 CHAPTER 9 – WINCUE RUNDOWNS Importing files You can import files saved in other formats such as Word or plain Text into WinCue rundowns. Open the rundown queue you wish to import to. Open the Story menu and select Import File… Select the file to import and click Open: Alternatively you can simply drag and drop the file from Windows Explorer into the required position in the rundown. Select from the list of available formats e.g.
WINCUE USER GUIDE CHAPTER 9 – WINCUE RUNDOWNS Click the Automatically use these settings checkbox if you want to prevent this dialog box appearing again. The imported file will then appear as a new item in the rundown. You can also import into an existing script or story in the rundown. Open the story or script by doubleclicking on it. Open the Insert menu and select File… Select the file to import and click Open.
WINCUE USER GUIDE 9.3.6 CHAPTER 9 – WINCUE RUNDOWNS Editing the fields of an item in the rundown You can change data in fields in the rundown by clicking once to select the field and clicking again to highlight the field, which can then be edited. Or you can right-click on the field and select Edit Field. You can then overtype the contents of the field or move the cursor into position to edit. Or press F2 anywhere on the item line to edit the first field.
WINCUE USER GUIDE CHAPTER 9 – WINCUE RUNDOWNS You can select options for deleting and transferring items, editing fields and items and when opening items. Turn the appropriate option on or off by clicking in the adjacent checkbox ( ). Click OK to save the changes. 64 AUTOCUE LTD.
WINCUE USER GUIDE 9.5 CHAPTER 9 – WINCUE RUNDOWNS Modifying the Columns in the Script Editor To modify the Columns in the Script Editor such as renaming them, open the Rundown menu and choose Settings: The Column with the radio button checked is the Script Column and the only column in which the Word count and Link time boxes will work. You can change the script column to be any one of the 8 Columns. 9.5.
WINCUE USER GUIDE CHAPTER 9 – WINCUE RUNDOWNS You can rename the column by changing the Title, change the width and specify single, double or triple line spacing. If you are not modifying the script column you can select Lock Font and Lock Styles to prevent the font or style being changed in the column. If you want the spell checker enabled for use select this option here. To change the default font click on the Font button and select the required style and size. 9.
WINCUE USER GUIDE CHAPTER 9 – WINCUE RUNDOWNS to another pane moves the story into the new pane and updates it’s settings to allow stories to be opened in that pane in future as above. 9.6.1 Copying stories between rundowns You can copy stories from one rundown to another. To do this, open the rundowns in individual panes.
WINCUE USER GUIDE CHAPTER 9 – WINCUE RUNDOWNS Use the Pane Settings tabs to set preferences for panes: For each type of queue you can specify view options, by clicking in the relevant checkbox ( ). Text in List Pane – this option is if you want to view text of items in the same pane as the rundown. Show Search View at Open – this option is only available for Wire Queues and Assignment Desk (in Pane Settings 2 window) if you want the search results window to open when you open a wire queue.
WINCUE USER GUIDE CHAPTER 10 – PROMPTING SCRIPTS Chapter 10 Prompting Scripts In this chapter we learn how to prompt scripts in a running order, how to use the scroll controllers and the various prompting options available. 10 Prompting scripts in a queue Firstly open the queue file you want to prompt from. 10.1 Opening a Queue Click the Open File button on the toolbar: Select the queue you wish to open and click Open. 10.
WINCUE USER GUIDE CHAPTER 10 – PROMPTING SCRIPTS The first item on the rundown list appears yellow indicating that this is the current item prompting. The prompter operator can now control the text on the prompter using the scroll controller they have. When prompting the Word Count box and Time box will switch to yellow. 10.3 Scroll Controllers 10.3.
WINCUE USER GUIDE CHAPTER 10 – PROMPTING SCRIPTS To stop scrolling turn the scroll knob fully anti-clockwise or press the Stop button. There are options available whilst prompting which are accessible on the View menu or via keyboard shortcuts. Refer to the table below for a description of these options and their shortcuts. A check mark ( ) indicates the command is on.
WINCUE USER GUIDE CHAPTER 10 – PROMPTING SCRIPTS You can make these settings permanent by opening the View menu and selecting Save Settings. You will get a message that your Preferences have been saved. OR open the View menu, select Settings… and click the Multicolumn Rundown View Tracking tab: Clicking in the appropriate checkbox to select it ( ) will set that option permanently. Click OK to save the changes. These settings will be retained next time you start WinCue. 72 AUTOCUE LTD.
WINCUE USER GUIDE CHAPTER 10 – PROMPTING SCRIPTS 10.4.1 Prompting with the Script Column displayed If you have your screen arranged so that the rundown is displayed in one pane and the script being prompted in another pane, with the AutoScale Column to Window option set (by clicking ), make sure you open the View menu and select Save View Settings. This ensures that when the next item is prompted the Script retains the AutoScale Column to Window setting.
WINCUE USER GUIDE CHAPTER 11 – UPGRADING WINCUE Chapter 11 Upgrading the Software In this chapter we cover the procedure involved to upgrade the WinCue software. 11 Upgrading WinCue When you are ready to upgrade your system you will receive a CDROM with the latest WinCue files on. Insert the CDROM in the drive and the Autorun program should start: Click the Setup button at the top left of the window. If Autorun does not start, click Start and choose Run.
WINCUE USER GUIDE CHAPTER 11 – UPGRADING WINCUE The files required for Setup will begin copying: When the WinCue Setup banner appears click on Next > When you get the message asking if you are ready to upgrade your system, click on continue. 75 AUTOCUE LTD.
WINCUE USER GUIDE CHAPTER 11 – UPGRADING WINCUE Click Finish to continue with the upgrade. The files will install with a progress dialog box: If a WinCue Setup dialog box appears asking if you wish to replace a file, check the date and time stamp of the file in question. If the new file is later click on Replace. If it’s the same or earlier as in this case click on Skip. When the upgrade has finished you will get a message that Setup has completed successfully.
WINCUENEWS PROMPTER GUIDE APPENDIX A Appendix A - WinCue Installation Help There are issues to look out for when installing WinCue: WinCueNews only works on Windows 95, 98 or Windows NT 4.0. It is not recommended to have a SCSI hard disk or any other SCSI device on the same SCSI bus as the IMT Card. If you have to then see the SCSI documentation below. We recommend using an Adaptec 2906 SCSI adapter in a desktop PC. Ensure that the Adaptec SCSI cards ROM BIOS is not a Version 1.
WINCUENEWS PROMPTER GUIDE APPENDIX A which can be obtained from Autocue. SCSI Hard disks on the same SCSI BUS as IMTCard: Certain drives do things to the SCSI bus that prevent the IMT from working particularly SCSI drives from Micropolis, Quantum and Western Digital. Some drives should work providing the SCSI address(ID) of the IMT card is higher (a lower number) than the SCSI disk E.G. IMT address(ID) is 3 then hard disk is 4 or above. Drives that should work are Seagate, O'Connor and IBM.
WINCUENEWS PROMPTER GUIDE APPENDIX A SCSI Cards Autocue has tested a range of SCSI cards. Those listed below have been found suitable for use with WinCueNews. If you do not find your SCSI card listed below, please contact your vendor. SCSI Cards for Desktop PCs Manufacturer Type Bus Adaptec 2906 PCI Manufacturer Type Bus Adaptec APA 1460A-2 Slim SCSI PCMCIA SCSI Cards for Laptops 79 AUTOCUE LTD.
WINCUENEWS PROMPTER GUIDE APPENDIX B Appendix B The I.M.T. Card In the following appendix we will look at the entire configuration options available for the I.M.T. board. Contents Card Layout Termination - J6 Power to Bus for SCSI Termination - J6 SCSI ID – SW2 SCSI/Parallel Select - SW2 Video (PAL or NTSC) - J11 SECAM External Power Supply - J12 Composite Video Features Connector - J10 Other Jumpers B2 B3 B3 B4 B4 B5 B5 B6 B6 B6 The I.M.T. card is configured at the factory to work in your country.
WINCUENEWS PROMPTER GUIDE APPENDIX B IMT Card – Issue 1. Genlock Port SCSI Card Connector Parallel Port Connector Even flash ROM chip Reset Button Odd flash ROM chip I.M.T Scroll Control Port Composite Video Port 81 AUTOCUE LTD.
WINCUE USER GUIDE APPENDIX B IMT Card – Issue 2. Connector Detail IMT Card – Issue 3. PCI card SCSI Card Connector Genlock Composite Video IMT Scroll Control Port 82 AUTOCUE LTD.
WINCUE USER GUIDE APPENDIX B B3 Termination - J6 See below to learn about power to bus SCSI Termination settings By Default the I.M.T. card is terminated, and expects to be connected to the end of the SCSI cable. Termination can be enabled/disabled by changing a jumper setting on J6. To enable termination of the I.M.T. card place a jumper on leftmost pins of J6 To disable termination of the I.M.T.
WINCUE USER GUIDE APPENDIX B B4 SCSI ID - SW2 By default, SCSI ID is set to 3. It can be changed using dipswitches 1,2 and 3 on SW2. When a dipswitch is in the top position it is on. When it is in the bottom position it is off. The dipswitch positions for each SCSI ID is shown in the table below: SCSI ID Dip Switches 3 1 2 0 On On On 1 On On Off 2 On Off On 3 On Off Off 4 Off On On 5 Off On Off 6 Off Off On 7 Off Off Off B4 SCSI/Parallel Select - SW2 The I.M.T.
WINCUE USER GUIDE APPENDIX B When a dipswitch is in the top position it is on. When it is in the bottom position it is off. The dipswitch positions for SCSI/parallel port selection is shown in the table below: Dip Switch Port 4 SCSI Off Parallel On B5 Video (PAL or NTSC) - J11 The I.M.T. card can produce either a PAL or NTSC composite video signal. The signal available from the composite video port will have been set at the factory, prior to dispatch.
WINCUE USER GUIDE APPENDIX B SECAM To configure the I.M.T. card for SECAM composite video output use the same jumper setting as PAL on J11. In the WinCueNews software, from the Prompt menu choose Configuration then Prompt Engine and ensure that Colour Burst is disabled. These settings will generate a mono composite output. B6 Internal and External Power Supply - J12 If there is not an ISA slot available in your PC for the I.M.
WINCUE USER GUIDE APPENDIX B appears as an 8-pin connector on Issue 1 cards, and a 3-pin connector on Issue 2 cards. If you need further information about powering the I.M.T. card from an external power supply please contact your supplier. B6 Composite Video Features Connector - J10 The Composite Video Features connector allows additional 4 composite video ports to be added to your PC. To find out more about this product contact your supplier. Do not attach anything to any of the pins on J10.
WINCUE USER GUIDE APPENDIX C Appendix C Wiring Diagrams The following Appendix contains wiring diagrams to aid you in connecting WinCue in a number of configurations. You may find that many of the wiring diagrams are not appropriate for your system. Contents Standalone Prompter Wiring Diagram C2 Laptop and I.M.T. Box Wiring Diagram (UK) C3 Laptop and IMT Box Wiring Diagram (US) C4 Standalone Edit Station Wiring Diagram C5 Network Prompter Wiring Diagram C6 88 AUTOCUE LTD.
WINCUE USER GUIDE APPENDIX C C2 Standalone Prompter Wiring Diagram Video Distribution Amplifier (Optional Internal) VGA Port Power to Monitor Genlock Port To Mains Power Supply Key - Essential cabling Optional cabling 89 AUTOCUE LTD.
WINCUE USER GUIDE APPENDIX C C3 Laptop and I.M.T. Box Wiring Diagram (UK) On Camera Units Laptop Computer Genlock Input I.M.T. Scroll Control PCMCIA SCSI Card Parallel Port Video Out Powering the I.M.T.
WINCUE USER GUIDE APPENDIX C C4 Laptop and I.M.T. Box Wiring Diagram (US) On Camera Units Laptop Computer PCMCIA SCSI Card I.M.T. Scroll Control Powering the I.M.T.
WINCUE USER GUIDE APPENDIX C C5 Standalone Edit Station Wiring Diagram Security Sentinel Power to VGA Monitor VGA Port To Mains Power Supply 92 AUTOCUE LTD.
WINCUE USER GUIDE APPENDIX C C6 Network Prompter Wiring Diagram Video Distribution Amplifier (Optional Internal) Power to Monitor VGA Port Genlock Port To Mains Power Supply Ethernet Hub Key - Essential cabling Optional cabling 93 AUTOCUE LTD.
WINCUE USER GUIDE APPENDIX D Appendix D WinCue Tool Buttons and Keyboard Shortcuts Rundowns: Tools and Shortcuts Function Toolbar Button Shortcut Menu Command New File ALT+FN Open File ALT+FO CTRL+Q ALT+FQ Copy CTRL+INS ALT+EC Paste SHIFT+INS ALT+EP Open Queue Change Layout ALT+VL Favourites ALT+FV Begin Prompting ALT+PB Stop Prompting ALT+PS Edit at Prompt position F11 ALT+PE Jump Prompt to Editor SHIFT+F11 ALT+PJ Panes Function Toolbar Button Shortcut Zoom pane CTRL+
WINCUE USER GUIDE APPENDIX D On Highlighted items in Rundown Function Shortcut Menu Command INSERT ALT+SN ALT+INSERT ALT+SB Delete Item DELETE ALT+SD Edit Script ENTER ALT+SE View Script CTRL+ENTER ALT+SV ALT+F3 ALT+SH Insert New Script Insert New Break Script Toggle Hold state Toggle Break/Normal state ALT+SC Lock/Unlock item ALT+SL Approve Story ALT+SA 95 AUTOCUE LTD.
WINCUE USER GUIDE APPENDIX D Script Editor: Tools and Shortcuts Shortcut Menu Command Cut CTRL+X ALT+ET Copy CTRL+C ALT+EC Paste CTRL+V ALT+EP Change to plain text CTRL+R ALT+TR Bold CTRL+B ALT+TB Underline CTRL+U ALT+TU Italic CTRL+I ALT+TI Inverse CTRL+E ALT+TV Change case of text CTRL+L ALT+TH Font CTRL+F ALT+TF CTRL+1/2/3/4/5 ALT+TC, D/R/G/B/Y CTRL+SHIFT+L/C/R ALT+TJ, L/C/R Function Button Change colour: White / Red / Green / Blue / Yellow Justify Text: Left / Ce
WINCUE USER GUIDE APPENDIX D Redo CTRL+Y CTRL+M or Insert Marker ALT+IM Keypad+,M Mark text as Not CTRL+N ALT+TN Captioned Mark text as Not CTRL+P ALT+TP Prompted Commit changes F7 Swap columns ALT+ Go to Next Script ALT+SC / F6 ALT+SN Go to Previous Script SHIFT+F6 ALT+SV Find CTRL+F3 ALT+EF F3 ALT+EN SHIFT+F3 ALT+EV Replace CTRL+H ALT+ER Exit Script ESCAPE Find Next Find Previous Next Hit in Search F4 Results Previous Hit in SHIFT+F4 Search Results Hard page break
WINCUE USER GUIDE APPENDIX E Appendix E Wiring E1 WinCue Multibutton Hand Control E1.1 1 2 3 4 5 6 7 8 9 WinCue IMT card 9 way d connections 0v 0v gnd +5 +5 pot n/c marker fwd/rev pot = 10k E1.2 9 way d Serial port connections 2……..rd……..brown 4……..dtr……..yyeellloow w 5……..gnd……..w whhiittee 7……..rts……..purple dtr and rts are used to generate the supply voltage E1.3 P4 Multibutton Remote Connector 15 Pin D Male 9……..+ 5v……..Red 10……..0v……..Black 11……..Pot……..Green 12……..Fwd/Rev……..
WINCUE USER GUIDE APPENDIX E 5……..0v……..Black 6……..pot……..Green Yeellloow 8……..marker……..Y w 9……..fwd/rev……..Blue 99 AUTOCUE LTD.
WINCUE USER GUIDE TECHNICAL SUPPORT Technical Support For more technical help or advice please contact our Technical Support Help Line: +44 (0) 20-8665 2992 Or email support@autocue.co.uk 100 AUTOCUE LTD.