
User's Manual


68
NOTE
The items that must be filled are indicated as required fields.
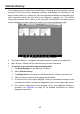
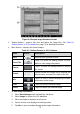
4. Tap the photo frame beside the Name chart to add a photo. A sub menu
displays, select Take Photo to take a new photo for the account, or select
Choose Photo to choose from the existing files.
5. Some customers may have more than one vehicle for service; you can always
add new vehicle information to the account to be correlated. Tap Add New
Vehicle Information, and then fill in the vehicle information. Tap the button
to cancel adding.
6. Tap Done to save the account, or tap Cancel to exit without saving.
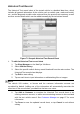
To edit a customer account
1. Tap Shop Manager on the MaxiSys Job Menu.
2. Select Customer Manager.
3. Select a customer account by tapping the corresponding name card. A
Customer Information sheet displays.
4. Tap Edit on the top toolbar to start editing.
5. Tap on the input field where needs to be altered or supplemented, and enter
updated information.
6. Tap Done to save the updated information, or tap Cancel to exit without
saving.
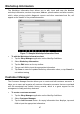
To delete a customer account
1. Tap Shop Manager on the MaxiSys Job Menu.
2. Select Customer Manager.
3. Select a customer account by tapping the corresponding name card. A
Customer Information sheet displays.
4. Tap Edit on the top toolbar to start editing.
5. Tap Delete Customer Information. A confirmation message displays.
6. Tap OK to confirm the command, and the account is deleted. Tap Cancel to
cancel the request.
History Notes
The History Notes function allows you to add audio and video records, text notes and
photos, to keep multi-media work logs for the associated customer account, which can
be very helpful when dealing with repeat customers. Keeping notes for each vehicle
serviced for each customer will keep you always on track and well organized in
business.
To access History Notes
1. Tap Shop Manager on the MaxiSys Job Menu.