
Install guide


(19) Set INPUT POWER UUT circuit breaker to
ON.
(20) Set 0 to + 40V input power source to on,
(21) Set BATTERY and VEHICLE circuit breakers
CB1 and CB2 to ON.
(22) Check for + 12V at sequence monitor circuit
card assembly AS connector P2-1.
(23) If + 12V is present, perform the following
steps:
(a) Set BATTERY and VEHICLE circuit break-
ers CB1 and CB2 to OFF.
(b) Set PSTS INPUT POWER UUT circuit
breaker to OFF.
(c) Set INPUT POWER PSTS circuit breaker
to OFF.
(d) Set 0 to + 40V input power source to off.
(e) Replace 28V converter-regulator circuit
card assembly A3.
(24) If + 12V is not present, perform the following
steps:
(a)
(b)
(c)
(d)
(e)
(f)
(g)
(h)
Reinstall 28V converter-regulator circuit
card assembly A3.
Disconnect connector A5 J2 from sequence
monitor circuit card assembly A5.
Set PSTS INPUT POWER PSTS circuit
breaker to ON.
Set INPUT POWER UUT circuit breaker
to ON.
Set 0 to + 40V input power source to on,
Set BATTERY and VEHICLE circuit break-
ers CB1 and CB2 to ON,
Check for + 12V at sequence monitor cir-
cuit card assembly A5 connector P2-1.
If + 12V is present, set BATTERY and VE-
HICLE circuit breakers CB1 and CB2 to
OFF.
(i)
(j)
(k)
(1)
(m)
(n)
ARMY TM 5-6675-308-34
MARINE CORPS TM 08837A-34/2
Set PSTS INPUT POWER UUT circuit
breaker to OFF.
Set INPUT POWER PSTS circuit breaker
to OFF.
Set 0 to + 40V input power source to off,
Replace sequence monitor circuit card as-
sembly A5.
If + 12V is not present, replace battery
charger circuit card assembly A7.
Reconnect connector A5T2 to sequence
monitor circuit card assembly A5.
4-14. Computer Power Supply Testing and Trou-
bleshooting.
a. Test Equipment and Materials.
(1) Power supply test set (PSTS)
(2) Digital Voltmeter AN/GSM-46B
(3) Multimeter AN/USM-223
(4) Oscilloscope AN/USM-281A or AN/USM-273
b. Procedure.
NOTE
When card Al, A2, or A3 is removed
during the troubleshooting process, be
sure to note the serial number of the
original card so it will not be confused
with any new replacements and installed
inadvertently,
Perform computer PS testing and troubleshooting in
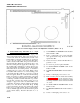
accordance with table 4-20, Figure 4-12 contains the
test setup interconnection diagram. See figure 4-13 for
circuit card adjustment locations, See figure 4-15 to
locate circuit cards in the computer power supply.
After a repair action has been taken, the complete test
(part 2 of table 4-20) should be performed. In any test
where more than one circuit card has been replaced,
circuit cards other than the last circuit card changed
shall be replaced and the step repeated.
4-123