
Install guide


ARMY TM 5-6675-308-34
MARINE CORPS TM 08837A-34/2
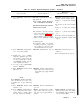
Table 4-6. Computer Diagnostic/Alignment Program – Continued
Test procedure
Malfunction
Normal indication
indication/corrective action
NOTE
Press VERIFY switch-indicator off
and back on if a stop code is reached
prior to tape data being verified.
2i.
2j.
Press VERIFY switch-indicator
to off
Press EXECUTE switch-indica-
tor to on to start diagnostic pro-
gram no. 1
Press verify switch-indicator to off.
Press PADS ON/OFF and EN-
TER switch-indicators to turn
computer off. Check tape reader
and tape for dirt. Clean as re-
quired. (Rewind tape and repeat
test from beginning before pro-
ceeding)
Replace cards in sequence given and
reattempt memory load after each
card replacement
Memory unit A1
16-bit data circuit card assembly A2
Control no. 2 circuit card assembly
A4
Control no. 3 circuit card assembly
A5
Control no. 1 circuit card assembly
A3
VERIFY extinguishes
EXECUTE switch-indicator lights
1. EXECUTE
switch-indicator
TTY prints out:
flashes. Same card replacement as
step 2b
PADS CPU TEST, TYPE CHARAC-
TER SET (carriage return)
2. No or ir correct print-out. Verify
TTY is on. Repeat steps 2c through
NOTE
2j. If the second attempt gives the
same results, replace cards in se-
The above printout indicates mem-
quence given:
ory type is core. Continue with diag-
nostic program load, step 2k.
16-bit data circuit card assembly A2
Control no. 2 circuit card assembly
A4
Control no. 3 circuit card assembly
A5
TTY prints out: Control no. 1 circuit card assembly
PADS SOLID STATE CPU TEST,
A3
TYPE CHARACTER SET (car- Memory unit A1
riage return)
NOTE
The above printout indicates mem-
ory type is solid state. Continue with
diagnostic program load, step 2k.
4-52
Change 1