
Install guide


ARMY TM 5-6675-308-34
MARINE CORPS TM 08837A-34/2
right side mounting plates. Hold 1 1/4-inch
lip flat against rear panel.
(2) CenterPunch the eight screw hole locations in
the middle of the slots in the rear panel.
(3) Drill the eight 5/16-inch screw holes in rear
panel,
(4) Place angle bracket against rear panel and
align screw holes,
(5) Secure angle bracket to rear panel usin eight
1/4-28 X 3/4-inch screws (5), washers (3), and
f.
g.
h.
i.
j.
k.
l.
I
I
(1)
(2)
(3)
(4)
(5)
(6)
(7)
(8)
locknuts (l).
Place rear panel in vehicle body and place the
side mounting plates and bottom plate snugly
against vehicle body.
Using side and bottom plates as templates, lo-
cate and centerpunch the outer screw hole loca-
tions (three on each side and two on bottom) in.
vehicle body,
Loosen the eight screws in angle bracket and
butt the 3/4-inch lip against bottom of vehicle
gutter. Tighten the screws sufficiently to main-
tain this position.
Using the angle bracket as a template, mark
centerline of the five inserts on the gutter. Cen-
terpunch these locations.
Remove rear panel.
Drill the five 5/16-inch screw holes marked in
gutter.
Install Nutplates 880541-1 (3, figure 3-16, sheet
2) and Nutplate 880542-1 (5, figure 3-16, sheet
3).
-
Drill the 3/8-inch screw holes marked in each
side of vehicle body,
Drill the 3/8-inch screw holes marked in
lower portion of vehicle body.
Place left and right nutplates 880541-1 (3,
figure 3-16, sheet 2) on inside of vehicle body,
Align nuts with the 3/8-inch screw holes
drilled in vehicle body.
Install two 5/16-24 X 3/4-inch screws (5) and
secure each nutplate to vehicle body.
Using nutplates as templates, centerpunch
4-40 screw hole locations in vehicle body.
Remove the two 5/16-inch screws securing
each nutplate; remove nut plates.
Drill (no. 27) the four 4-40 screw holes (each
side) through vehicle body.
From exterior of vehicle, countersink the
screw holes 100° x 0.225-inch diameter (width
of screw head).
(9)
(10)
(11)
(12)
(13)
(14)
(15)
(16)
Place nutplates (3) in position and secure each
nutplate with four 4-40 x 7/16-inch screws (4),
washers (2), and locknuts (l).
Place nutplate 880542-1 (5, figure 3-16, sheet
3) in position on lower inner surface of vehicle
body.
Install two 5/16-24 X 3/4-inch screws (7) and
secure nutplate to vehicle body.
Using nutplate as a template, center-punch the
three 4-40 screw hole locations in vehicle
body.
Remove the two 5/16-inch screws and remove
nutplate.
Drill (no. 27) the three 4-40 screw holes
through vehicle body.
From exterior of vehicle, countersink the
screw holes 100° x 0.225-inch diameter (width
of screw head).
Place nutplate (5) in position and secure with
three 4-40 x 7/16-inch screws (9), washers (2),
and locknuts (l).
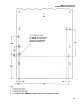
m. Cut Out Hole In Rear Panel for Porro Prism
Door Installation (See-figure 3-16, sheet 5).
(1)
(2)
(3)
(4)
(5)
(6)
Using figure 3-16, sheet 5, locate dimemsion
and cut out lines. Begin datum line -A- 0.450
– 0.490 inches from edge of vertical hat sec-
tion. This line establishes vertical edge.
Begin datum line -B- 0.970 – 1.02 inches from
edge of horizontal hat section. This line estab-
lishes horizontal edge.
Mark cutout lines and radii on rear panel and
make cutout maintaining these lines and radii.
Mark horizontal line 0.500 inch from top of
cutout (datum -B-). Extend this line from one
vertical edge to the other.
Locate centerpoint of six screw holes along
this line to the dimensions shown in figure
3-16, sheet 5, keeping the holes symmetrical
about the cutout. CenterPunch the screw
holes.
Drill the six 7/32-inch top screw holes.
n. Drill Holes for Door Fmme Attachment (See
figure 3-16
, sheets 5 an
d 6).
(1) Place door frame 880522-1 on inner surface o
rear panel where cutout was made.
(2)
Align the six top screw holes with holes drilled
in rear panel and temporarily install 8-32 x
3/4-inch screws, washers, and nuts to
door frame (4) to rear panel. Adjust door.
3-58