
Users Manual
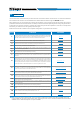
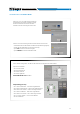
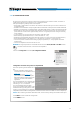

Table Of Contents
- Index
- 1. PRODUCT DESCRIPTION
- 2. PACKAGING CONTENTS
- 3. bit One HD Virtuoso AND DRC MP INSTALLATION
- 4. CONNECTION PANELS - DESCRIPTION
- 5. CONNECTIONS
- 6. bit One HD Virtuoso SOFTWARE AND DRIVERS - INSTALLATION GUIDE
- 7. bit One HD Virtuoso SETUP WITH PC
- 8. bit One HD Virtuoso SETUP USING A PC
- 9. TROUBLESHOOTING
- 10. TECHNICAL SPECIFICATIONS
- 11. ADDENDUM
21
USER'S MANUAL
In this case the bit One HD Virtuoso processor must be connected to the PC and turned on. The connection between
PC and bit One HD Virtuoso can be established via USB or Wireless cable through the W-CON interface.
When switched on for the rst time the product uses the lters on the IIR output channels by default, but it is then
possible to select the FIR mode. Firmware 2.0 allows you to select these two operating modes using a single Firmware.
At this point it is necessary to know in advance the system that you intend to implement, since later, to modify these
selections, you will have to run the guided procedure again.
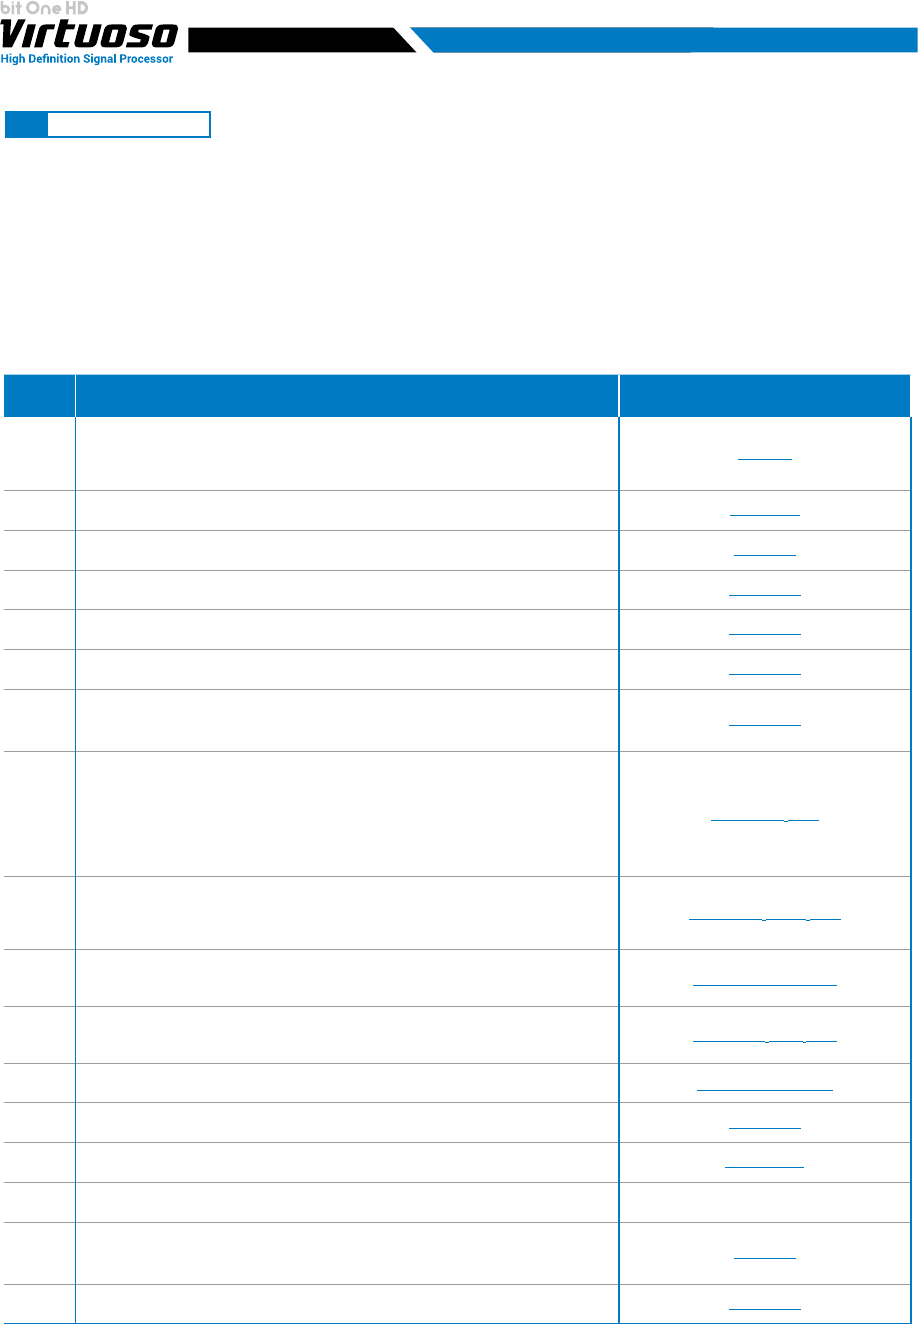
Below is the check list to follow for the complete conguration of your bit One HD Virtuoso.
*
Remark: in the case of the Pass through, only one memory linked to the Master input will be available and it will
not be possible to copy this memory to the other remaining and vice versa. The other available memories will be
available for the other AUX, Optical 1/2 inputs available.
SETUP OPERATION REFERENCE
1
Connect the Master inputs of the bit One HD Virtuoso to the outputs of your audio
system source. During this operation it is advisable to disconnect the RCA / AD LINK -
AC LINK sockets of the bit One HD Virtuoso, connected to the ampliers.
See sec. 5
2
Connect the bit One HD Virtuoso to the PC, switch on the audio system.
See sec. 6 - 7
3
Open the bit One HD Virtuoso Pc software previously installed in the PC.
See sec. 7.2
4
Start the cong “I/O CONFIGURATION WIZARD”.
See sec. 7.2.1
5
Set the lters of all the bit One HD Virtuoso output channels according to the
characteristics of your speakers.
See sec. 8.7.1
6
Set the bit One HD Virtuoso time delays manually.
See sec. 8.7.2
7
Finalize the bit One HD Virtuoso. Exit the PC Software and turn off the system.
Reconnect the Bit One HD outputs to the ampliers, and restart the system and PC
software.
See sec. 8.2.3
8
Select through the "solo" function all the speakers that make up the FRONT Left, and adjust
the output levels, the polarity. Perform this operation for the FRONT Right, REAR Left, REAR
Right. Enable via the “solo” function only the SUBWOOFER channel(s), together with the
previously adjusted fronts and perform its level calibration, phase. To perform a calibration
of the output levels it is advisable to perform an RTA of the system via bit Tune.
See sec. 9.3.5 - 11.2
9
Select Input eq and optimize the input equalization curve and the possible presence of
ALL PASS. If the DE-EQ / Phase Adjustement has been carried out, it will be possible
to intervene on the results and further rene them.
See sec. 8.8.1 - 8.12.2 - 11.2
10
Select all the speakers of the FRONT and through an RTA and PINK NOISE, set the
output channels levels, Polarity and CHANNELS EQ equalization.
See sec. 8.9.5 - 8.8.2 - 11.2
11
Select all the speakers of the REAR and through an RTA and PINK NOISE, set the levels
of the output channels, Polarity and equalization CHANNELS EQ.
See sec. 8.9.5 - 8.8.2 - 11.2
12
Make the whole system play and through an RTA and PINK NOISE, set the levels of the
output channels, Polarity and equalization.
See sec. 8.8.2 - 8.9 - 11.2
13
Select MAIN EQ and set the desired frequency response, depending on the preferred
acoustic approach.
See sec. 8.8.3
14
Use the BASS BOOST function to set the low frequency response.
See sec. 8.12.4
15
By listening to your favorite music, you can further rene your system by intervening at points
9 ÷ 13.
16
*
Copy the current memory to the other memories to create starting bases for other
setups, or select a new memory and repeat points 10 ÷ 15.
See sec. 8.4
17
FINALIZE THE BIT ONE HD
See sec. 8.2.3
7.2 CONNECT MODE
7