
Service manual

09/09 Rev. 5.02-02 SERVICE MANUAL Service Electronics
AP 4.4 – AP 5.4 – AP 7.t
30
3. Remove the white paper to verify the read back value. It should match the
range of 50..160.
¯ Proceed the preceding step only if the printer doesn´t have a top side
reflex sensor.
4. Insert some black paper to verify the read back value. It should match the
range of 190..255.
¯ The paper stripe must be pulled tight while the setting is checked, similar
to the conditions during printing operation.
¯ If the printer is equipped with an additional reflex sensor on the top side,
the test paper must be light-proof! Put thick enough cardbord under the
paper, if it is not.
5. Press the Online button to save the setting.
By doing so, the reflex sensor is set.
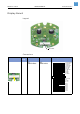
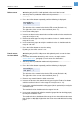
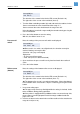
Reflex sensor
(top)
Next, the settings of the top reflex sensor are displayed:
The left value is the control value for the LED current (Default: 112).
The right value is the sensor value read back (here: 17).
¯ The top reflex sensor is an optional component. If the printer doesn't have
a top reflex sensor built in, skip this section by pressing the Online button.
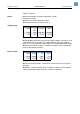
1. Insert some white paper.
¯ The paper stripe must be pulled tight while the setting is checked, similar
to the conditions during printing operation.
¯ If the printer is equipped with an additional reflex sensor on the top side,
the test paper must be light-proof! Put thick enough cardbord over the paper,
if it is not.
2. Increase or decrease the control value until the read back value matches the
range of 8..20 (best: 10).
3. Remove the white paper to verify the read back value. It should match the
range of 50..160.
¯ Proceed the preceding step only if the printer doesn´t have a bottom side
reflex sensor.
4. Insert some black paper to verify the read back value. It should match the
range of 190..255.
¯ The paper stripe must be pulled tight while the setting is checked, similar
to the conditions during printing operation.
¯ If the printer is equipped with an additional bottom reflex sensor, the test
paper must be light-proof! Put thick enough cardbord over the paper, if it is
not.
5. Press the Online button to save the setting.
By doing so, the reflex sensor is set.
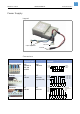
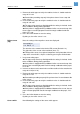
Cover switch Next following the settings of the cover switch appear.
Sensor Adjust
112 Refl O 17