
Service manual

09/09 Rev. 5.02-02 SERVICE MANUAL Service Electronics
AP 4.4 – AP 5.4 – AP 7.t
25
Sensor settings
Setting sensors (AP4.4/AP5.4)
The following cases require the sensor or all sensors to be set newly:
• A sensor was replaced
• The CPU board was replaced
• A punch sensor fork with additional reflex sensor was mounted (only possible
with AP 5.4).
Punch sensor 1. Start the printer in production mode and call parameter
SERVICE FUNCTION >
Sensor Adjust
.
P For more information about production mode, refer to the description of para-
meter
SYSTEM PARAMETERS > Access authoriz..
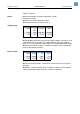
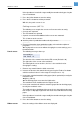
The following message shows up:
The left value is the control value for the LED current (Default: 140).
The right value is the sensor value read back.
The more light the sensor receives, the less is the read back value.
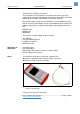
2. Remove any material from the label sensor fork.
3. Increase or decrease the control value by pressing the Feed or Cut button
until the read back value is in the range of 8..20 (best at 13..15).
4. Insert some standard material backing paper (labels peeled off) to verify the
read back value.
¯ Glossy side up.
¯ The backing paper must cover the light barrier.
The read back value should match the range of 40..90.
5. Insert some standard self-adhesive material (paper label on backing paper)
to verify the read back value.
The read back value should match the range of 100..220 and it must be more
than 50 (best: 100) digits higher than the value measured with bare backing
paper.
If the value doesn´t match this range: modify the control value by pressing the
Cut or Feed button.
6. Press the Online button to save the setting.
7. Press the Esc button to exit the parameter.
With this, the punch sensor is set.
Sensor Adjust
140 Punch 16